22
With the pilot flame lit:
• Turn knob “C“ to position .
F.3.4 Cooking
When the water in the tank is boiling:
• Add salt, (only use pan salt, to avoid corrosive deposits on
the tank bottom; if only coarse salt is available dissolve it in
a separate container).
• Place the baskets with food to be cooked in the tank. The
overflow pipe ensures control of the maximum water filling
level and the removal of cooking froth.
• Use knob “C“ to adjust tank heating according to the
quantity and type of food being cooked.
F.3.5 Switching off
• Turn knob “C“ to to turn off the main burner.
• Turn the knob to to shut off the pilot burner.
F.4 ELECTRIC MODELS – Tank heating
F.4.1 Lightning on
The switch control knob has the following positions:
0 = Power Off (green indicator off)
1 = Low Power
2 – 3 = Medium Power
4 = High power
IMPORTANT
Do not activate tank heating or leave it on if the
water level is below the reference mark on the right
wall of the tank. Failure to observe the above can
cause serious damage to the cooking tank and the
functional parts of the appliance.
F.4.2 Cooking
When the water in the tank is boiling:
• Add salt, (only use pan salt, to avoid corrosive deposits on
the tank bottom; if only coarse salt is available dissolve it in
a separate container).
Therefore it is advisable to use salt in the proportion of 1%
with respect to the water in the tank (e. g. cooking 1 kg of
pasta = 10 litres of water +100 g of salt.
NOTE!
Water with hardness below 5 ℉ requires a
higher percentage of salt (1.5 instead of 1%) for
better cooking.
• Place the baskets with food to be cooked in the tank.
The overflow pipe ensures control of the maximum water
filling level and the removal of cooking froth.
• Operate the switch according to the quantity and quality of
food to be cooked.
F.4.3 Switching off
• Turn the control knob to “0“ to switch the appliance off.
F.5 At the end of work
• Make sure the power is switched off.
• Drain the water from the tank (see previous paragraph F.7
Water drain).
• Wash any residuals of food from the tank and baskets (see
paragraph G.4 Tank cleaning (daily)).
• Turn off the main switch and the water valve upstream the
appliance.
CAUTION
It is advisable to carry out this operation
after the appliance has cooled (the inertia
of heating, even if deactivated, can
damage the tank if without water).
If this is not possible, fill the tank with cold
water at the same time as emptying the
cooking water.
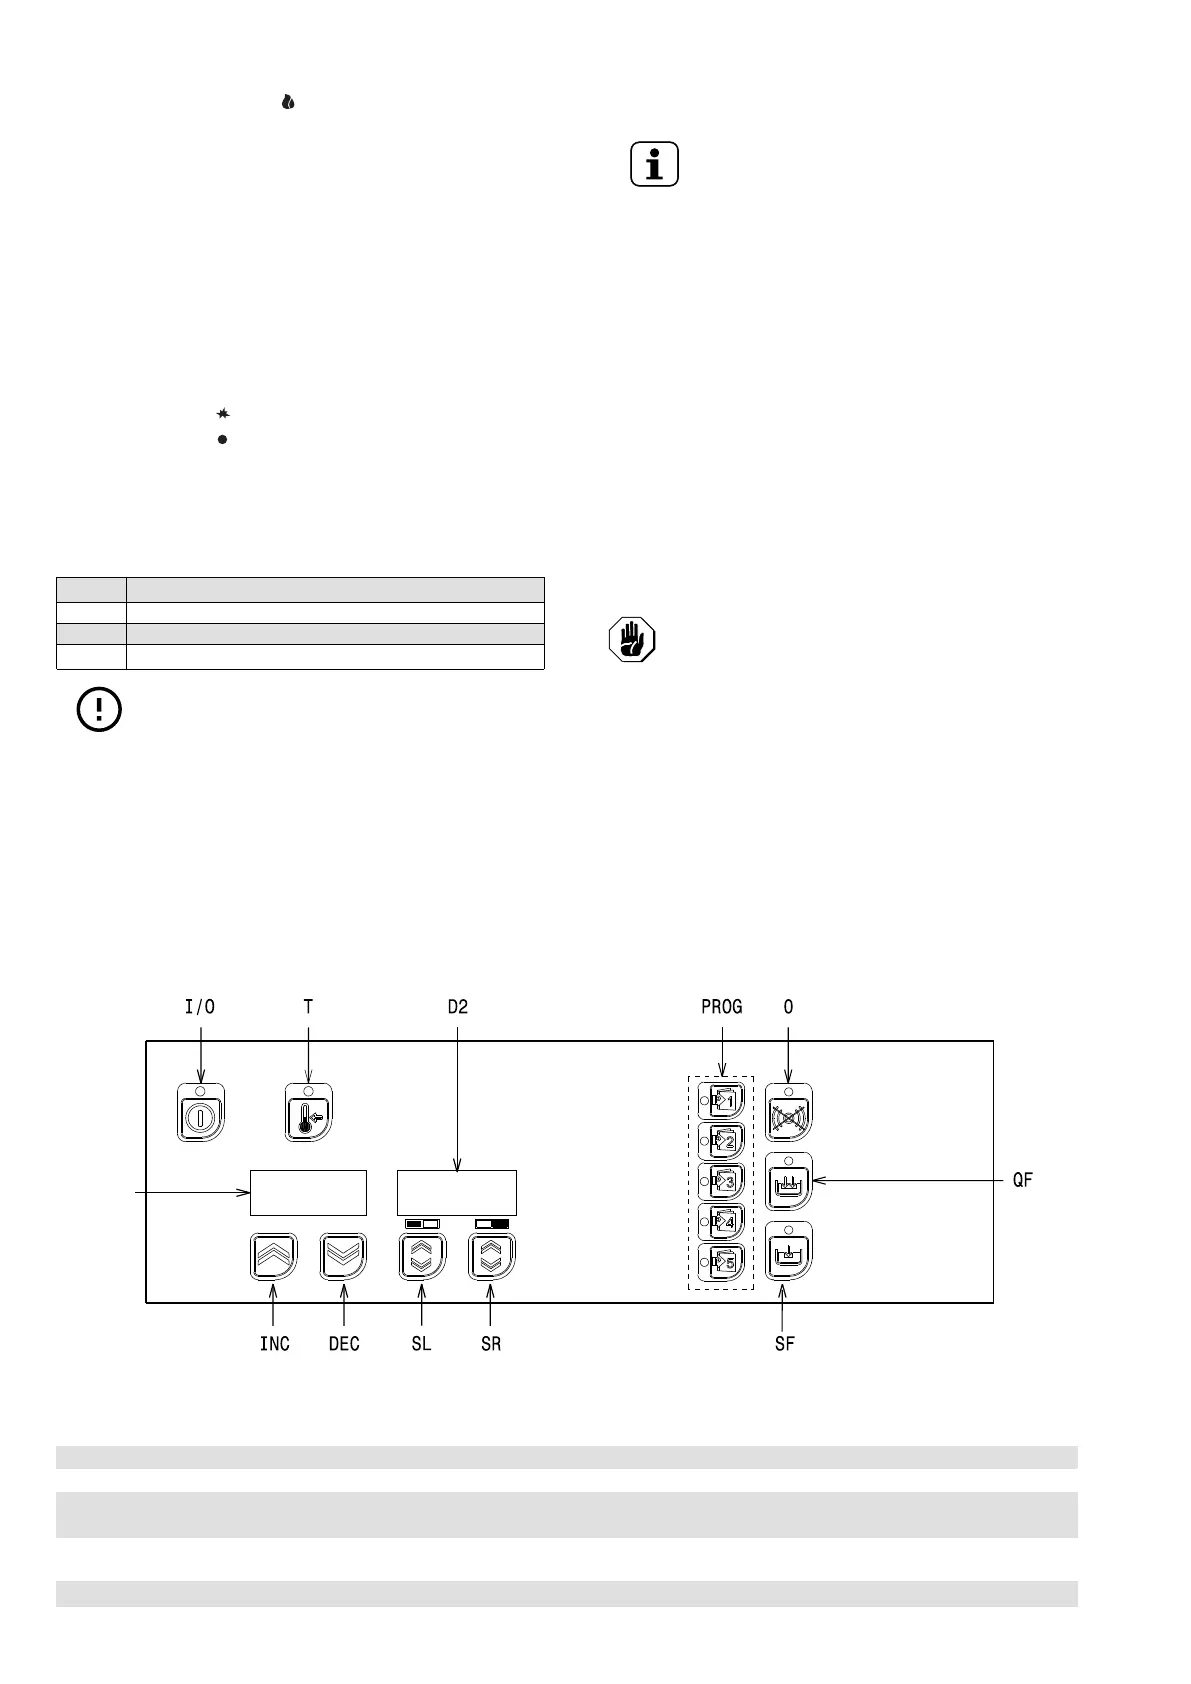
F.6 ELECTRIC MODELS with ELECTRONIC
CONTROL
I/O ON/OFF button
T Temperature real time visualization button
INC Temperature increasing setting buttons (standard mode) / Time increasing setting buttons (programming mode
only)
DEC Temperature decreasing setting button (standard mode) / Time increasing setting button (programming mode
only)
SL Left side basket start/stop button
SR Right side basket start/stop button
 Loading...