Basic Operations
29
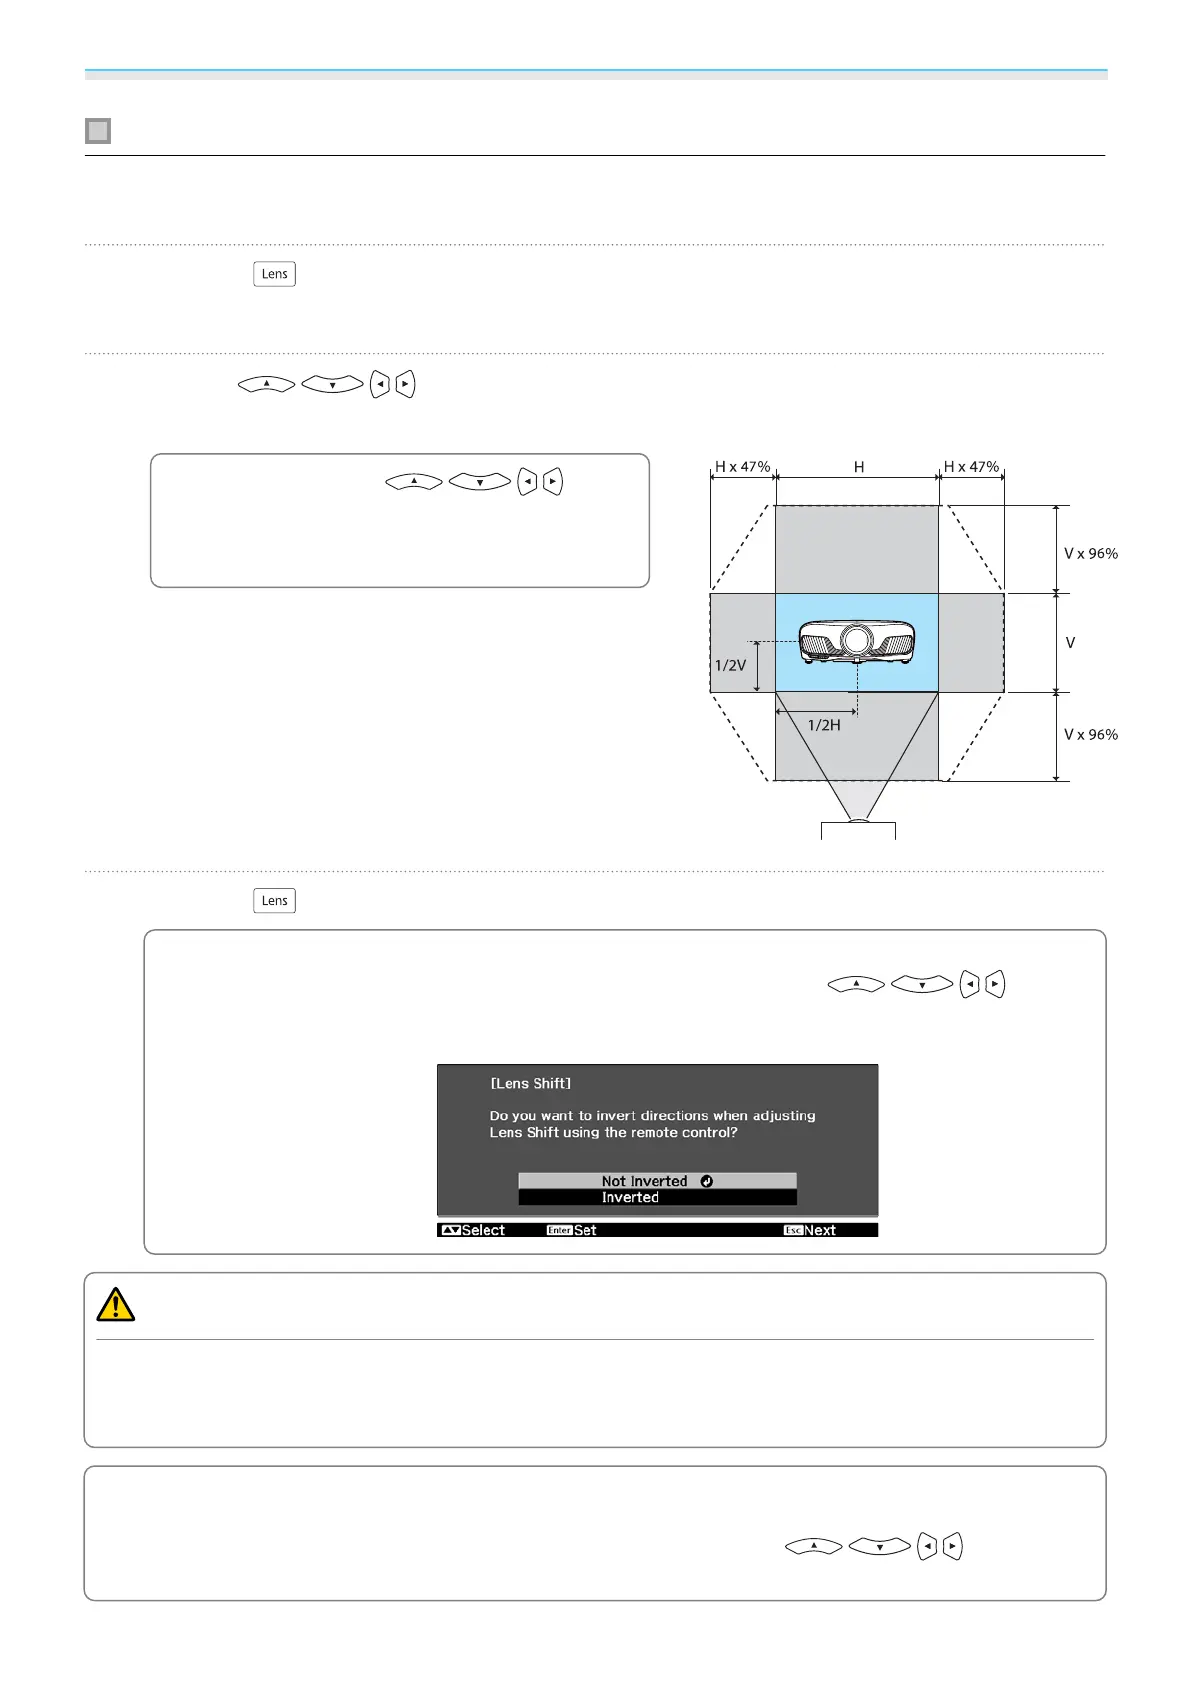
Adjusting the position of the projected image (Lens Shift Adjustment)
If the projector cannot be installed directly in front of the screen, you can adjust the position of the image by
using lens shift.
a
Press the button on the remote control three times.
Adjust Lens Shift is displayed on the screen.
b
Use the buttons to adjust the position of the image.
You can move the image within the range indicated by the dotted line in the following figure.
c
Hold down the but-
tons to return the image to the central po-
sition vertically and horizontally. The posi-
tion where the image stops is the center.
c
Press the button to finish the adjustment.
c
When the following message is displayed when you change to Adjust Lens Shift, the image
moves in the opposite direction to the direction pressed with the
buttons.
When Front/Ceiling or Rear/Ceiling is set for Projection, select Inverted.
s
Extended -
Projection p.65
Caution
•
When transporting the projector, set the lens position to the center. If you transport the projector when the
lens is not in the central position, the lens shift mechanism could be damaged.
•
Do not put your finger in the moving parts of the projector's lens. Otherwise an injury could occur.
c
•
When you cannot install the projector directly in front of the screen, it is recommended that you use
lens shift to adjust the projection position.
•
If finely adjusting the lens shift does not work, press briefly on the buttons to
perform minute adjustments while viewing the image.
 Loading...