Confidential
Disassembly/Reassembly Disassembly/Reassembly Procedures 27
Epson WF-5690/4640/4630/5620/5190/5110 series Revision D
2.2 Disassembly/Reassembly Procedures
2.2.1 Caution when Replacing the Printhead/Ink Supply Unit
For stable ink supply, this product employs a mechanism where the ink in the ink path is pressurized even the power is
off. Therefore, if the joint section of the printhead and the Ink Supply Unit is simply disconnected, the ink in the ink
tube will spill over.
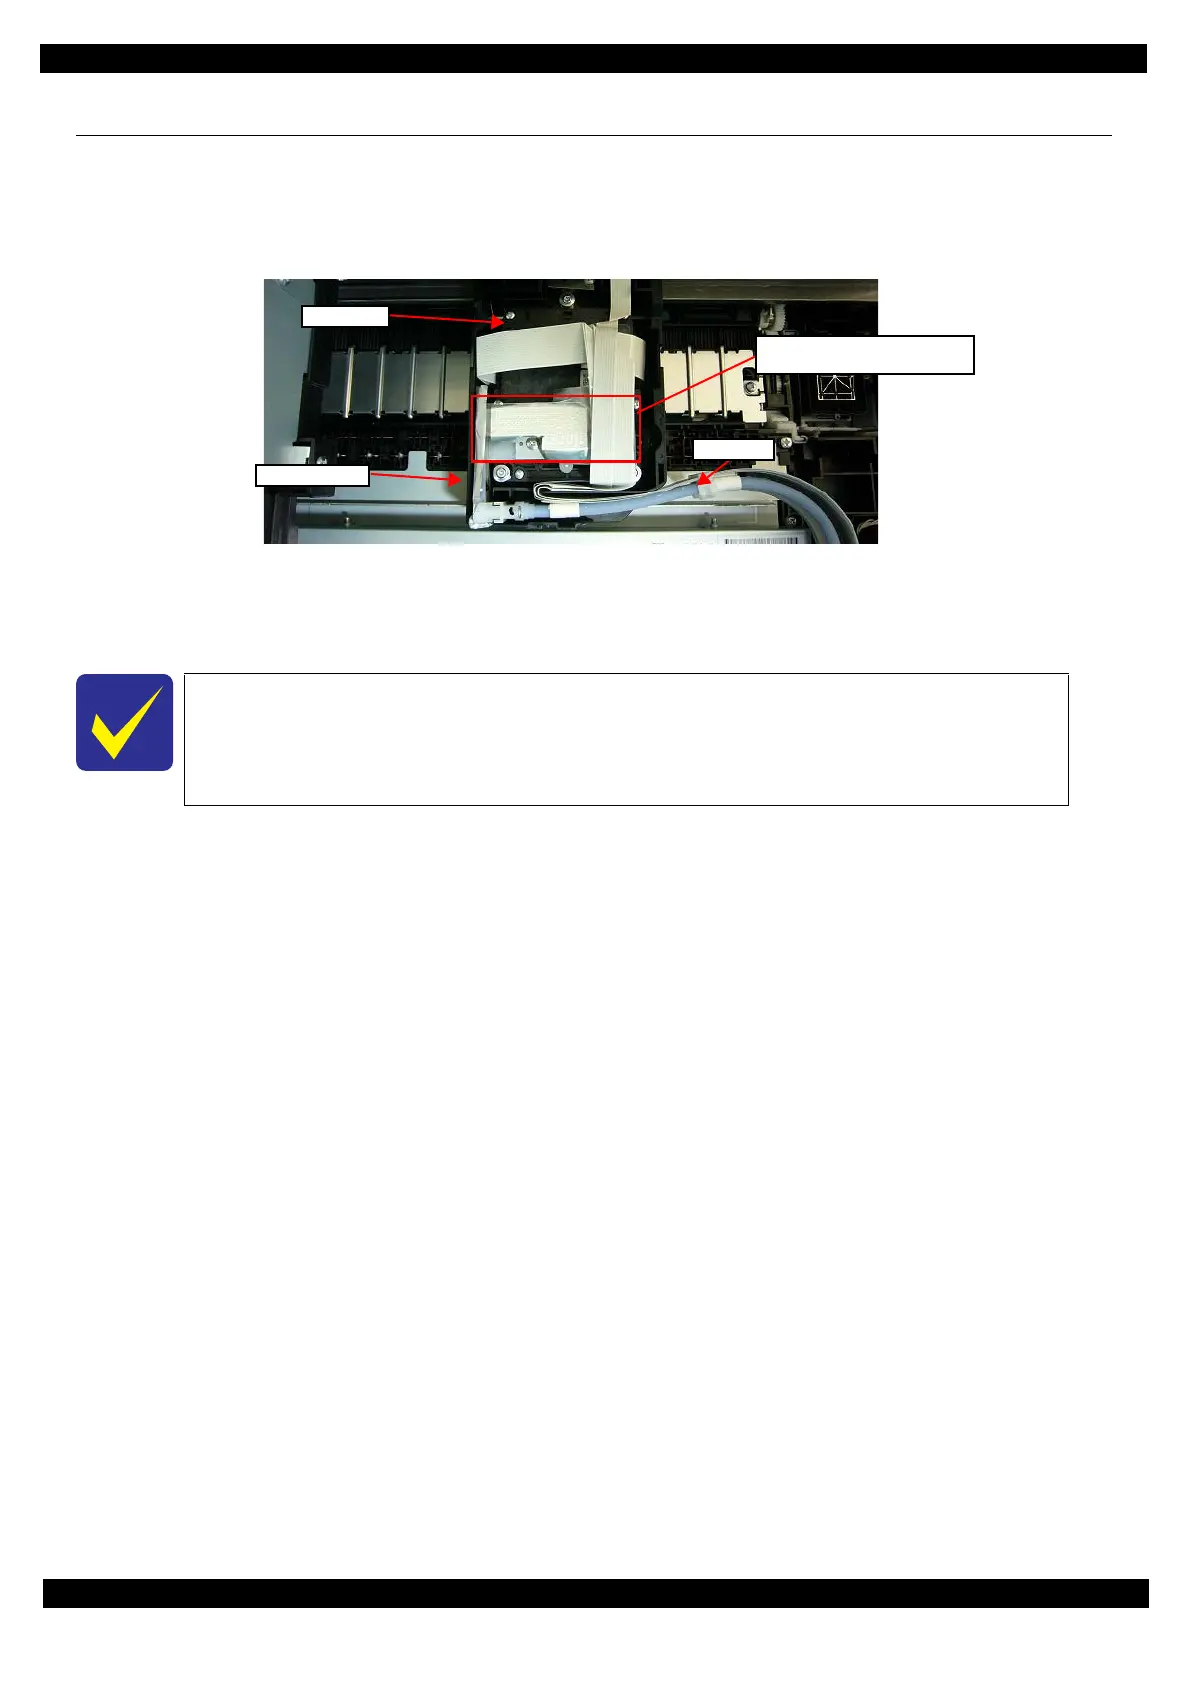
Figure 2-1. Joint Section of the Printhead and Ink Supply Unit
To prevent this from happening, before separating the Printhead and Ink Supply Unit to replace the Printhead or the
Ink Supply Unit, make sure to release the pressure inside the ink path using the Adjustment Program. The following
explains the procedure.
Tools
Ink Cartridges (four colors: cyan, magenta, yellow, black)
Do not use user’s ink cartridges since the ink in the ink cartridges is consumed when releasing the pressure. Prepare ink
cartridges supplied as consumables for this procedure. (Hereafter, an ink cartridge for this purpose is called as an “ink
cartridge (for service use)”.
Maintenance box
Do not use user’s maintenance box since the ink the ink path flows to the maintenance box when releasing the pressure.
Prepare maintenance box supplied as a consumable for this procedure. (Hereafter, a maintenance box for this purpose is
called as a “maintenance box (for service use)”.
Procedure
1. Remove the ink cartridges and maintenance box in the returned unit, and install the ink cartridges
(for service use)
and maintenance box
(for service use).
2. Connect the printer and the PC installed the Adjustment Program with the USB cable, and turn the power on.
3. Start the Adjustment Program, and select the “Ink Pressure Release” from the menu.
4. Click “Execute” in the displayed screen to release the applied pressure.
5. When the completion message appears, unplug the computer power cable.
Afterward, remove the parts referring to "2.2.2 Parts/Units Need to be Removed in Advance (p29)" and replace them
referring to "2.2.3 Disassembly Flowchart (p30)".
This is not necessary when replacing the Printhead and Ink Supply Unit together.
Approximately two minutes are required to release the applied pressure.
The ink in the ink path is pressurized in the power-off sequence again, therefore, make
sure not to turn the power off by the power button after the applied pressure is released.
Joint section of the Printhead
and Ink Supply Unit
Printhead
Ink tubes
Carriage Assy
 Loading...