Confidential
Adjustment Details of Adjustments 67
Epson WF-5690/4640/4630/5620/5190/5110 series Revision D
3.2.4 PG Adjustment
This section describes the procedure for the platen gap (PG) adjustment.
Tools
Thickness gauge: 1.37 mm (x2), 1.47 mm (x2)
Teflon Tape: Commercial item (thickness: 0.08 mm)
When performing the PG adjustment, make sure of the following.
Move the Carriage Assy by pulling the Timing Belt.
Be careful not to damage the nozzle surface of the Printhead with the thickness gauge.
Be careful not to damage the PF Scale when removing/installing the PG Cam Left.
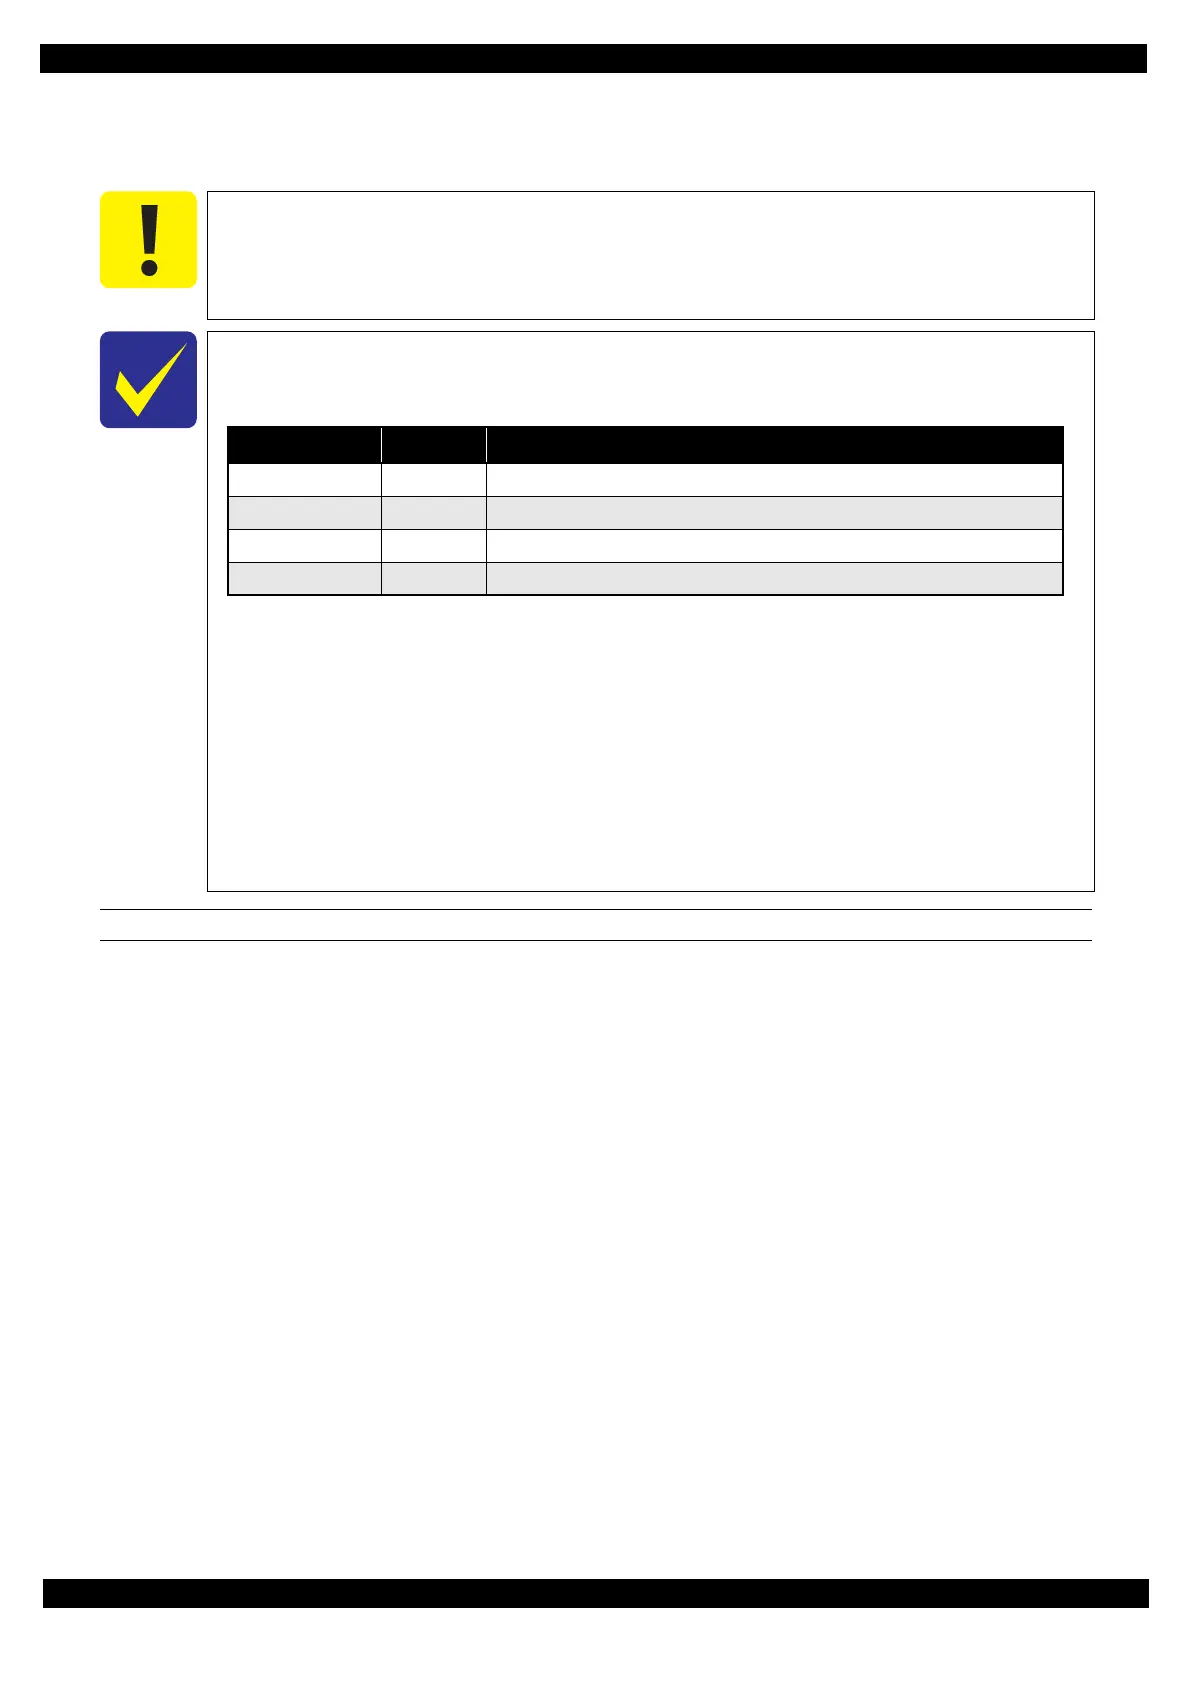
The PG position of this printer can be set to four points, from PG 1 to PG 4. Perform the
PG adjustment with the PG position set to PG 1.
The standard range of the PG and the adjustment pitch are as follows.
• Standard: 1.5 ± 0.0.5 mm (PG position: PG 1)
• Adjustment pitch: 0.05 mm (distance between notches on the PG Cam)
When performing the PG adjustment, install the Printhead to the Carriage Assy, and
remove the following parts beforehand.
• Exterior parts
• Main Board Unit
• Metal Plate Left
• CR Cover
Position PG (mm) Application
PG 1 1.50 Printing plain paper/EPSON special paper, PG adjustment
PG 2 1.85 Select when PG 1 is too narrow, printing envelopes/matte paper
PG 3 2.50 Select when PG 2 is too narrow
PG 4 3.00 Printing envelopes
 Loading...