Confidential
Adjustment Details of Adjustments 79
Epson WF-5690/4640/4630/5620/5190/5110 series Revision D
3.2.7 Ink Leak Check
This section describes the procedure for ink leak check necessary when disconnecting the Ink Supply Unit from
the Printhead or in a similar case.
Tools
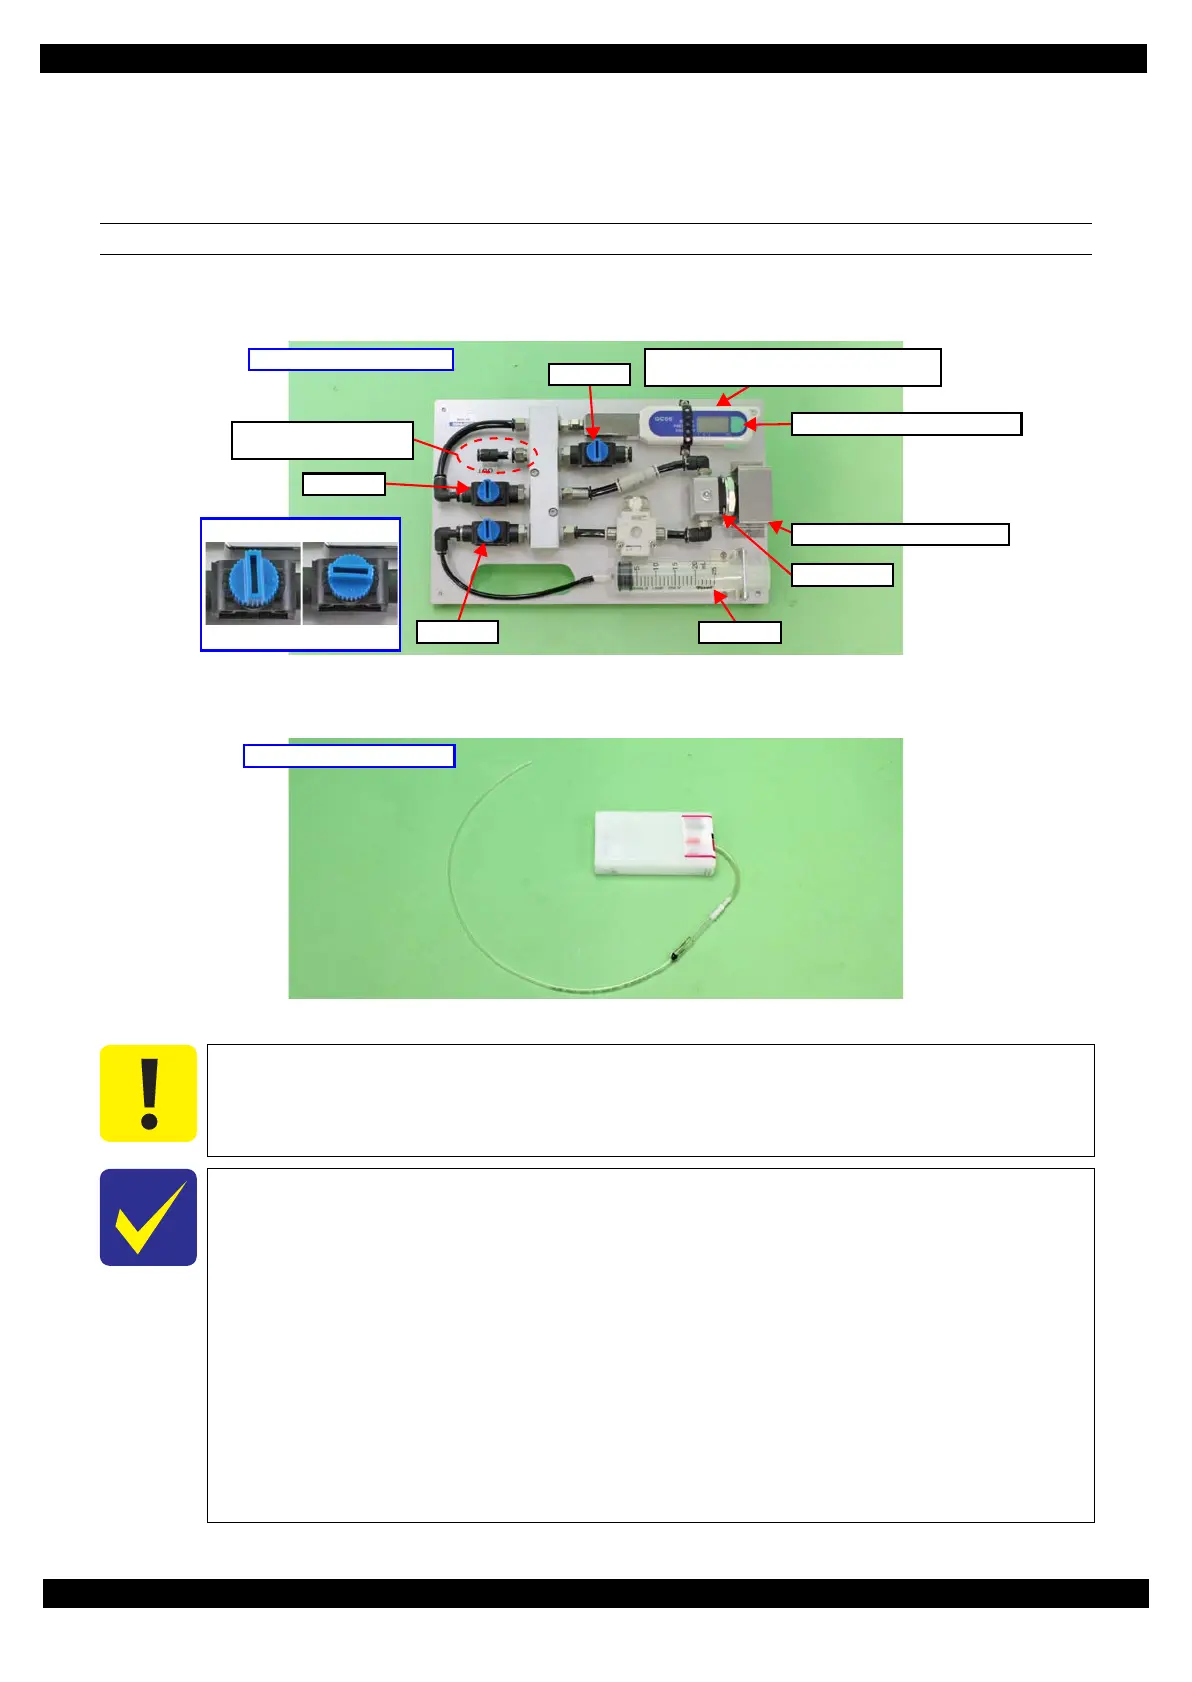
Ink Leak Measurement Jig (Parts code: TBD)
Battery type: CR2016 (3 V) x1
Figure 3-37. Ink Leak Measurement Jig
Ink Leak Check Cartridge (Parts code: 1565785)
Figure 3-38. Ink Leak Check Cartridge
Do not touch or press the regulator located under the regulator protection plate of the Ink
Leak Measurement Jig.
The Ink Leak Measurement Jig applies pressure by sending air using a syringe into the
ink path, and detects the variation of pressure in the ink path between the self-sealing
valve in the Printhead and the ink supply holes of the ink cartridges to check the
presence of ink leakage. If air leak occurs in the Ink Leak Measurement Jig, the leak
check itself cannot be done. Therefore, before performing the leak check, perform "Ink
Leakage Inspection Condition (p80)" without inserting the Ink Leak Check Cartridge to
the printer to test air leak from the Ink Leak Measurement Jig itself. (If the Ink Leak
Check Cartridge is not loaded to the printer, the valve in the cartridge is shut. Therefore,
the air leak check from the Ink Leak Measurement Jig itself becomes possible.)
The ink leak check should be done with the ink tubes secured with the tube clamps and
the CR Cover attached after the joint section of the Printhead and the Ink Supply Unit
has been secured. (See "Ink Supply Unit (p42)".)
Ink Leak Measurement Jig
Regulator
Regulator protection plate
Pressure gauge GC66 (The battery can
be replaced from the hole on the rear.)
Syringe
Valve C
Valve A
Connection part for Ink
Leak Check Cartridge
Valve B
Valve status
Closed Open
Power button of pressure gauge
 Loading...