Quick Reference
Button Lock
The 2WT11R-SS comes equipped with button lock. This requires you to tap any button to wake your
remote up then tap the button for the function you are trying to activate. Button lock can be turned off in
your remote’s option menu.
Valet Mode
When servicing or loaning your vehicle to others, the system should be placed in Valet Mode. Valet
Mode prevents the system from remote starting and disables all alarm functions. IMPORTANT: While in
Valet mode the remote will still control power lock and unlock systems. The parking lights will not flash.
The system can be put into valet one of three ways:
1. While holding the foot brake, cycle the key to the Ignition or ‘On’ position and then
back to the ‘Off’ position 5 times within 10 seconds. The parking lights will flash once
indicating that the system has entered Valet Mode.
2. Turn the vehicle’s key to the ignition “on” position, tap the Function button 3 times, and finally tap
the Lock button. The parking lights will flash once, the remote will read “Valet On” and Z’s will show
on the LCD above the vehicle’s hood to confirm valet mode. Repeat this process to exit valet mode. The
parking lights will flash twice, remote read “Valet Off” and Z’s will disappear confirming valet mode is
disabled.
3. Turn the key to the Ignition or ‘On’ position then using a 4 button remote press and release
the lock and trunk buttons together simultaneously for a half second. The vehicle parking lights
will flash 1 time to indicate the system has successfully entered valet mode.
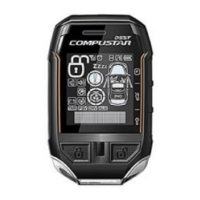
Remote Maintenance – Battery Charging
The 2WT11R-SS comes with a rechargeable battery. Use the included power adapter and
micro USB cable to charge your remote.
2WT11R-SS:
First, locate the micro USB port on the top of your remote. Connect your micro USB cable to the power
adapter and plug into wall outlet. The LED on the front of the remote will flash red showing that your
remote is charging. The LED will change to solid blue when charging is complete. This should take
approximately 2 hours.
1WG8R-SS:
Locate the small indent on the side of your remote. Use a small flat tip screw driver or flat plastic tool to
pop open your remote. Gently pull the remote apart taking care to not damage the circuit board. Your
battery size will be listed on the back of the remote. Replacements can be purchased from your local
Compustar dealer or an electronics store.
Programming the Clock
STEP 1: Enter remote programming mode by holding the Trunk and Start/Stop buttons for 2.5
seconds. The remote will beep and the LCD read “Remote Menu” to indicate that you have successfully
entered programming mode.