satisfactory, but the valves are leak-
ing.
If
the
compre
ssion has increased
10 pounds
or
more over the original
re
ading, there is leakage past the
rings.
During a compression test,
if
the
pressure fails to climb steadily
and
remains the same during the first two
successive strokes,
but
climbs higher
on the succeeding strokes,
or
fails to
climb during the entire test, it indi-
cates a sticking valve.
VALVE LASH
COLD VALVE LASH
If
the valve
rocker
arm
s
haft
as-
se
mbly has been removed and in-
stalled, it will be necessary
to
make
a
preliminary (cold) valve lash adjust-
ment before starting the engine.
If
tbe adjustment
is
made for
an
engine
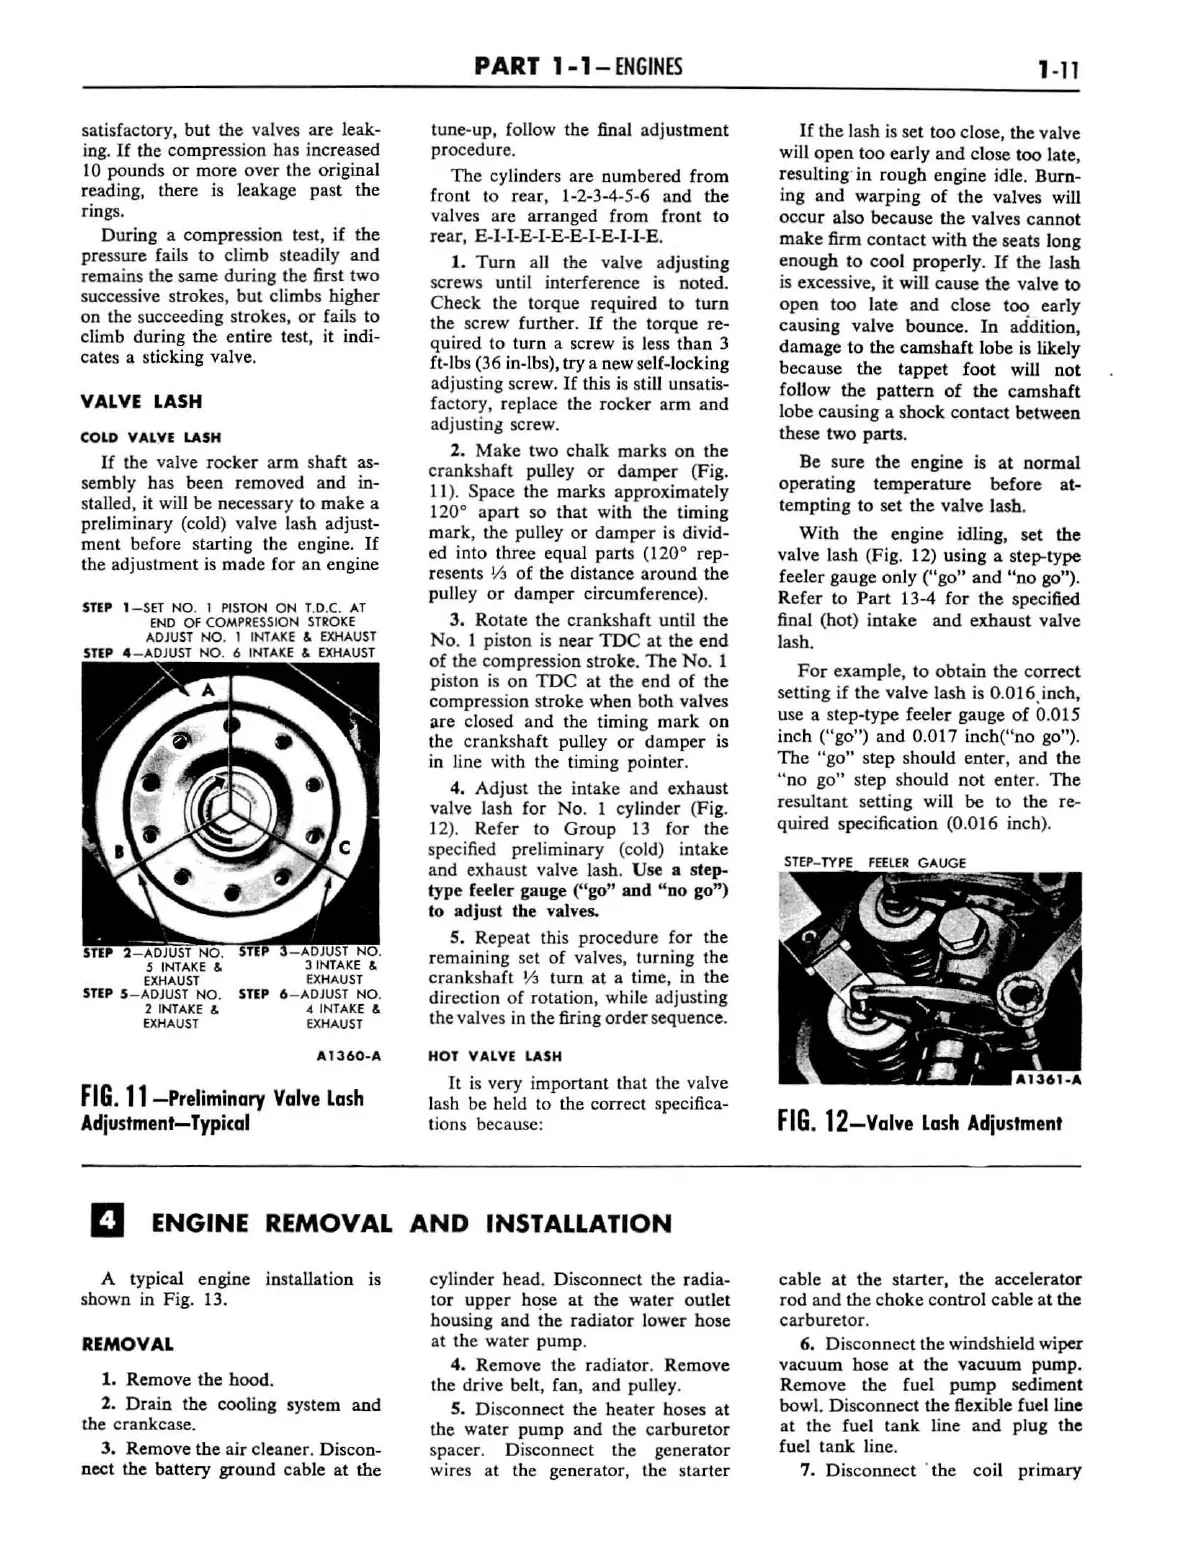
STEP
l -
SET
NO. I
PISTON
ON T,D.
C.
AT
END
OF
COMPRESSION
STROKE
ADJUST
NO
. 1 INTAKE & EXHAUST
4
-ADJ
UST
NO
. 6 INTAKE & EXHAUST
.s
INTAKE &
EXHAUST
SliP
S- ADJUST
NO
.
2 INTAKE &
EXHAUST
3 INTAKE &
EXHAUST
SliP
6 - ADJUST
NO
.
.. IN
TAKE
&
EXHAUST
A
1360-A
FIG.
II-Preliminary
Valve
lash
Adjustment-Typical
PART
1-1-
ENGINES
tune-up, follow the final adjustment
procedure.
The
cylinders are numbered from
front to rear, 1-2-3-4-5-6 and the
valves are arranged from front
to
rear, E-I-I-E-I-E-E-I-E-I-I-E.
1.
Turn
a
ll
the valve adjusting
screws until interference
is
noted.
Check the torque required
to
turn
the screw
further
.
If
the torque re-
quired to
turn
a screw is less
than
3
ft-Ibs (36 in-Ibs),
try a new self-locking
adjusting screw.
If
this
is
still unsatis-
factory, replace the rocker
arm
and
adjusting screw.
2. Make two chalk marks
on
the
crankshaft
pulley
or
damper
(Fig.
11).
Space the
mark
s approximately
120
0
a
part
so
that
with the timing
mark, the pulley
or
damper
is divid-
ed into three equal parts (120
0
rep-
resents
VJ
of
the distance
around
the
pulley
or
damper
circumference).
3. Rotate the crankshaft until
the
No
. 1 piston
is
near
TDe
at
the
end
of
the compression stroke.
The
No.1
pis
ton
is
on
TDC
at the end
of
the
compre
ss
ion stroke when both valves
are
closed
and
the timing
mark
on
the
crankshaft
pulley
or
damper
is
in line with the timing pointer.
4. Adjust the intake and exhaust
valve lash for No. 1 cylind
er
(Fig.
12). Refer
to
Group
13
for the
specified preliminary (cold) intake
and
exhaust valve lash. Use a step-
type feeler gauge
("go"
and
"
00
go")
to
adjust the valves.
S. Repeat this procedure
for
the
remaining set
of
valves, turning the
crankshaft
VJ
turn
at a time, in
the
direction
of
rotation, while adjusting
the valves in the firing
order
sequence.
HOT
VALVE
LASH
It
is very important that the valve
lash be held
to
the correct specifica-
tions because:
D ENGINE REMOVAL
AND
INSTALLATION
A typical engine installation is
shown in Fig. 13.
REMOVAL
1. Remove the hood.
2.
Dr
ain the cooling system
and
the crankcase.
J. Remove the air cleaner. Discon-
nect the battery ground cable at the
cylinder head. Disconnect the radia-
tor
upper
ho:se
at
the
water outlet
housing
and
the
radiator
lower hose
at the water pump.
4. Remove the radiator. Remove
the drive belt, fan,
and
pulley.
s.
Disconnect the heater
ho
ses at
the water
pump
and the
carburetor
spacer. Disconnect the generator
wires at the generator, the start
er
1-11
If
the lash
is
set too close, the valve
will
open
too
early
and
close too late,
resulting' in rough engine idle. Burn-
ing and warping
of
the
valves will
occur
also because the valves
cannot
make
firm
contact
with
the
seats long
enough
to
cool
properly.
If
the lash
is
excessive,
it
will cause
the
valve
to
open
too
late
and
close too early
causing valve bounce.
In
addition,
damage
to
the
camshaft
lobe is likely
because
the
tappet
foot
wiU
not
follow
the
pattern
of
the
camsbaft
lobe causing a shock
contact
between
these two
parts.
Be sure
the
engine is
at
normal
operating
temperature
before
at-
tempting
to
set the valve lash.
With the engine idling, set the
valve lash (Fig. 12) using a step-type
feeler gauge only
("go"
and
"no
go").
Refer
to
Part
13-4 for
the
specified
final (hot)
intake
and
exhaust valve
lash.
For
example,
to
obtain
the
cor
rect
setting if
the
valve lash
is
O.
016)nch.
use a step-type feeler gauge
of
0.
015
inch
("go")
and
0.017
inch("no
go").
The
"go"
step
shou
ld enter, and the
"no
go" step should
not
enter.
The
resultant setting will be
to
the re-
quired
specification (0.016 inch).
FIG.
12-Valve lash
Adjustment
cable
at
the
starter, the accelerator
rod
and
the
choke
control
cable at the
carburetor
.
6.
Disconnect
the windshield wiper
vacuum
hose
at
the
vacuum
pump.
Remove the fuel
pump
sediment
bowl.
Disconnect
the
flexible fuel line
at the fuel
tank
line
and
plug the
fuel
tank
line.
7.
Disconnect
' the coil primary
 Loading...