23
Scan
(Via USB)
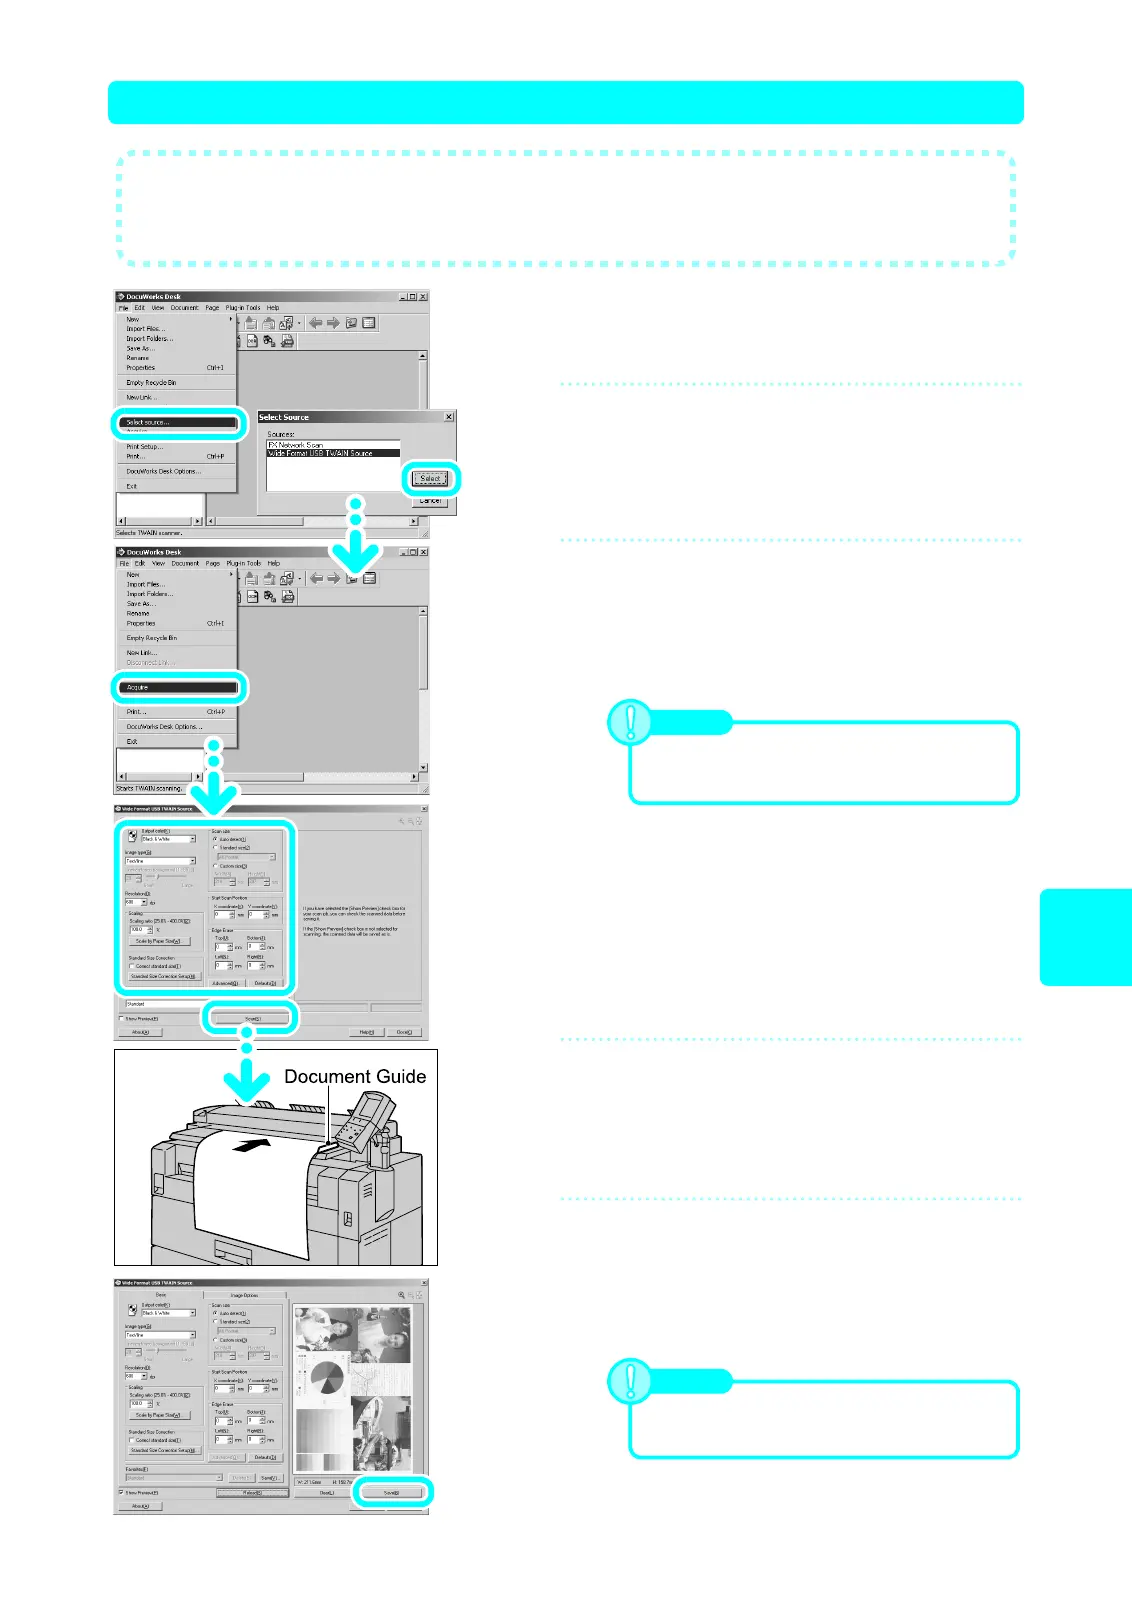
Import the document to the PC while scanning the document
1
Click [Start] > [Program] > [Fuji Xerox]
> [DocuWorks] > [DocuWorks Desk].
2
Select a scanner.
(1) From the [File] menu, select [Select source].
(2) From [Sources], select [Wide Format USB TWAIN
Source], and click [Select].
3
Start scanning.
(1) Select [Acquire] from the [File] menu.
(2) On the screen displayed, specify the media size and
adjust the image quality.
(3) Click [Scan].
4
Set the document.
Align the document face down with the document guide.
The document will be scanned automatically.
5
Save the document.
(1) If the [Show Preview] check box is selected, adjust
the image quality and edit the image, as required.
(2) Click [Reload], and rescan the data.
(3) Click [Save].
● This section describes the procedure to import the scanned document to your
computer using DocuWorks.
For information about DocuWorks, refer to the DocuWorks online help.
Note
If the [Show Preview] check box is selected,
the preview screen is displayed after the
document is scanned.
Note
If the [Show Preview] check box is not
selected, the document automatically is saved.
 Loading...