6. SYSTEM DESIGN
BRANCH BOX3-3.
INSTALLATION THE UNIT
WARNING
Perform installation in a location which can properly withstand the weight of the unit. Failure to
install in a robust location or a faulty installment may cause the equipment to fall, a water leakage,
electric shock or fire.
During installation, secure the hanger bolt so it does not come off.
CAUTION
Be sure to provide adequate maintenance space when installing the unit above the ceiling.
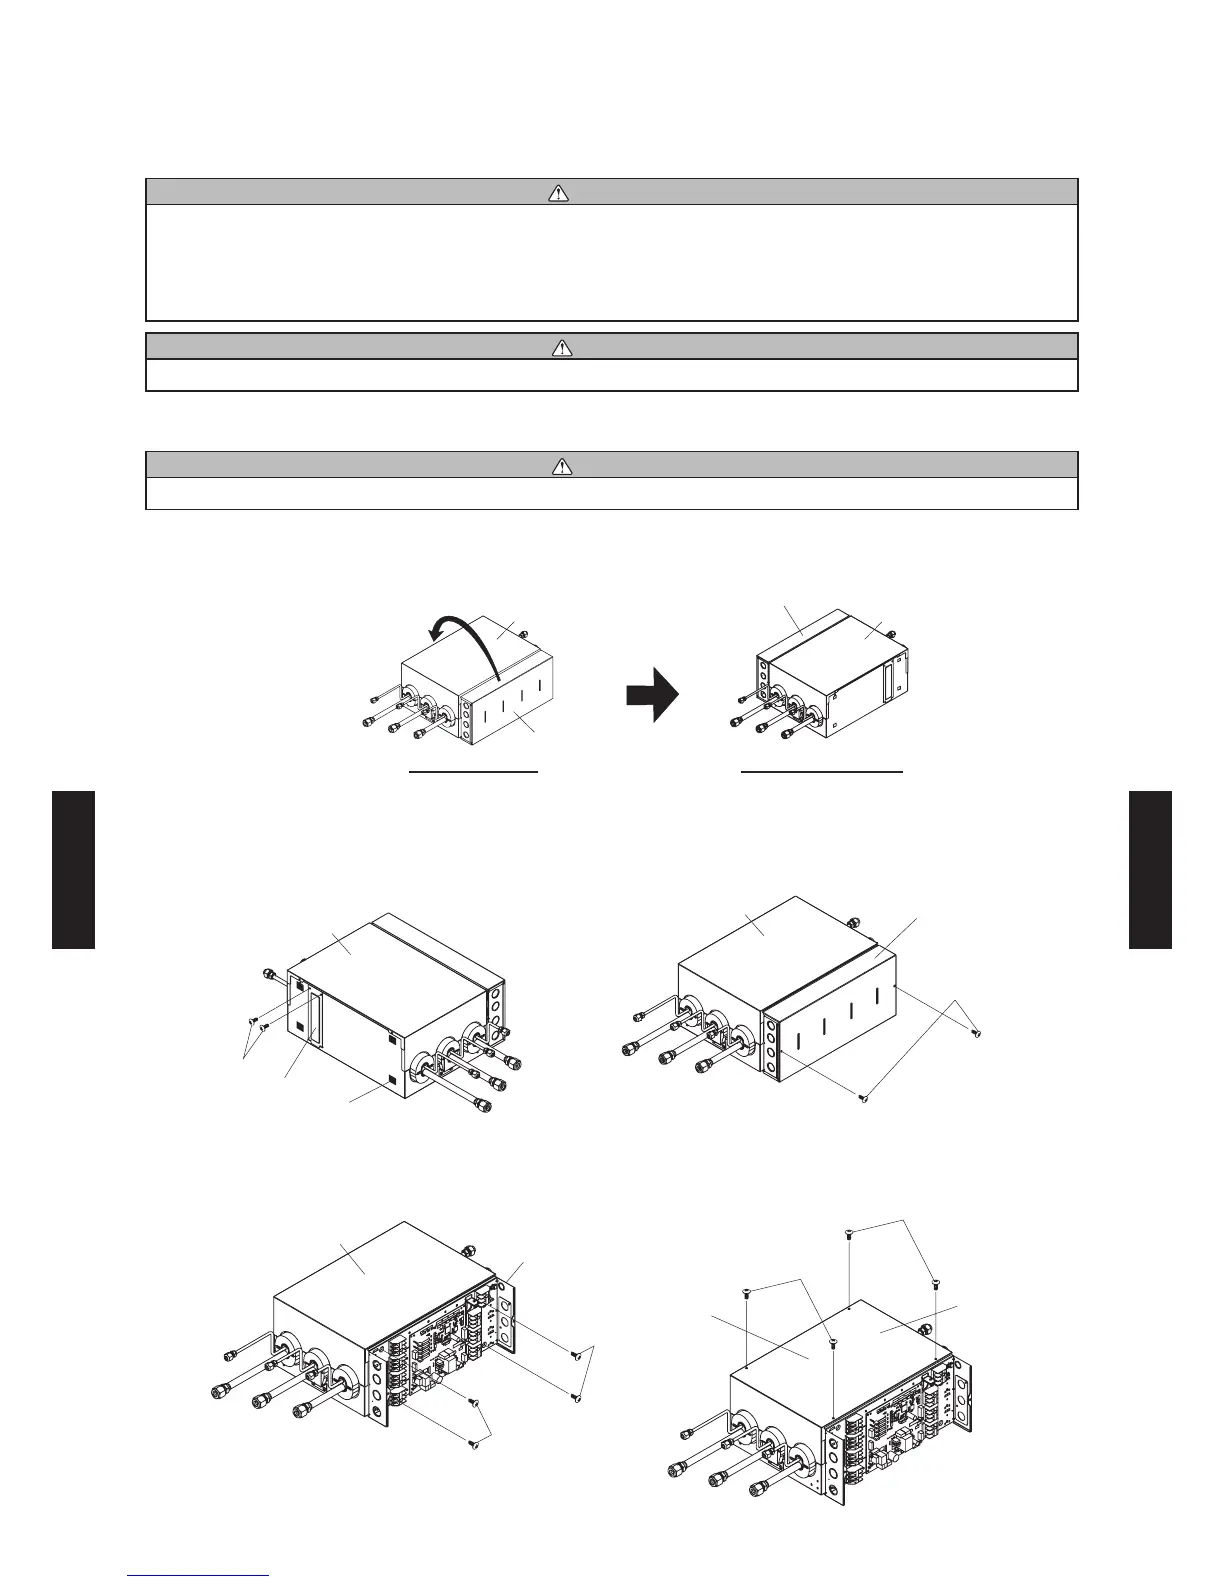
Changing the positioning of the control box
CAUTION
Change the positioning of the control box on-site before performing the installation.
The positioning of the control box can be changed.
(Only when installed horizontally. When vertically installed, the positioning cannot be changed.)
To the opposite side
At time of shipment Positioning after change
Bottom side
Bottom side
Control box
Control box
Bottom side
Bottom side
Control box cover
Screw
Screw
Wiring cover
Tape (4 places)
(1) Remove the screws (2 pieces) to remove the
wiring cover.
Remove the tapes (4 places) on the main unit.
(2) Remove the screws (2 pieces) to remove the
control box cover.
Bottom side
Bottom
panel
Bottom side
Screw
Screw
Screw
Screw
Control box
(3) Remove the screws (4 pieces).
(Note: Do not remove the control box.)
(4) Remove the screws (4 pieces) to remove the
bottom panel.
- (06 - 32) -
SYSTEM
DESIGN
SYSTEM
DESIGN
 Loading...