1-10
Installation procedure
Refer to the outline drawing at the back of this manual for the dimensions. Make five holes in the
platform. Four holes to fasten the antenna unit and one hole for the signal cable.
How to fasten the radiator to the radiator bracket
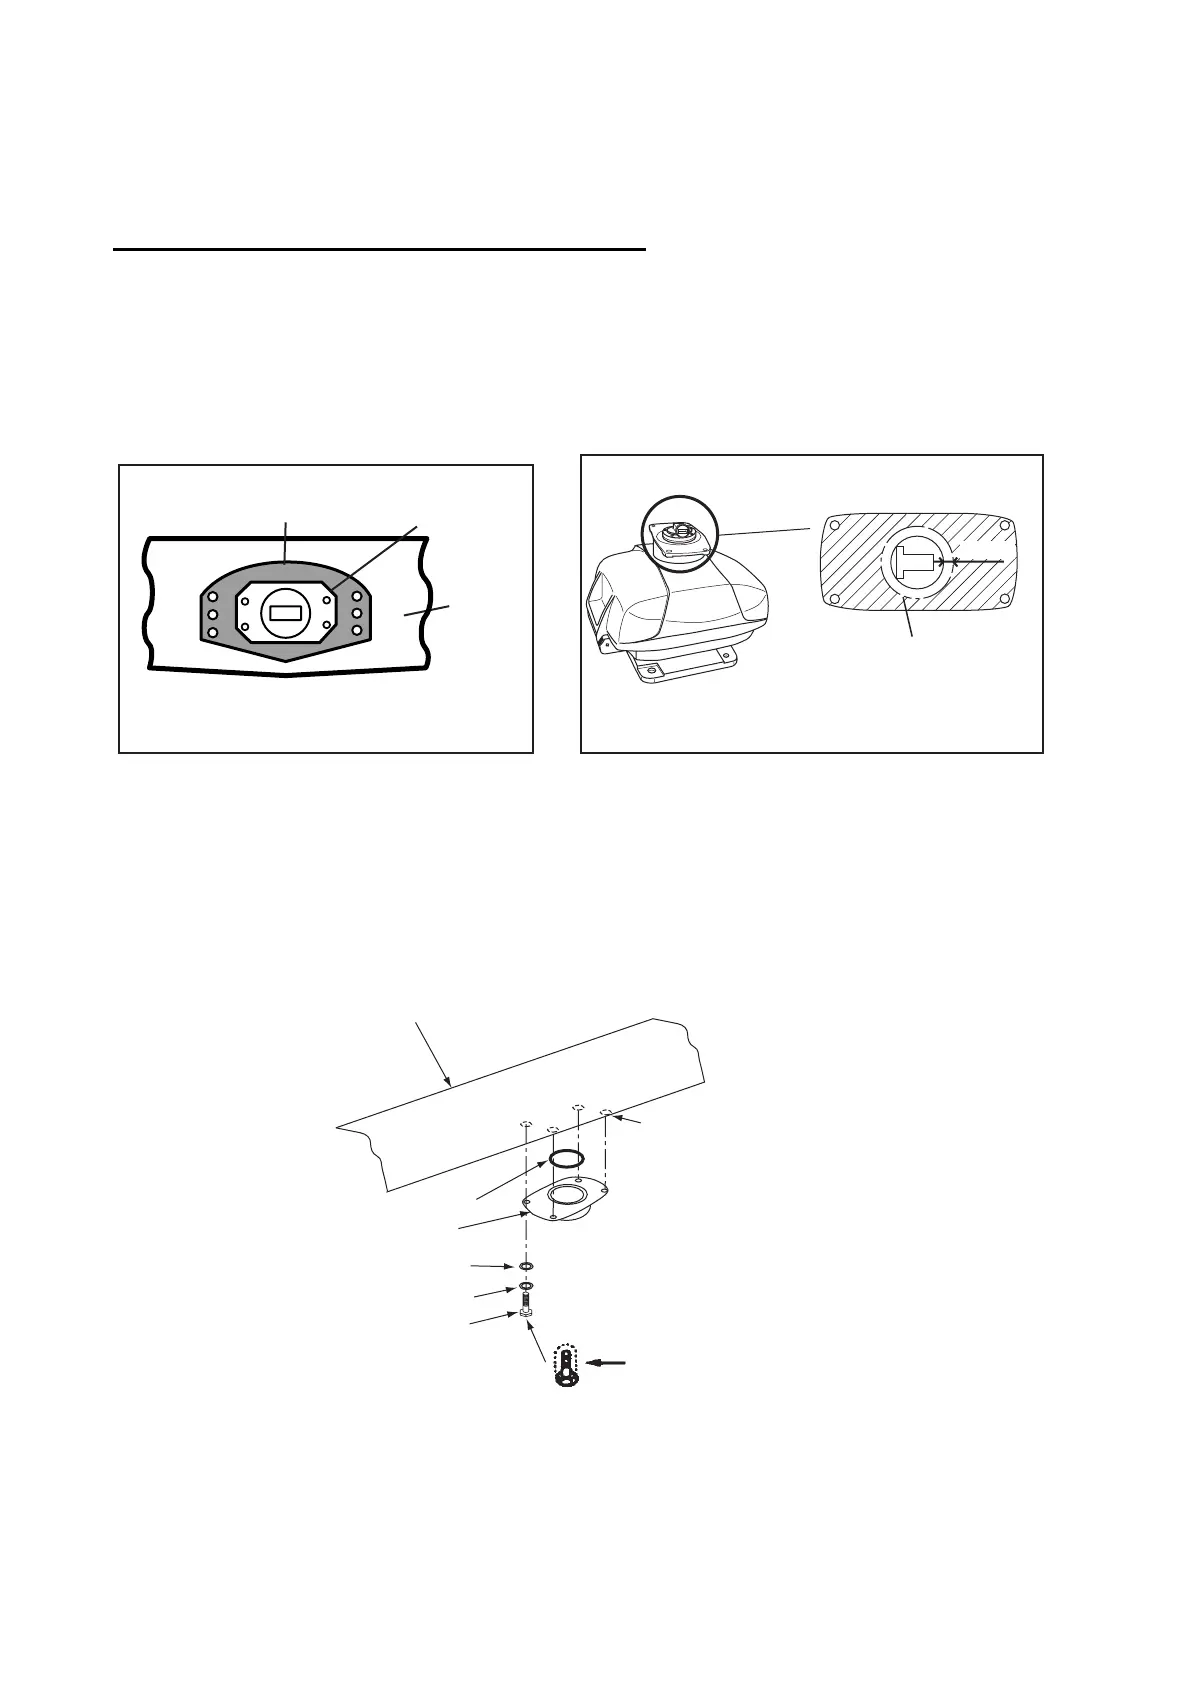
See the packing list at the back of this manual for the installation materials.
1. Remove the radiator cap from the radiator bracket.
2. Apply the silicone sealant to the surface of the antenna radiator and the radiator bracket. See
the figure shown below for the location.
3. Apply the silicone sealant to the threads in the four holes on the antenna radiator.
4. Apply the grease to the O-ring and set the O-ring to the radiator bracket.
5. Set the antenna radiator on the radiator bracket.
6. Apply the silicone sealant to the radiator bolts (4 pieces). Fasten the antenna radiator to the
radiator bracket with the radiator bolts, flat washers and spring washers.
How to fasten the antenna radiator to the radiator bracket
Coat grey area with
silicone sealant.
Groove
Radiator
RADIATOR BRACKET
(top view)
Coat hatched area with
silicone sealant.
10mm
(Radiator type: XN-10A)
(Radiator type: XN-12A)
ANTENNA RADIATOR
(bottom view)
Flat washer
Spring washer
Hex head bolt
(M8 x 30)
Radiator bracket
Apply silicone sealant
to bolts.
Antenna
radiator
O-ring
Apply silicone sealant
to threaded holes

 Loading...