3-58 B90 LOW IMPEDANCE BUS DIFFERENTIAL SYSTEM – INSTRUCTION MANUAL
ADD DEVICE TO SOFTWARE CHAPTER 3: INSTALLATION
3
2. Start the EnerVista UR Setup software, or in EnerVista Launchpad select the UR device to start the software.
3. Click the Add Site button. A new category is added.
4. Enter a site name in the Site Name field. Optionally add a short Description of the site. This example uses “Location 1”
as the site name. Click the OK button. The new site appears in the Online Window area.
5. Click the Device Setup button. The window opens.
6. Select the new site.
7. Click the Add Device button. A new device is added.
8. Enter a name in the Device Name field, up to 15 characters, and optionally add a Description of the site. The Color is
for the text in the device list in the Online Window.
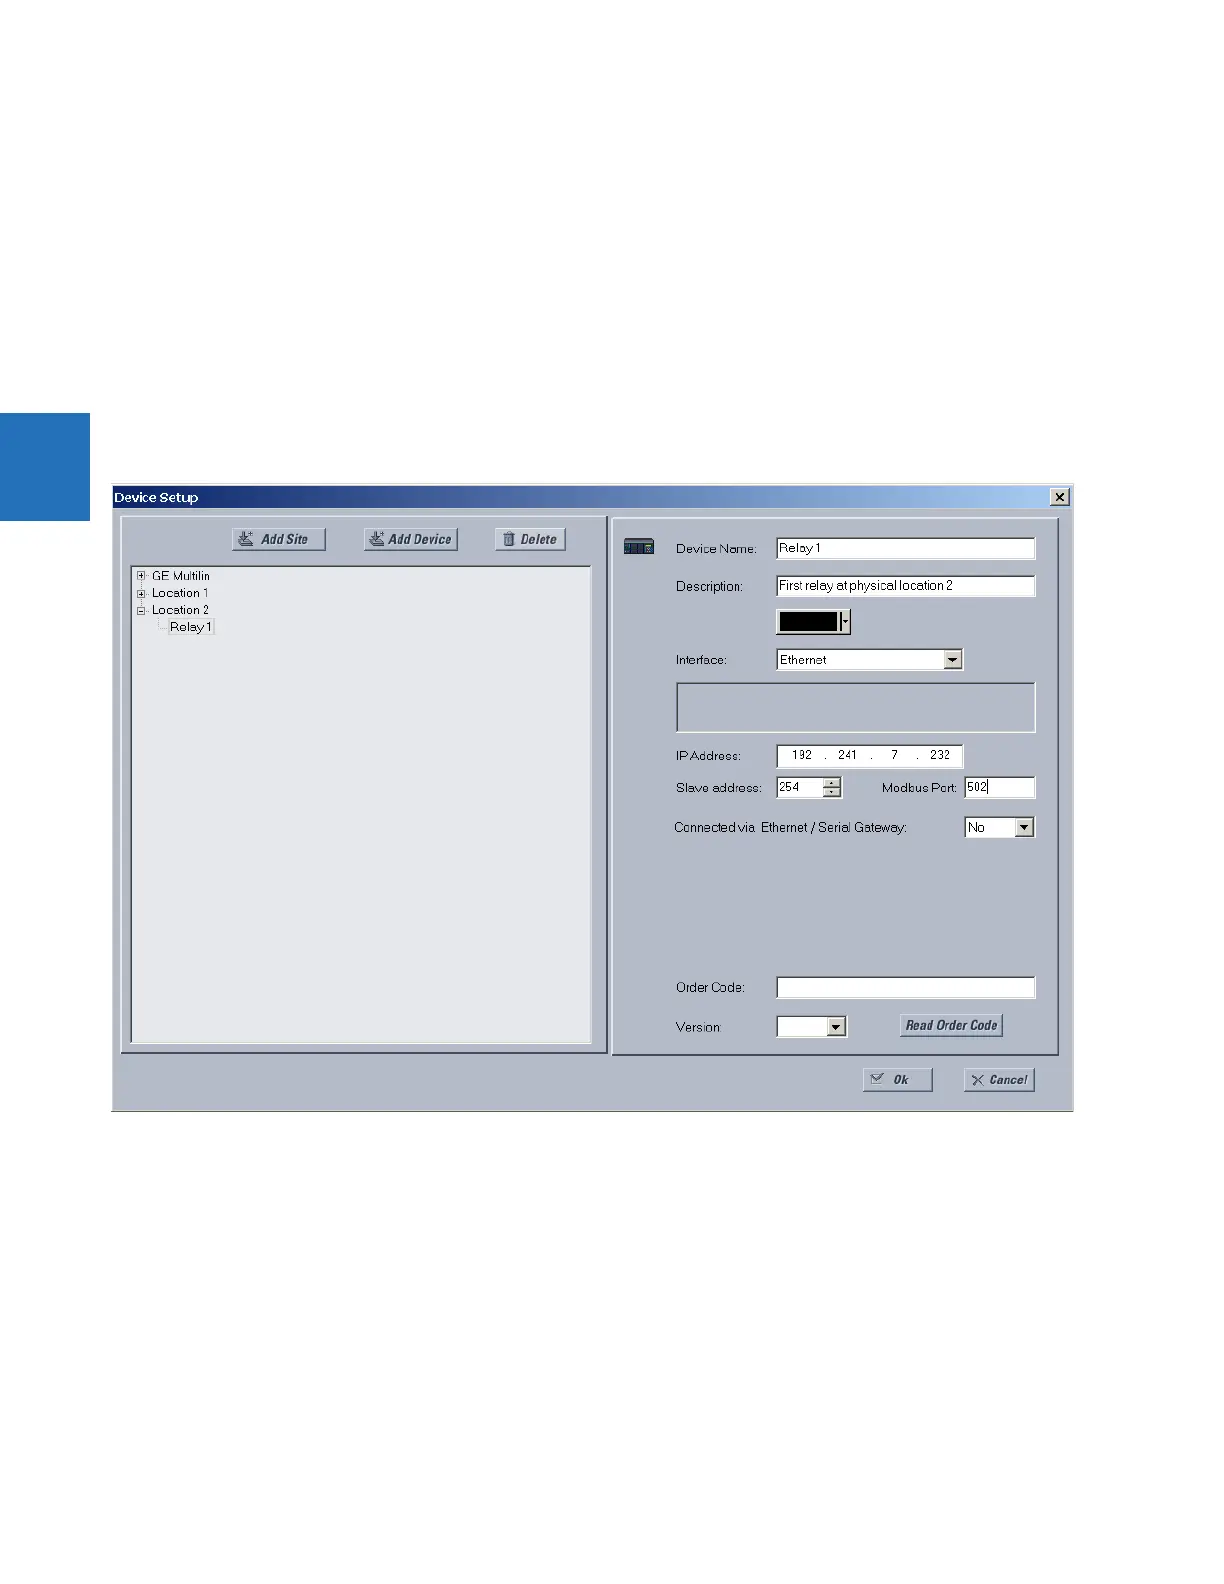
9. Select “Ethernet” from the Interface drop-down list. This displays a number of interface parameters that must be
entered for Ethernet functionality.
Figure 3-61: Configuring Ethernet communication
10. Enter the relay IP Address, which can be viewed on the device front panel under
SETTINGS PRODUCT SETUP
COMMUNICATIONS NETWORK IP ADDRESS
. Once the IP address is entered, try to load automatically the device
information by clicking the Read Order Code button.
11. Enter the relay Slave address and Modbus Port address values from the settings in the front panel
SETTINGS
PRODUCT SETUP COMMUNICATIONS MODBUS PROTOCOL
menu.
12. If using a gateway to connect to the device, select Yes from the drop-down list.
13. Click the Read Order Code button to connect to the B90 device and upload the order code. If the device was entered
already, a message displays "Device ’x’ is also using IP address...." If a communications error occurs, ensure that the
values entered in the previous steps correspond to the relay setting values, and also ensure that the same IP address
is not assigned to multiple B90 ports.
14. Click the OK button when the relay order code has been received. The device is added to the Online Window.
 Loading...