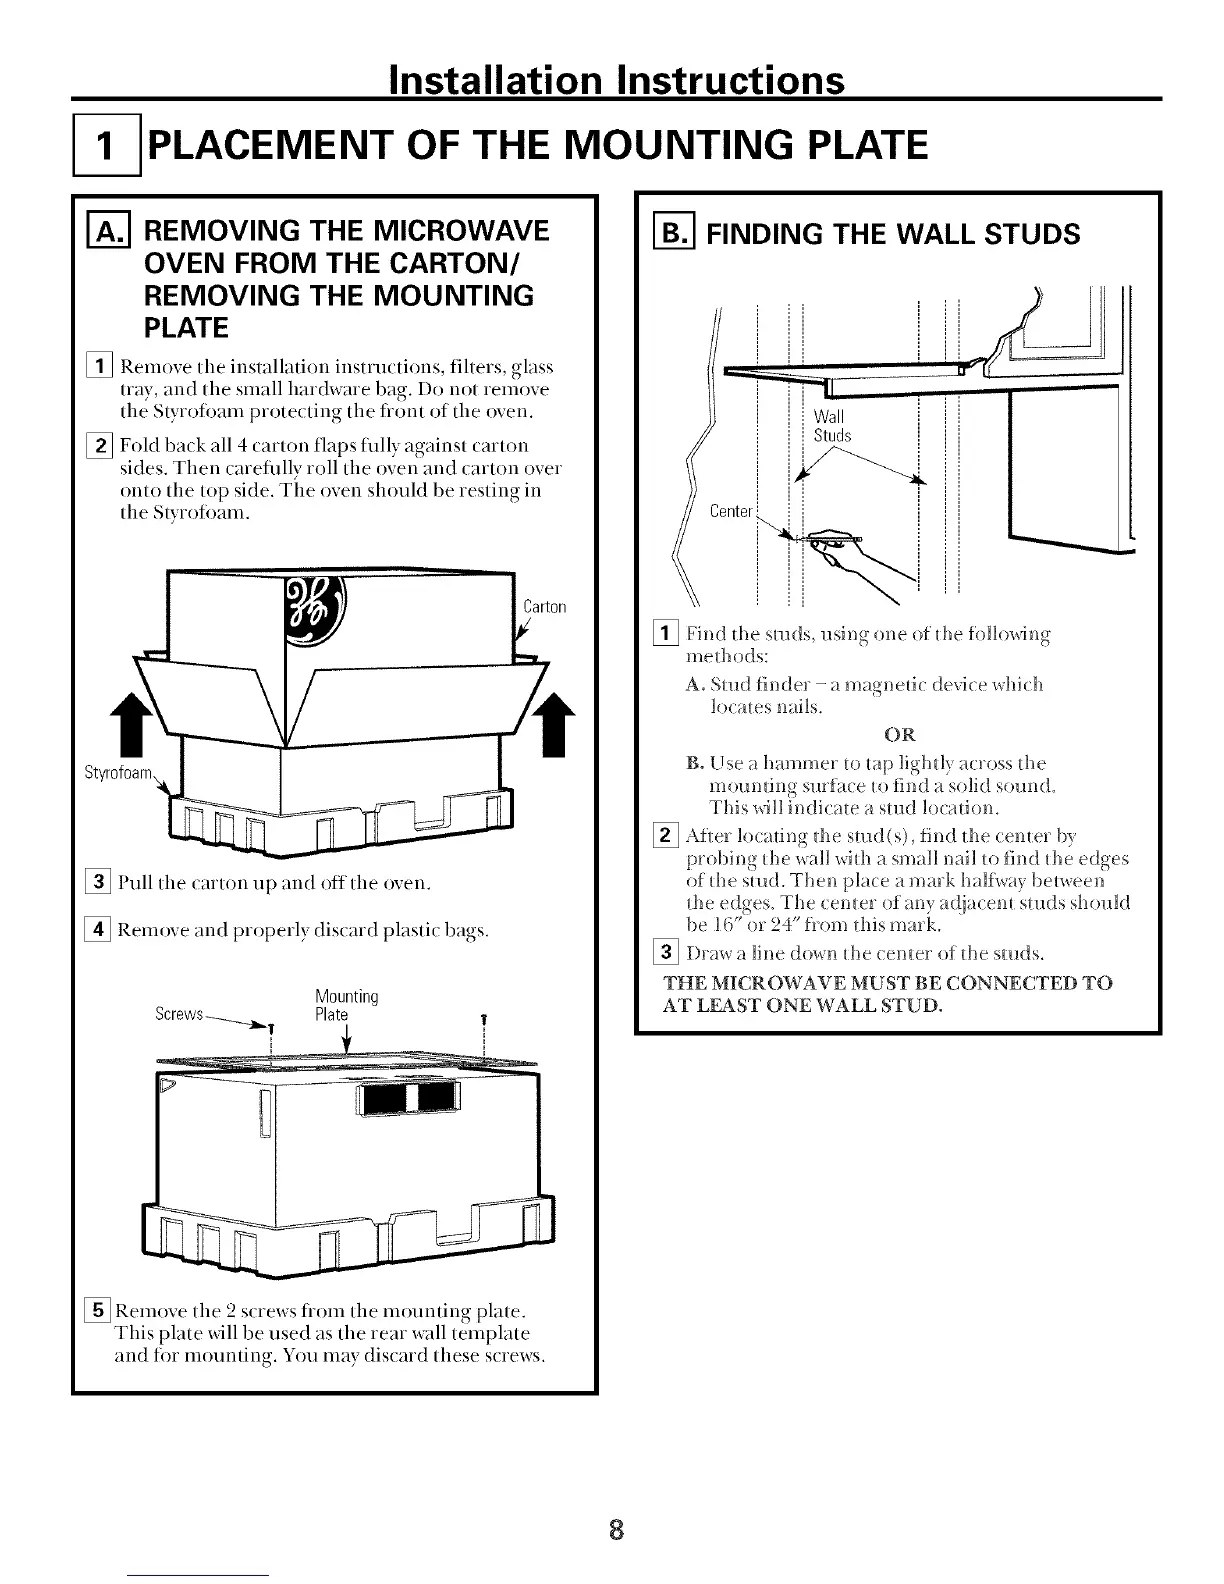
Installation Instructions
I- PLACEMENT OF THE MOUNTING PLATE
I'_ REMOVING THE MICROWAVE
OVEN FROM THE CARTON/
REMOVING THE MOUNTING
PLATE
[] Remove tile installation instructions, filters, glass
tray, and the small hardware bag. Do not remove
the Styroli)am protecting the flont of tile oven.
[] Fold back all 4 carton flaps flllly against carton
sides, Then carefiflly roll the oven and carton over
onto the top side, The oven should be resting in
the Styroloam.
[] Pull tile carton up and off tile oven.
[] Remove and properly discard plastic bags.
Mounting
Plate
[] Remove the 2 screws tiom the mounting plate.
This plate will be used as the rear wall template
and ti)r mounting. You may discard these screws.
I-_ FINDING THE WALL STUDS
A. Stud finder - a magnetic device which
loca_es nails.
OR
B. Use a hammer _o mp lighdy across d_e
mounting suri_ce _ofind a solid soun(L
This will indicate a stud location.
[] Afler locating d_e stud(s), find _he cemer by
probing d_e wall wid_ a small nail _o l_h_dd_e edges
of d_e stud. Then place a mark half_ay between
the edges. The cemer of any adjacen_ studs should
be 16" or 24" from dfis mark.
[]Draw a line down d_e (emer of d_e studs.
THE MICROWAVE MUST BE CONNECTED TO
AT LEAST ONE WALL STUD.
8
 Loading...