Do you have a question about the GE JVM3160DFCC and is the answer not in the manual?
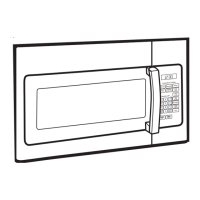
| Style | over-the-range |
|---|---|
| Color | bisque |
| Total Capacity | 1.6 cu. ft. |
| Cooking Programs | microwave |
| Control Options | popcorn; beverage; potato; vegetable; reheat; defrost; weight/time |
| Convection | no |
| Power Levels | 10; yes |
| Fan Speeds | 2-speed |
| Venting Type | convertible; externally vented |
| Sensor Cooking | no |
| Quick Start | yes; 1-6 minutes |
| Control Type | electronic touch |
| Timer | yes |
| Interior Light | incandescent - 2 bulbs; programmable night light; bright/night/off; incandescent; yes |
| Microwave Power | 1, 000 watts |
| Electrical Requirements | 120/60 |
| Voltage | 120 volts |
| Current | 15 |
| Depth | 15 1/4 inch |
|---|---|
| Height | 16 1/2 inch |
| Width | 29 7/8 inch |
| Net Weight | 63 lbs. |
Details an example of one possible ductwork installation for top exhaust venting.
Details an example of one possible ductwork installation for back exhaust venting.
Lists the components included in the hardware packet for installation.
Lists the additional parts provided with the microwave oven for installation.
Instructions for safely removing the microwave oven from its packaging and detaching the mounting plate.
Guidance on locating wall studs using a stud finder or tapping method for secure mounting.
Procedures for determining the correct placement of the mounting plate under various cabinet types.
Steps for accurately aligning the mounting plate on the wall using templates and lines.
Step-by-step guide for attaching the mounting plate to the wall using toggle bolts and screws.
Instructions for preparing the top cabinet by drilling holes for screws and the power cord.
Procedure for installing the charcoal filter into the microwave oven assembly.
Steps for securely mounting the microwave oven onto the installed mounting plate.
Method for filter installation/replacement when top access is limited after mounting.
Guide for attaching the mounting plate to the wall for top exhaust installations.
Instructions on preparing the top cabinet for ventilation and mounting hardware.
Detailed steps for adjusting the blower motor orientation for proper exhaust.
Procedure for assembling and installing the exhaust adaptor to the blower unit.
Steps for lifting and mounting the microwave oven onto the wall plate.
Guidance on adjusting the exhaust adaptor to connect to the house duct system.
Instructions for extending and sealing the house ductwork to the exhaust adaptor.
Steps for cutting an opening in the rear wall for the exhaust duct.
Procedure for attaching the mounting plate to the rear wall for back exhaust.
Instructions for preparing the top cabinet for mounting and electrical connections.
Steps to adapt the blower motor and fan for outside back exhaust configuration.
Procedure for mounting the microwave oven onto the prepared wall and cabinet.