34 31-7000173 Rev. 0
USE LA PLANTILLA DEL
GABINETE SUPERIOR PARA
PREPARAR EL GABINETE
SUPERIOR
B4.
•
Lea las instrucciones sobre la PLANTILLA DEL
GABINETE SUPERIOR.
• Péguela debajo del gabinete superior.
• Taladre los agujeros, siguiendo las instrucciones en la
PLANTILLA DEL GABINETE SUPERIOR.
PRECAUCIÓN
Use gafas de seguridad
cuando perfore los agujeros en el fondo del
gabinete.
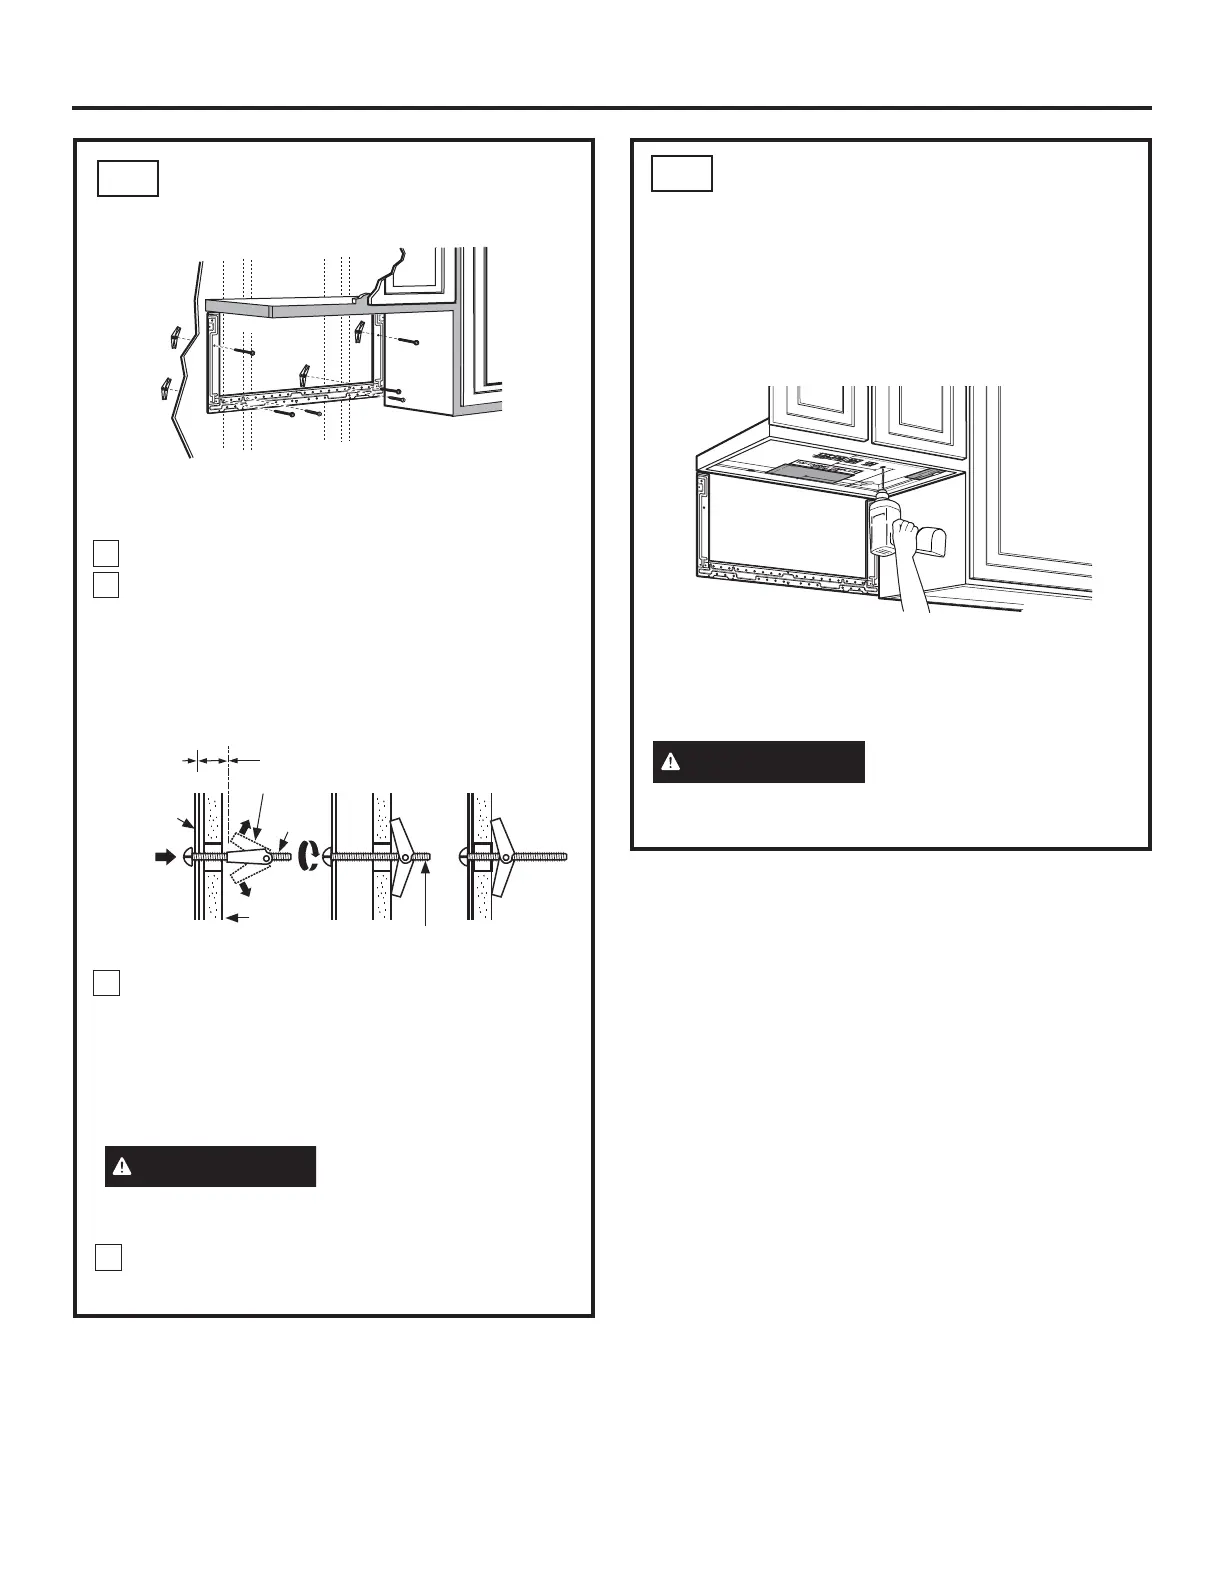
Instrucciones de instalación
Necesita perforar agujeros para los tornillos de apoyo
superiores y un agujero suficientemente grande para
que el cable eléctrico quepa.
CÓMO ADHERIR EL PLATO
DE MONTAJE A LA PARED
B3.
Pegue el plato a la pared usando los tornillos basculantes.
Por lo menos un tornillo de madera debe ser usado para
pegar el plato al poste de viga de la pared.
Remueva las mariposas de los tornillos.
Inserte los tornillos en el plato de montaje a través
de los agujeros diseñados para colocarse contra la
pared de mampostería seca y pegue otra vez las
mariposas de
3
/4” a cada tornillo.
1
2
Pared
Plato de
montaje
Espaciadores para los basculantes
mayores que el ancho de la pared
Tornillo de
mariposa
Alas de mariposa
Para usar los tornillos basculantes:
Extremo del tornillo
Coloque el plato de montaje contra la pared e
inserte las alas de mariposa en los agujeros de
la pared para montar el plato.
NOTA: Antes de apretar los tornillos basculantes y el
tornillo de madera, cerciórese de que las orejillas en el
plato de montaje toquen el fondo del gabinete cuando
se empujen contra la pared y de que el plato esté
centrado apropiadamente debajo del gabinete.
PRECAUCIÓN
Tenga cuidado de
evitar pellizcar sus dedos entre la parte
posterior del plato de montaje y la pared.
Apriete todos los tornillos. Tire del plato en dirección
opuesta a la pared para ayudar a apretar los tornillos.
3
4

 Loading...