Page
PROGRAMMING THE CONTROL
ENTERING THE PROGRAM MODE
To enter the Program Mode, press [r]-[8
]. At this time, the five function LEDs (Stay, Chime, Exit, Bypass, & Cancel) will
begin to flash. Next, enter the "Go To Program Code" (FACTORY DEFAULT IS [9]-[7]-[1]-[3]). If the "Go To Pro
ram
Code" is valid, the "Service" LED will flash and the five function LEDs will illuminate steady. You are now in the Pro
ram
Mode and ready to select the module to program.
SELECTING THE MODULE TO PROGRAM
Since all modules connected to the NX-6 are programmed through the keypad, the module you are programmin
should
be the first entry. To program the NX-6 Control Panel, enter [0]-[#]. The [0] is the module number of the control and
the [#] is the entry key. Other module entry numbers can be found in their corresponding manuals.
PROGRAMMING A LOCATION
Once the number of the module to be pro
rammed has been entered, the "Armed" LED will illuminate, indicatin
it is
waitin
for a pro
rammin
location to be entered. Any location can be accessed by directly enterin
the desired
programming location followed by the pound [#] key. If the location entered is a valid location, the "Armed" LED will
extin
uish, the "Ready" LED will illuminate and the binary data for the first se
ment of this location will be shown by the
zone LED's. While entering new data, the "Ready" LED will be
in flashin
to indicate a data chan
e in process. The
flashing will continue until the new data is stored by pressing the [r] key. Upon pressing the [r] key, the keypad will
advance to the next se
ment and display its data. This procedure is repeated until the last se
ment is reached.
Pressing the [#] key will exit from this location, and the "Armed" LED will illuminate again waitin
for a new
pro
rammin
location to be entered. If the desired location is the next sequential location, press the [POLICE] key. I
the previous location is desired press the [FIRE] key. If the same location is desired press the [MEDIC] key. To review
the data in a location, repeat the above procedure, pressing the [r
] key without any numeric data entry. Each time the
[r] key is pressed, the programming data of the next segment will be displayed for review.
EXITING A LOCATION
After the last segment of a location is programmed, press [r] to save the data, exit that location, turn the "Ready" LED
off and the "Armed" LED on. To exit before the last segment, press [#]. As before, you are now ready to enter another
programming location. If an attempt is made to program an invalid entry for a particular segment, the keypad sounder
will emit a triple error beep (beep, beep, beep), and remain in that segment awaiting a valid entry.
EXITING THE PROGRAM MODE
When all the desired changes in programming have been made, press the [Exit] key to exit this programming level, and
o to the "Select a Module To Pro
ram" level. If no additional modules are to be pro
rammed, pressin
the [Exit] key
a
ain will exit the pro
ram mode. If there is a module to be pro
rammed, it may be selected by enterin
its address
followed by the [#] key (see "Selectin
the Module To Pro
ram" above). The procedure for pro
rammin
these devices is
the same as for the control panel, except the locations will be for the module selected.
TYPES OF PROGRAMMING DATA
Programming data is always one of two types. One type of data is numerical and can use values from 0 -15 or 0 -255
depending on the location's segment. The other type of data is a feature selection type. Feature selection data is used to
turn features on or off. Use the following procedures when working with these two data types:
NUMERICAL DATA
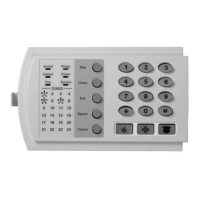
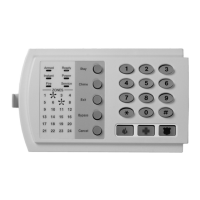
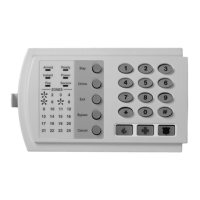
Numerical data is programmed by entering a number from 0-255 on the numeric keys of the system keypad. To view
the data in a location, a binary process is used. With this process, the LED=s for zones 1 throu
h 8 are utilized, and the
numeric equivalents of their illuminated LED=
s are added together to determine the data in a programming location. The
numeric equivalents of these LED=s are as follows:
Zone 1 LED = 1
Zone 2 LED = 2
Zone 3 LED = 4
Zone 4 LED = 8
Zone 5 LED = 16
Zone 6 LED = 32
Zone 7 LED = 64
Zone 8 LED = 128
Example: If the numerical data to be programmed in a location is "66", press [6]-[6] on the keypad. The LED=s for Zone
2 and Zone 7 will become illuminated indicating 66 is in that location (2 + 64 = 66). Once the data is programmed,
press the [r] key to enter the data and advance to the next segment of that location. After the last segment of a
location is programmed, pressing the [r] key will exit that location, turn the "Ready" LED off and the "Armed" LED on. As
before, you are now ready to enter another programming location. If an attempt is made to program a number too large
for a particular segment, the keypad sounder will emit a triple beep, indicating an error, and remain in that segment
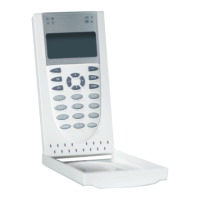
awaiting a valid entry. On the LCD keypad, the number in the location will be displayed. For locations with a maximum
of 15, the hexadecimal equivalent will be displayed in parenthesis. Example: 11 (B) or 14 (E).
 Loading...