– 59 –
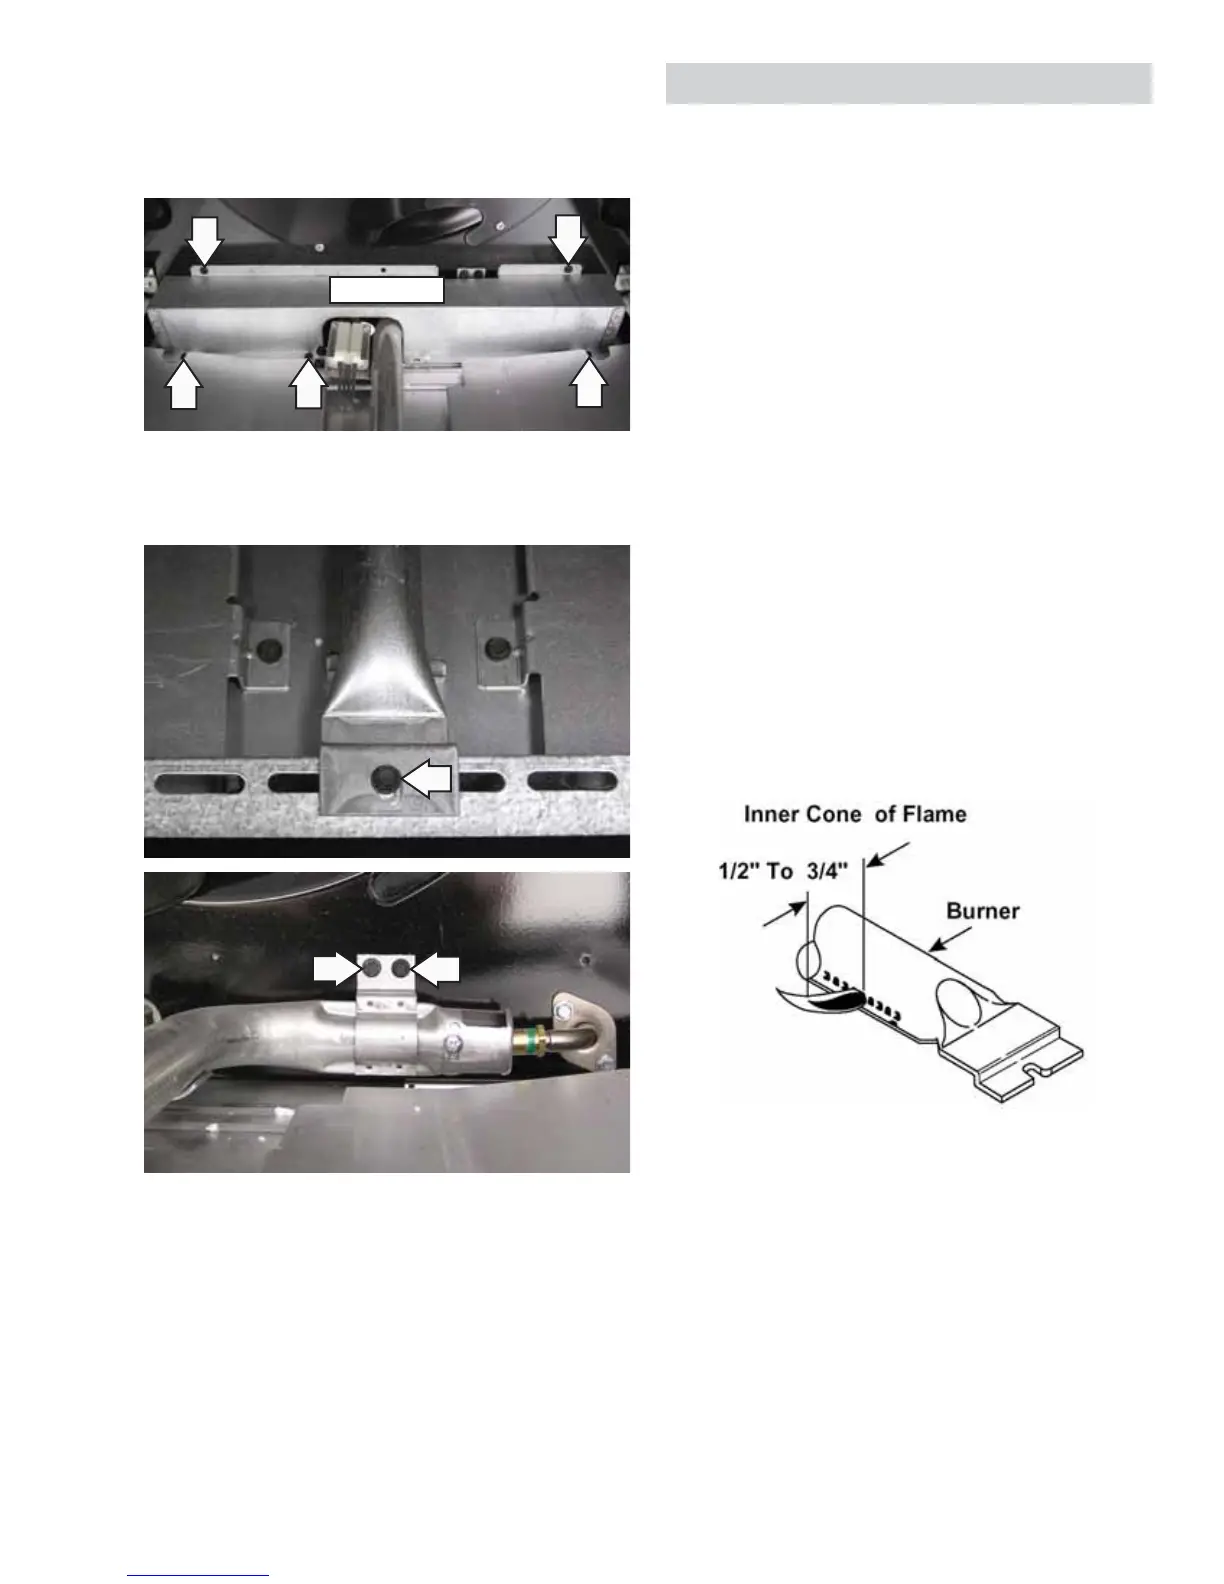
5. Remove the 2 Phillips-head screws from the
top of the metal shield and the three 1/4-in.
hex-head screws from the bottom. Remove the
metal shield from the oven cavity.
6. Remove the three 1/4-in. hex-head screws that
attach the burner to the burner box.
Bake and Broil Burner Flame Adjustments
WARNING: Adjustments require disassembly of the
burner section. To prevent handling hot parts, the
oven should be cool.
Note: A small amount of odor is normal and will be
present when the range is fi rst turned on. If there is
a strong odor, the bake and broil burner assemblies
should be inspected.
Bake and Broil Burner Test
1. Remove the oven door. (See Oven Door Removal.)
2. Remove the oven bottom and fl ame spreader
(burner baffl e). (See Bake Burners and Glow Bar
Igniters, steps 1-5.)
3. Install the oven door.
4. Close the oven door, set the control for BAKE,
and observe the bake burner fl ame.
5. Observe the fl ames for a period of at least 2
minutes. The fl ame should not lift or blow off
the burner during any period of operation. They
should be blue with an approximately 1/2-in. to
3/4-in. (13-mm to 19-mm) inner cone.
6. Set the control for BROIL and repeat step 5.
Note: The door should remain closed during this
test.
(Continued next page)
Metal Shield
7. Remove the bake burner from the range.
 Loading...