- 13 - Hardware Installation
1-3 Installing the APU and APU Cooler
1-3-1 Installing the APU
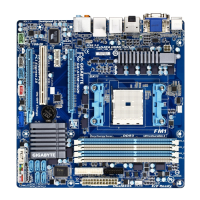
A. Locate the pin one (denoted by a small triangle) of the APU socket and the APU.
Read the following guidelines before you begin to install the APU:
• Make sure that the motherboard supports the APU.
(Go to GIGABYTE's website for the latest APU support list.)
• Always turn off the computer and unplug the power cord from the power outlet before installing
the APU to prevent hardware damage.
• Locate the pin one of the APU. The APU cannot be inserted if oriented incorrectly.
• Apply an even and thin layer of thermal grease on the surface of the APU.
• Do not turn on the computer if the APU cooler is not installed, otherwise overheating and dam-
age of the APU may occur.
• Set the APU host frequency in accordance with the APU specications. It is not recommended
that the system bus frequency be set beyond hardware specications since it does not meet the
standard requirements for the peripherals. If you wish to set the frequency beyond the standard
specications, please do so according to your hardware specications including the APU, graph-
ics card, memory, hard drive, etc.
APU
A Small Triangle Marking
Denotes APU Pin One
FM1 Socket
A Small Triangle Mark
Denotes Pin One of the
Socket

 Loading...
