3-90-00674R20_08/12
There are three different ue pipe stubs available.
1. The unit comes standard with the largest, for use
with 4” stainless steel ex pipe.
2. Part #1-00-674040 is for use with 4” PL vent starter
pipe.
3. Part # 1-00-674039 is for use with 3” PL vent starter
pipe and also for use with 3” aluminum ex duct for
outside air connections.
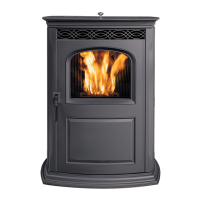
The ue stub assembly base is a round plate which
allows it to swivel to allow the ue pipe to exit the
mounting frame in other positions rather than straight
up. See g. 28.
Fig. 28
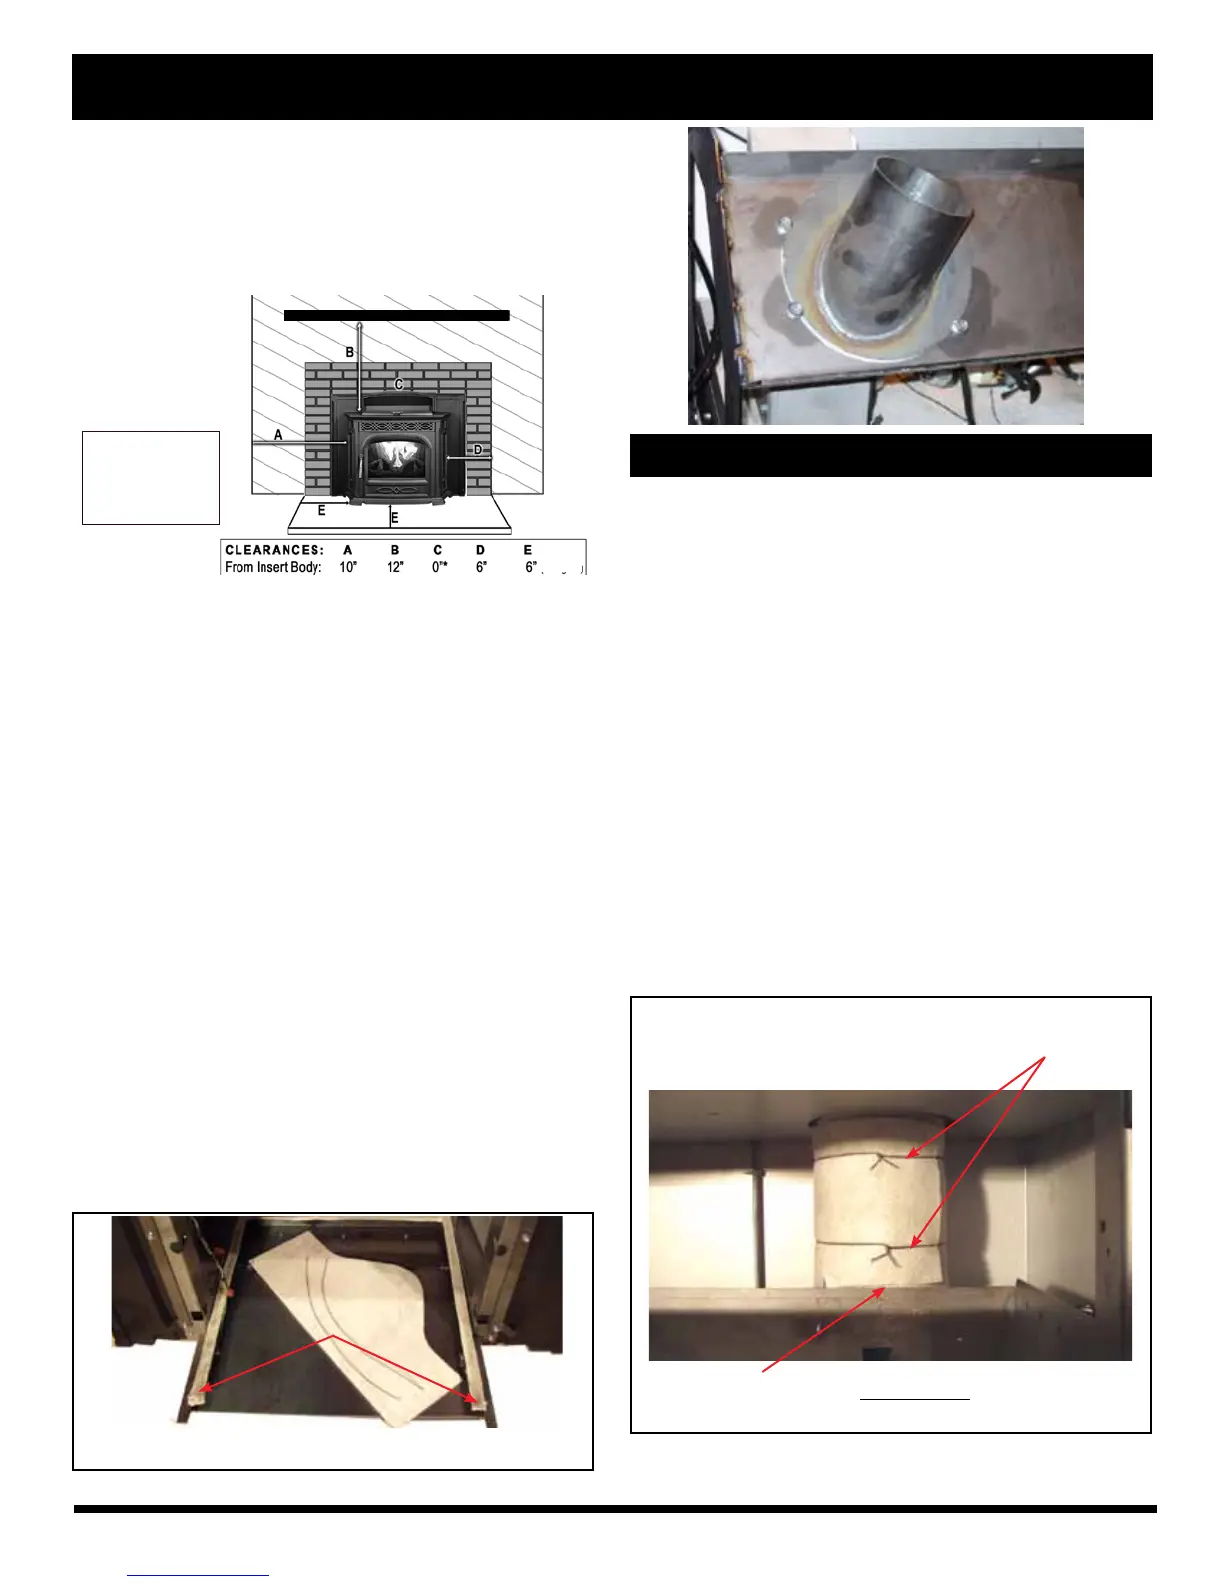
Install the ue pipe insulation wrap. See Fig. 27.
This ceramic insulation is precut to form around the ue
pipe stub, to reduce heat transfer into the area around
the rear of the hopper and motor area.
See Fig. 29.
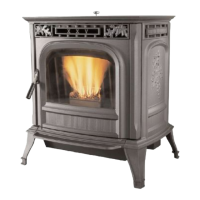
*3/4" trim, zero clearance to cast surround.
(from glass)
A = to sidewall
B = to 12" mantel
C = to 3/4" trim
D = to 3/4" trim
E = oor protection
Fig. 27
Pre-cut ceramic insulation and (2) pieces of tie wire.
With larger ue pipes this bottom edge of the insulation will
need to be trimmed to complete the wrap.
This picture shows the completed insulation
wrapped around the flue pipe from the
mounting frame upward.
Fig. 29
* Floor protection must be used from hearth opening
to 6" (152mm) in front of door glass and 6" (152mm)
to each side of the stove body to protect combustibles
from hot ashes. A minimum size will be 16.5" deep by
30" wide and be made of a non-combustible material
or meet UL approval.
Test t the cast ash lip (See g. 25) on the shell
frame mounting rails. The ash lip should slide on these
side rails without lifting upward off of the rails as the
ash lip is slid inward. A small clearance of about 1/16"
is an ideal space between the legs of the ash lip and
the hearth. This cast ash lip is a decorative part that
does not and should not support any weight.
Tighten the (2) 1/2" threaded rods up against the
lintel of the replace opening. It is also recommended
to use some form of anchoring screws through the
bottom of the shell into the hearth. There are up to 5
holes provided. Note: It is a good idea to check the ash
lip again. The frame may have shifted when the nal
anchoring was completed. See g. 26.
Complete the ue piping, and outside air piping, if
used. Make sure the damper area is sealed.
If a rear exit ue conguration is used, with or
without outside air, make sure the ue pipe termination
clearances are followed as per the manufacturers
recommendations.
 Loading...