• WiringtheProbeCelltotheOmniLogic
• WiringthepHDispensePigtailtotheOmniLogic
• ConguringtheOmniLogic
• ValidatingOperation
• EstablishingMaintenanceSchedule
Materials Needed for Installation
• 7/16”drillbit
• ¼”NPTtap
• TwosmalladjustablewrenchesifsidemountingtoOmniLogic
• 3/16”drillbitifsidemountingtoOmniLogic
• Deburringtoolorleifsidemounting
• Mountinghardwareifsurfacemounting(notsidemounting)
• Flextubingcutter
• Water-tightstrainrelieffordispensepigtail
• Flatheadscrewdriverandmallettoremoveknock-outandinstallstrainrelief
• 120VACGroundFaultCircuitBreaker(GFCB)forpowering120VACdispensepigtailor
240VAC(GFCB)forpowering240VACdispensepigtail
• Extrawire,wirestrippers,andwirenutscouldbehelpfulinsomeinstallations
• Anyitemsthatwouldberequiredforwiringandinstallationperlocalcode
Before carrying out any part of the installation, you MUST power down the OmniLogic panel. If the
pool filter pump is not powered from the OmniLogic, it MUST be powered down separately. This
will relieve pressure in the pool filtration system.
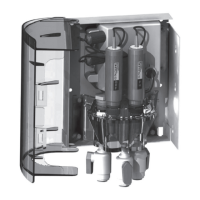
Mounting the Probe Cell
The Probe Cell can be mounted directly on the side of the OmniLogic or mounted up to 15' away
(limited by length of Probe Cell cable). When mounting remotely, take into account the amount of
cable needed to route through the OmniLogic.
The key to successful Probe Cell installation is in the plumbing. A pressure differential is required
to allow clean, untreated water to pass through the cell and across the probes. Consider this when
looking for an ideal mounting location.
Side Mounting: Side mounting the HL-CHEM will require drilling 3 mounting holes through the
"dimples" found on the side of the OmniLogic enclosure. Refer to the diagram and steps below.
OmniLogic power must be shut off before the enclosure can be drilled.
1) Remove door and front panel.
2) Usea3/16"dia.drillbitanddrillthroughthethree"dimples"onthesideoftheenclosure.
Take care that any wires behind the enclosure wall are clear and will not be damaged by the
drill bit.
3) After the holes are drilled, grind or file down any burrs and brush away any metal chips.
4) Route Probe Cell cable through access hole at bottom of Probe Cell mounting bracket.
5) Use the included stainless steel hardware to fasten the HL-CHEM to the OmniLogic as shown
on the top of the following page.
3
USE ONLY HAYWARD GENUINE REPLACEMENT PARTS
 Loading...