User Manual of E Series Network Mini PTZ camera
© Hikvision
6. Click OK button to start activation.
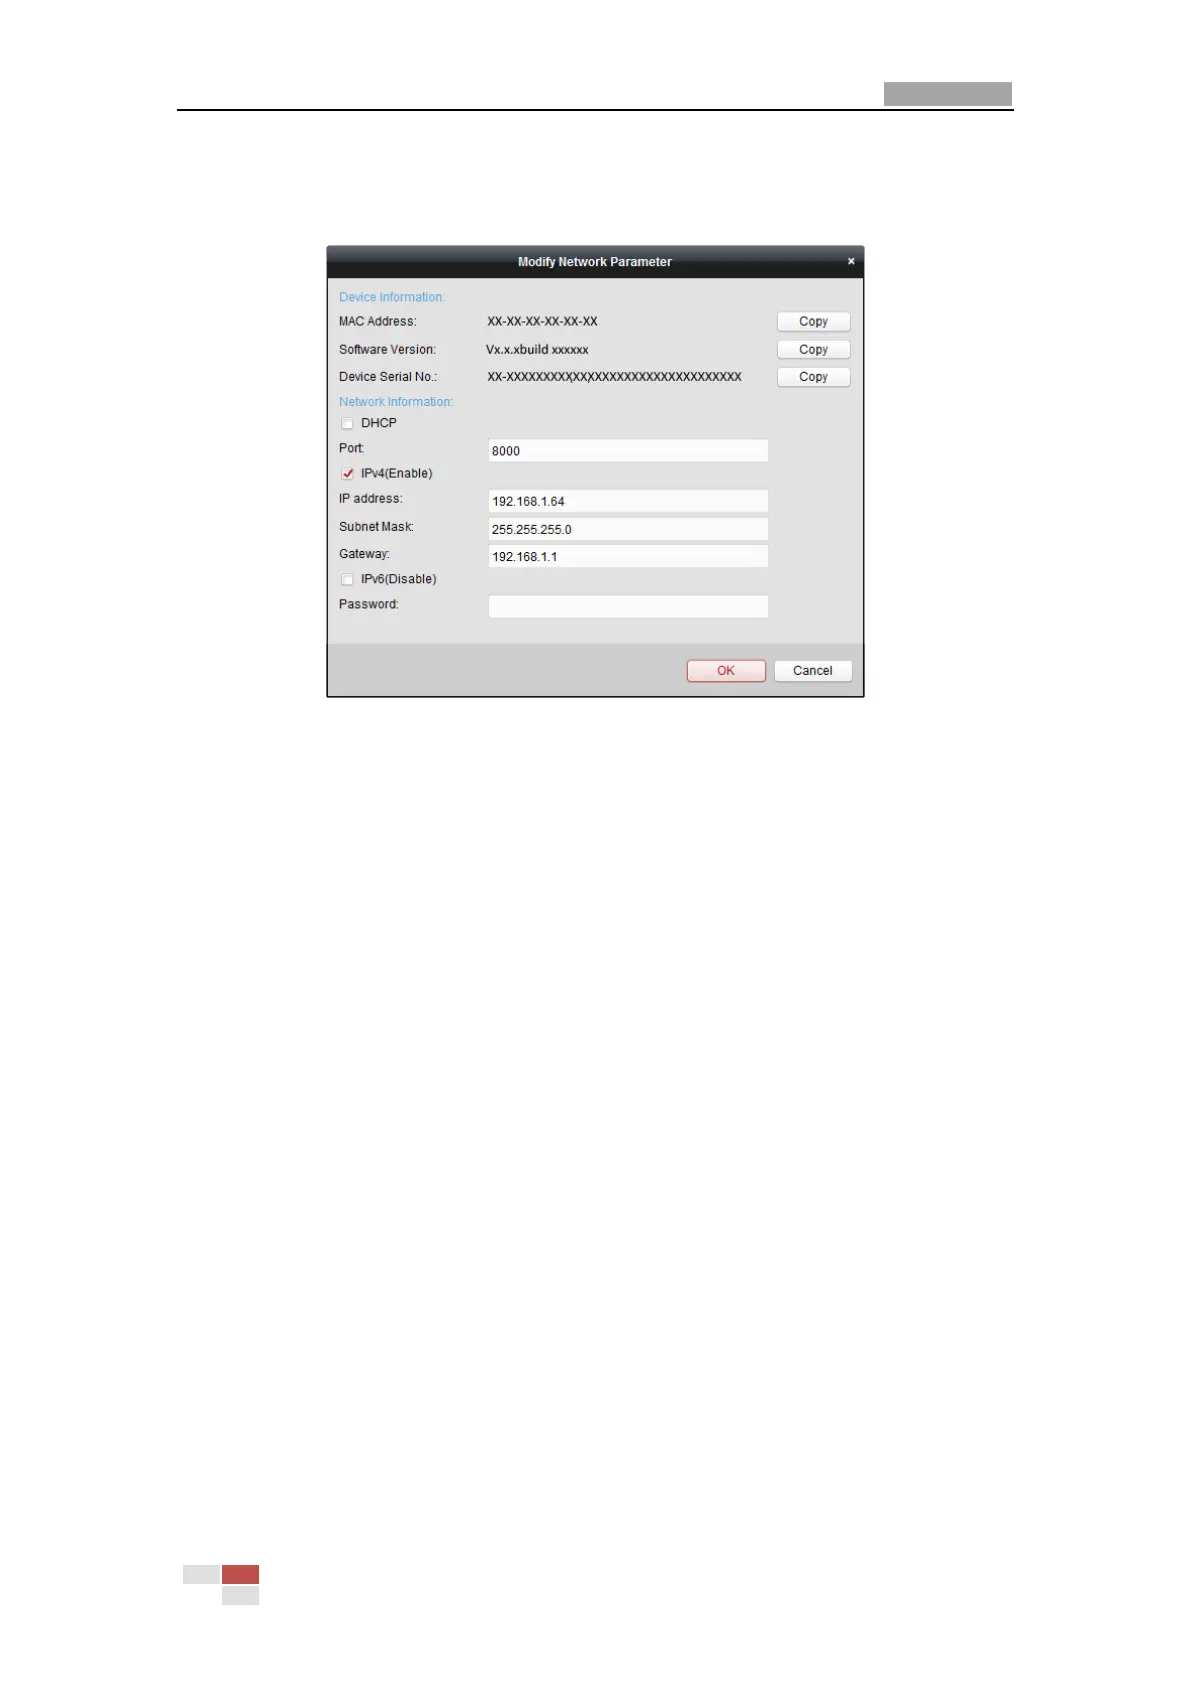
7. Click the Modify Netinfo button to pop up the Network Parameter Modification interface, as
shown in the figure below.
Figure 2-9 Modifying the Network Parameters
8. Change the device IP address to the same subnet with your computer by either modifying
the IP address manually or checking the checkbox of Enable DHCP.
9. Input the password to activate your IP address modification.
2.2 Setting the Network Mini PTZ camera over the
WAN
Purpose:
This section explains how to connect the network mini PTZ camera to the WAN with a static IP or
a dynamic IP.
2.2.1 Static IP Connection
Before you start:
Please apply a static IP from an ISP (Internet Service Provider). With the static IP address, you can
connect the network mini PTZ camera via a router or connect it to the WAN directly.
Connecting the network mini PTZ camera via a router
Steps:
1. Connect the network mini PTZ camera to the router.
2. Assign a LAN IP address, the subnet mask and the gateway. Refer to Section 2.1.2 for detailed
IP address configuration of the mini PTZ camera.
3. Save the static IP in the router.
 Loading...