HYDRAULIC BRAKE
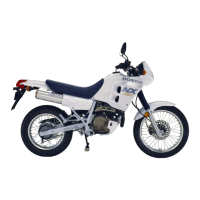
Place the front brake master cylinder on the handlebar and in-
stall the holder with the "UP" mark facing up.
Align the end of the master cylinder with the punch mark on
the handlebar, and tighten the upper bolt first, then tighten the
lower bolt.
Install the brake hose joint with new sealing washer to the
master cylinder, then tighten the joint nut (master cylinder
side).
TORQUE: 35
N-m
(3.5
kg-m,
25
ft-lb)
Connect the brake hose to the brake hose joint and tighten the
joint nut (brake hose side) holding the end of the brake hose.
TORQUE:
14
N-m
(1.4
kg-m,
10
ft-lb)
Connect the brake light switch wires to the switch.
Fill and bleed the hydraulic system (page 14-3).
(1)
JOINT NUT
(2)
UP MARK
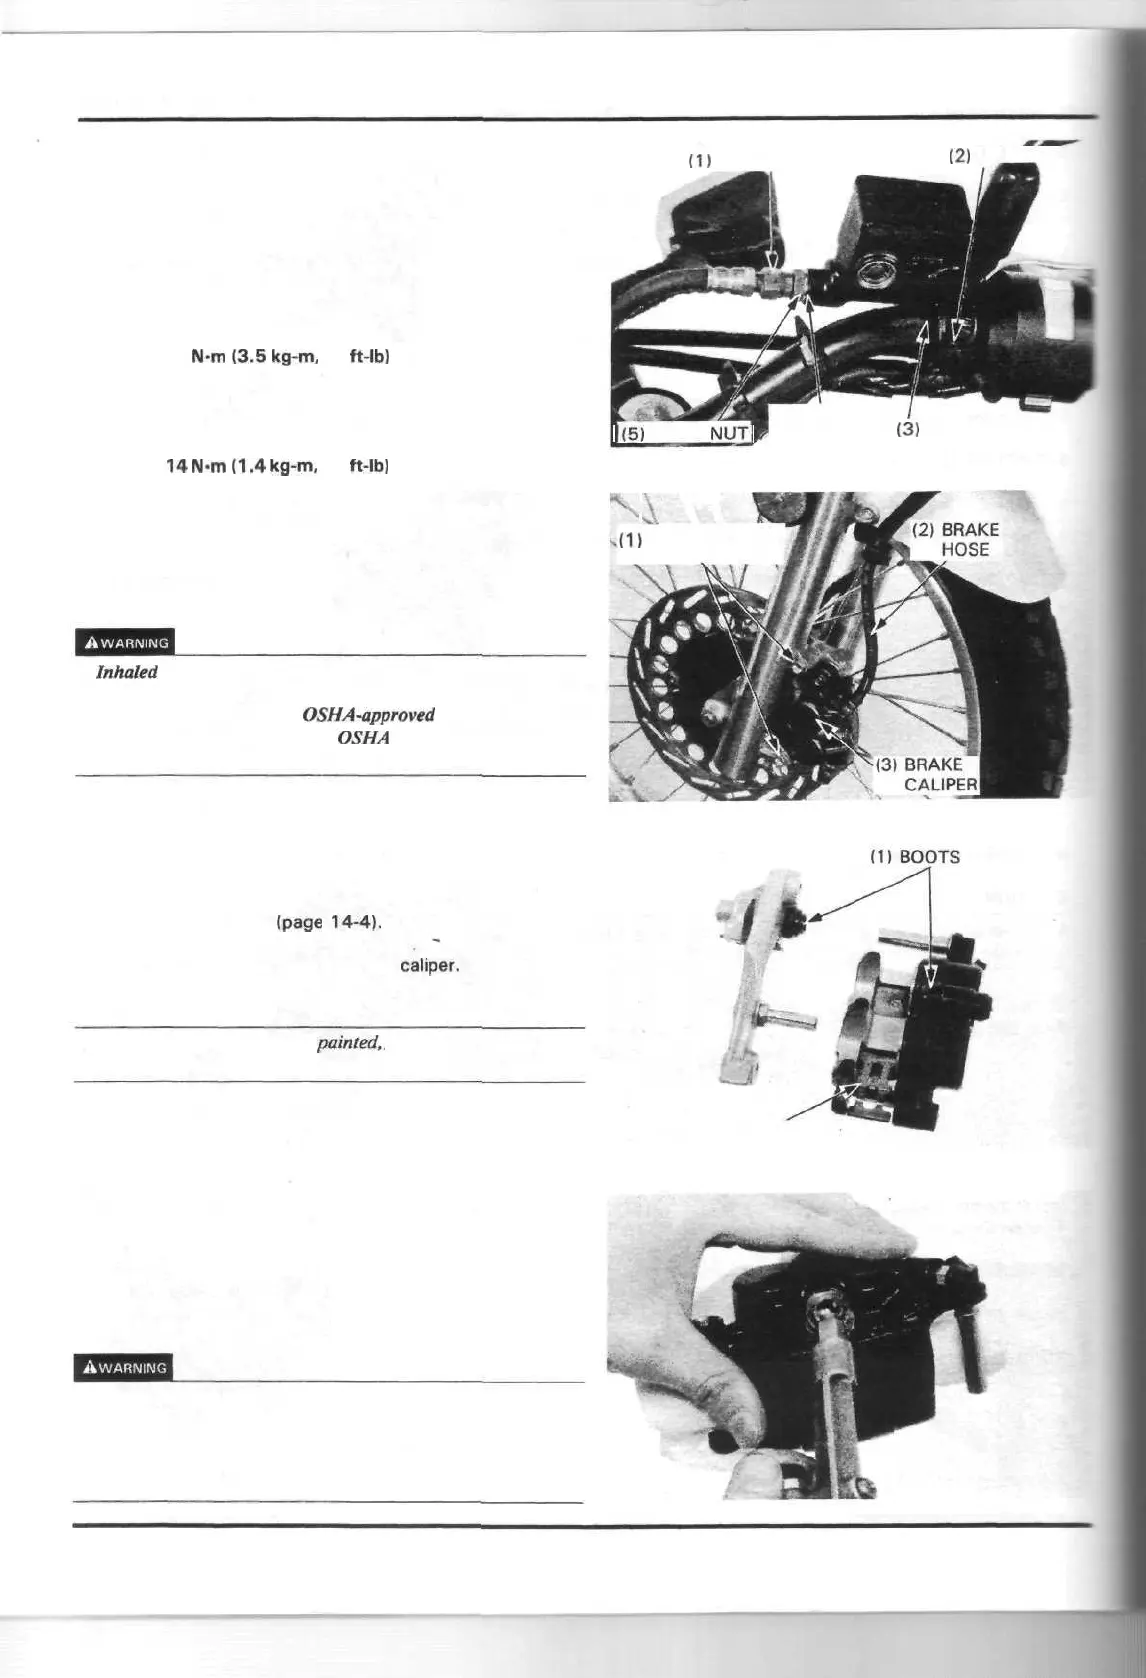
BRAKE CALIPER
•
Inhaled
asbestos fibers have been found to cause respiratory
disease and cancer. Never use an air hose or dry brush to clean
brake assemblies. Use an
OSHA-approved
vacuum cleaner or
alternate method approved by
OSHA
designed to minimize the
hazard caused by airborne asbestos fibers.
DISASSEMBLY
Drain the brake fluid from the front brake hydraulic system
(page 14-3).
Remove the brake pads
(page
14-4).
Remove the front brake hose from the
caliper.
CAUTION
• Avoid spilling brake fluid on
painted,,
plastic or rubber parts.
Place a rag over these parts whenever the system is serviced.
Remove the caliper mounting bolts and caliper.
Remove the following:
— bracket
— pivot boot
— pad srping
Check the pivot boots for wear or damage and replace them if
necessary.
Position the caliper with the pistons down and apply small
squirts of air pressure to the fluid inlet to remove the pistons.
• Do not use high pressure air or bring the nozzle too close to the
inlet.
• Place a shop towel over the pistons to prevent them from be-
coming projectiles.
• Use adequate eye protection.
(4) SEALING
1(5)
JOINT
NUTJ
WASHER
(3)
PUNCH MARK
i
w
(11
CALIPER
MOUNT BOLTS
(2) PAD SPRING
14-8
 Loading...