12.
Reconnect the power cord and any external devices, then turn on the computer.
13.
Lock any security devices that were disengaged when the access panel was removed.
14.
Reconfigure the computer, if necessary. Refer to the Computer Setup (F10) Utility Guide for
instructions on using Computer Setup.
System Fan
The front fan assembly is attached to the front of the chassis.
1.
Prepare the computer for disassembly (
Preparation for Disassembly on page 87).
2.
Remove the access panel (
Access Panel on page 88).
3.
Remove the front bezel (
Front Bezel on page 89).
4.
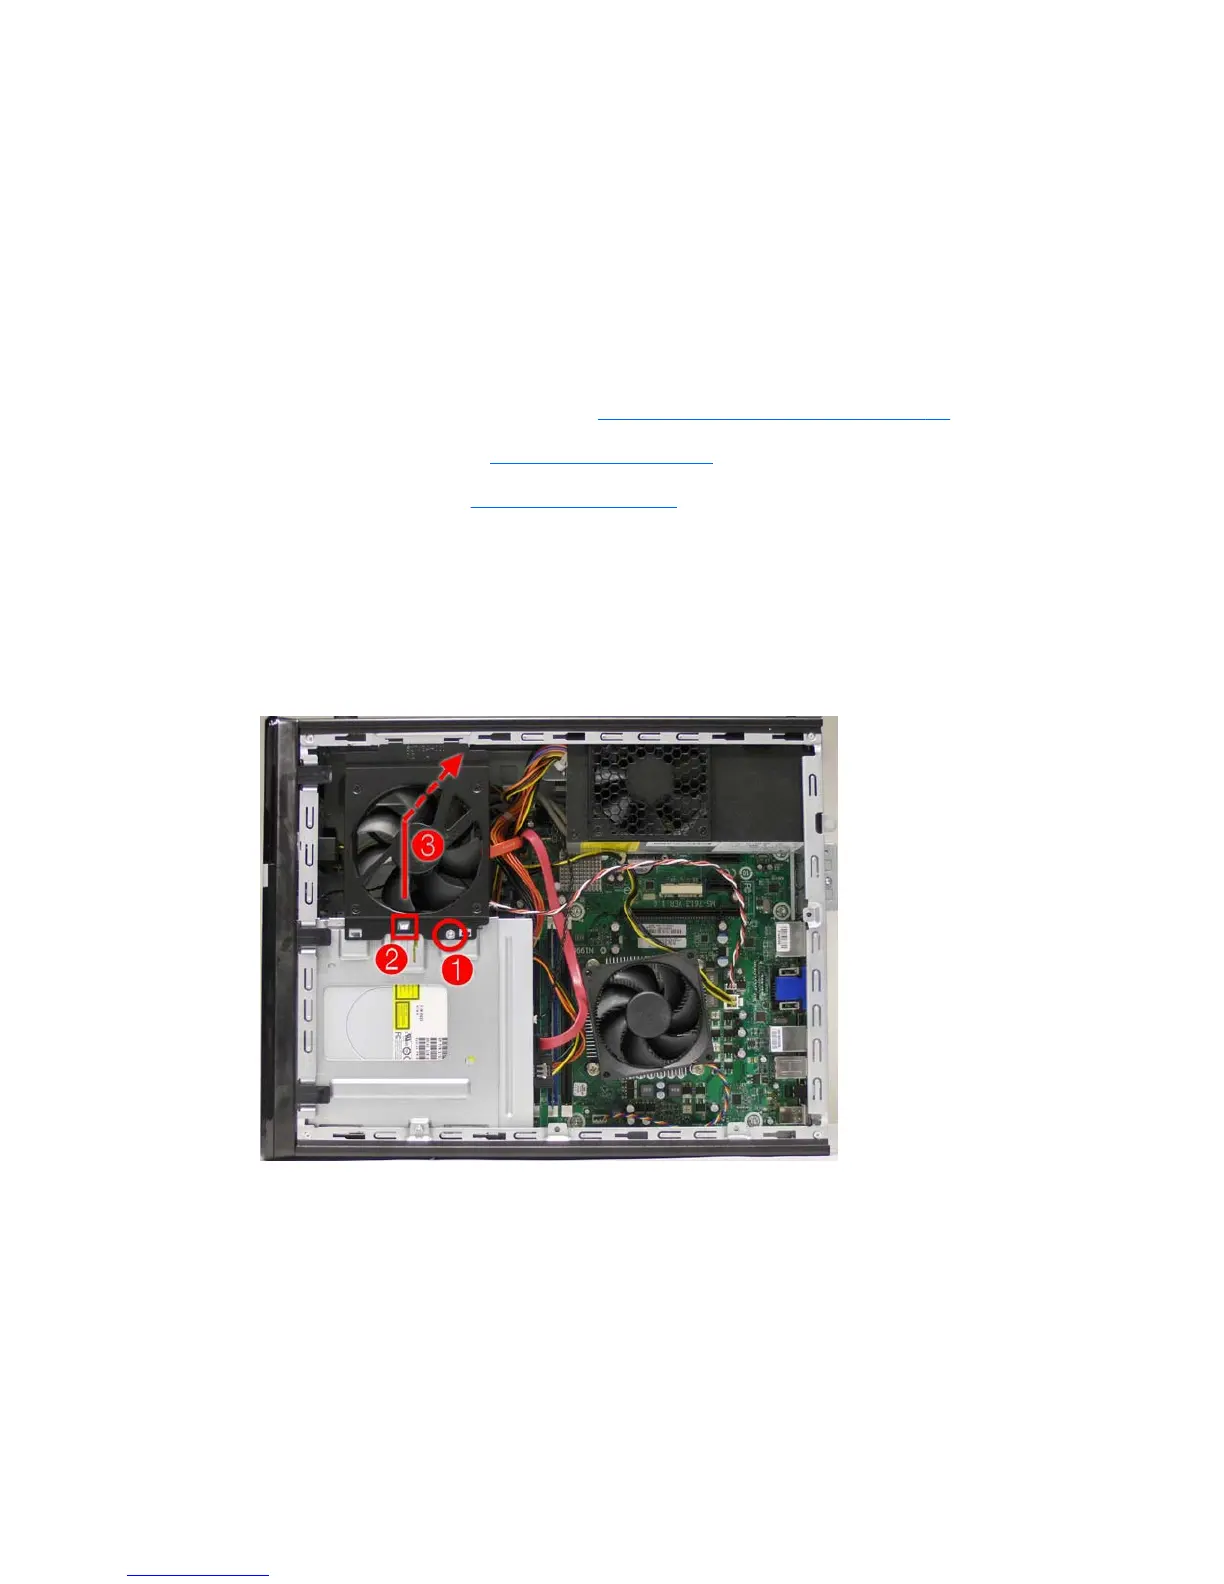
Disconnect the fan cable from the red/brown system board connector.
5. Remove the Torx screw that secures the fan to the computer (1).
6. While pressing the tab (2), slide the fan away from the optical drive and then lift it out of the
chassis (3).
Figure 6-16 Removing the system fan
To install the system fan, reverse the removal procedure.
System Fan
103
 Loading...