48 Husqvarna service manual 104 72 30-26
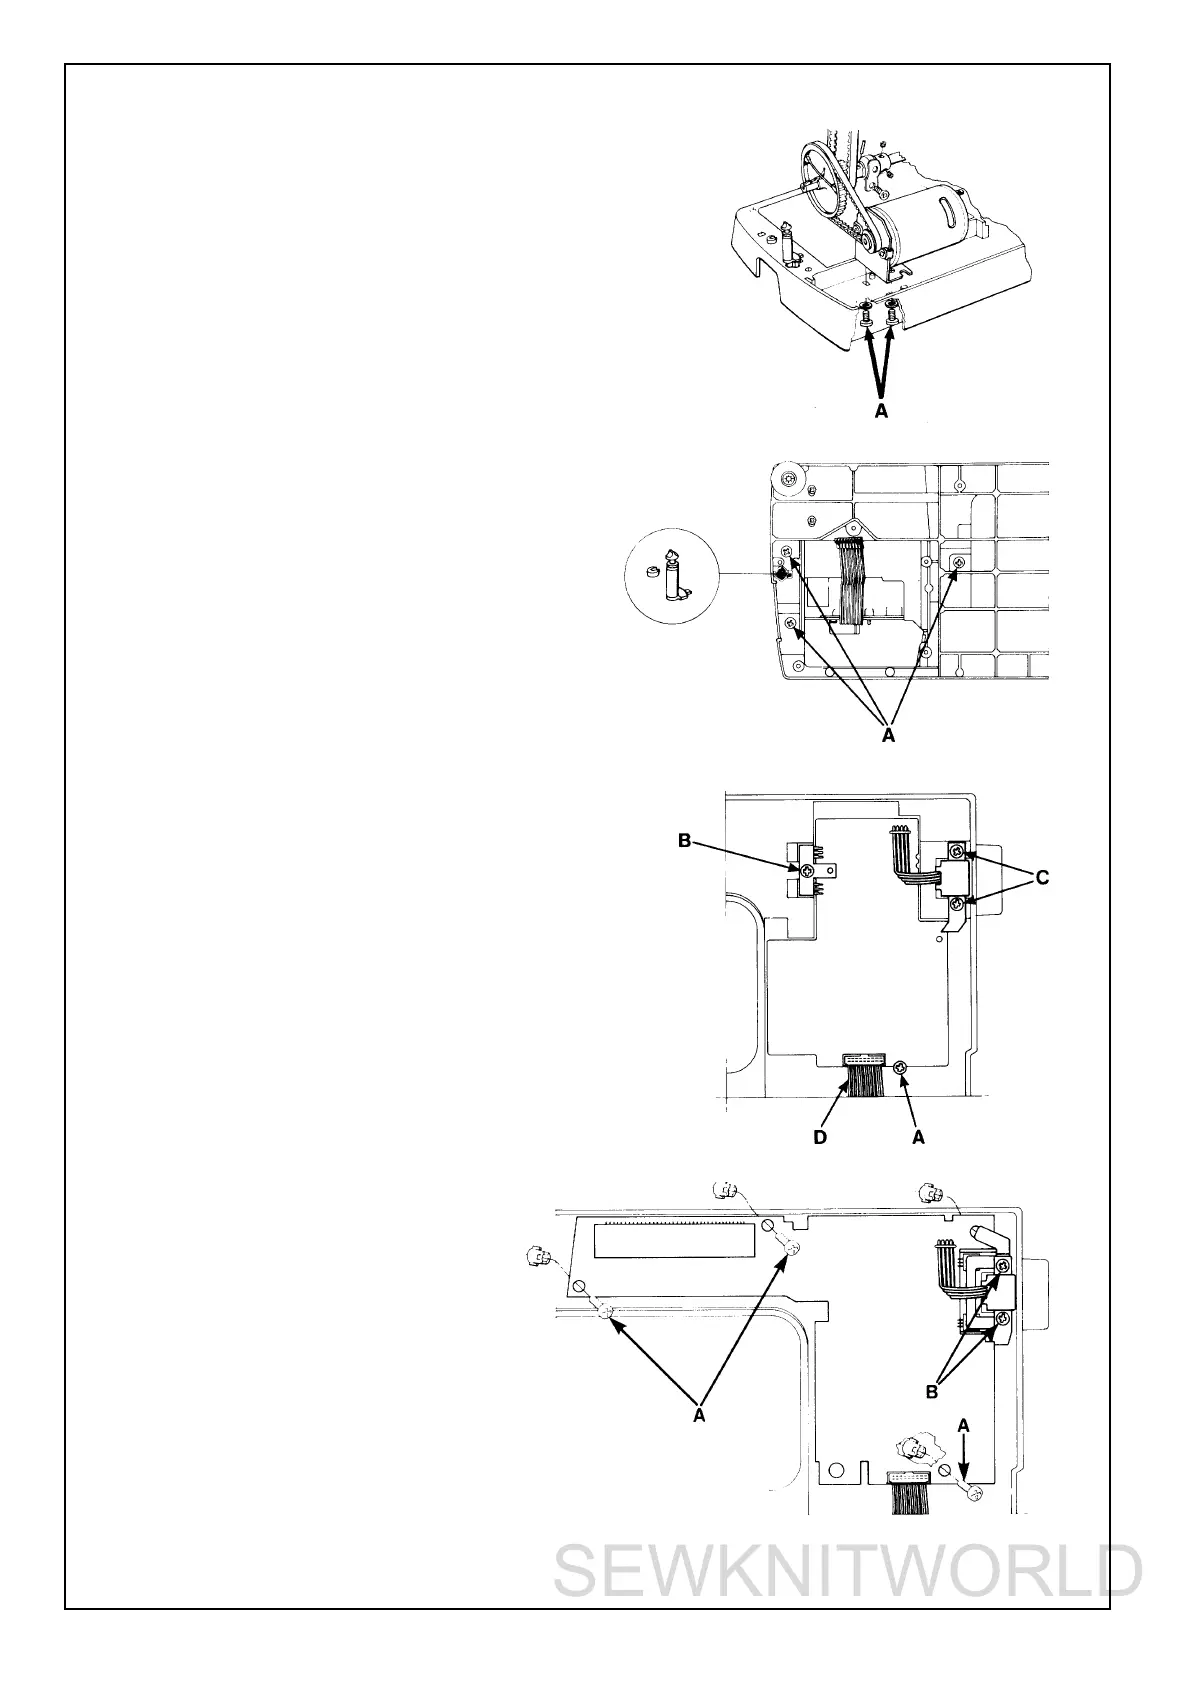
Main motor
Loosen the motor cable from the circuit board.
Loosen the screws (A) which secure the attachment for
motor to the base plate.
NOTE!
The cables are connected according to the wiring
diagram (P.13). The motor can be checked without
being mounted into the machine. Belt tension (P.12).
Bobbin-stop
Remove the transformer (P.47).
Remove the 3 screws (A) which secure the base
plate to the arm. Thereafter the bobbin-stop can
be pushed downward. Setting (P.35).
Circuit board 1100/1200
Dismounting
Remove the rear cover (P.44).
Remove the front cover (P.44).
Loosen all cables rearwisen from the circuit board.
Loosen screw (A) at the lower edge, the screw (B)
holding the plate for the transistors and the screw (C)
holding the arm shaft transmitter.
Loosen the cable (D) for the transformer from the board.
Wiring instruction (P.13).
Circuit board 1050/1070/1090
Dismounting
Remove the rear cover (P. 44).
Remove the front cover (P. 44).
Loosen all cables rearwisen from the
circuit board. Loosen screws (A) and the
screws (B) holding the plate of the arm
shaft transmitter. Loosen the cable (D)
for the transformer from the board.
Wiring instruction (P. 13).
 Loading...