17
The needle bar frame
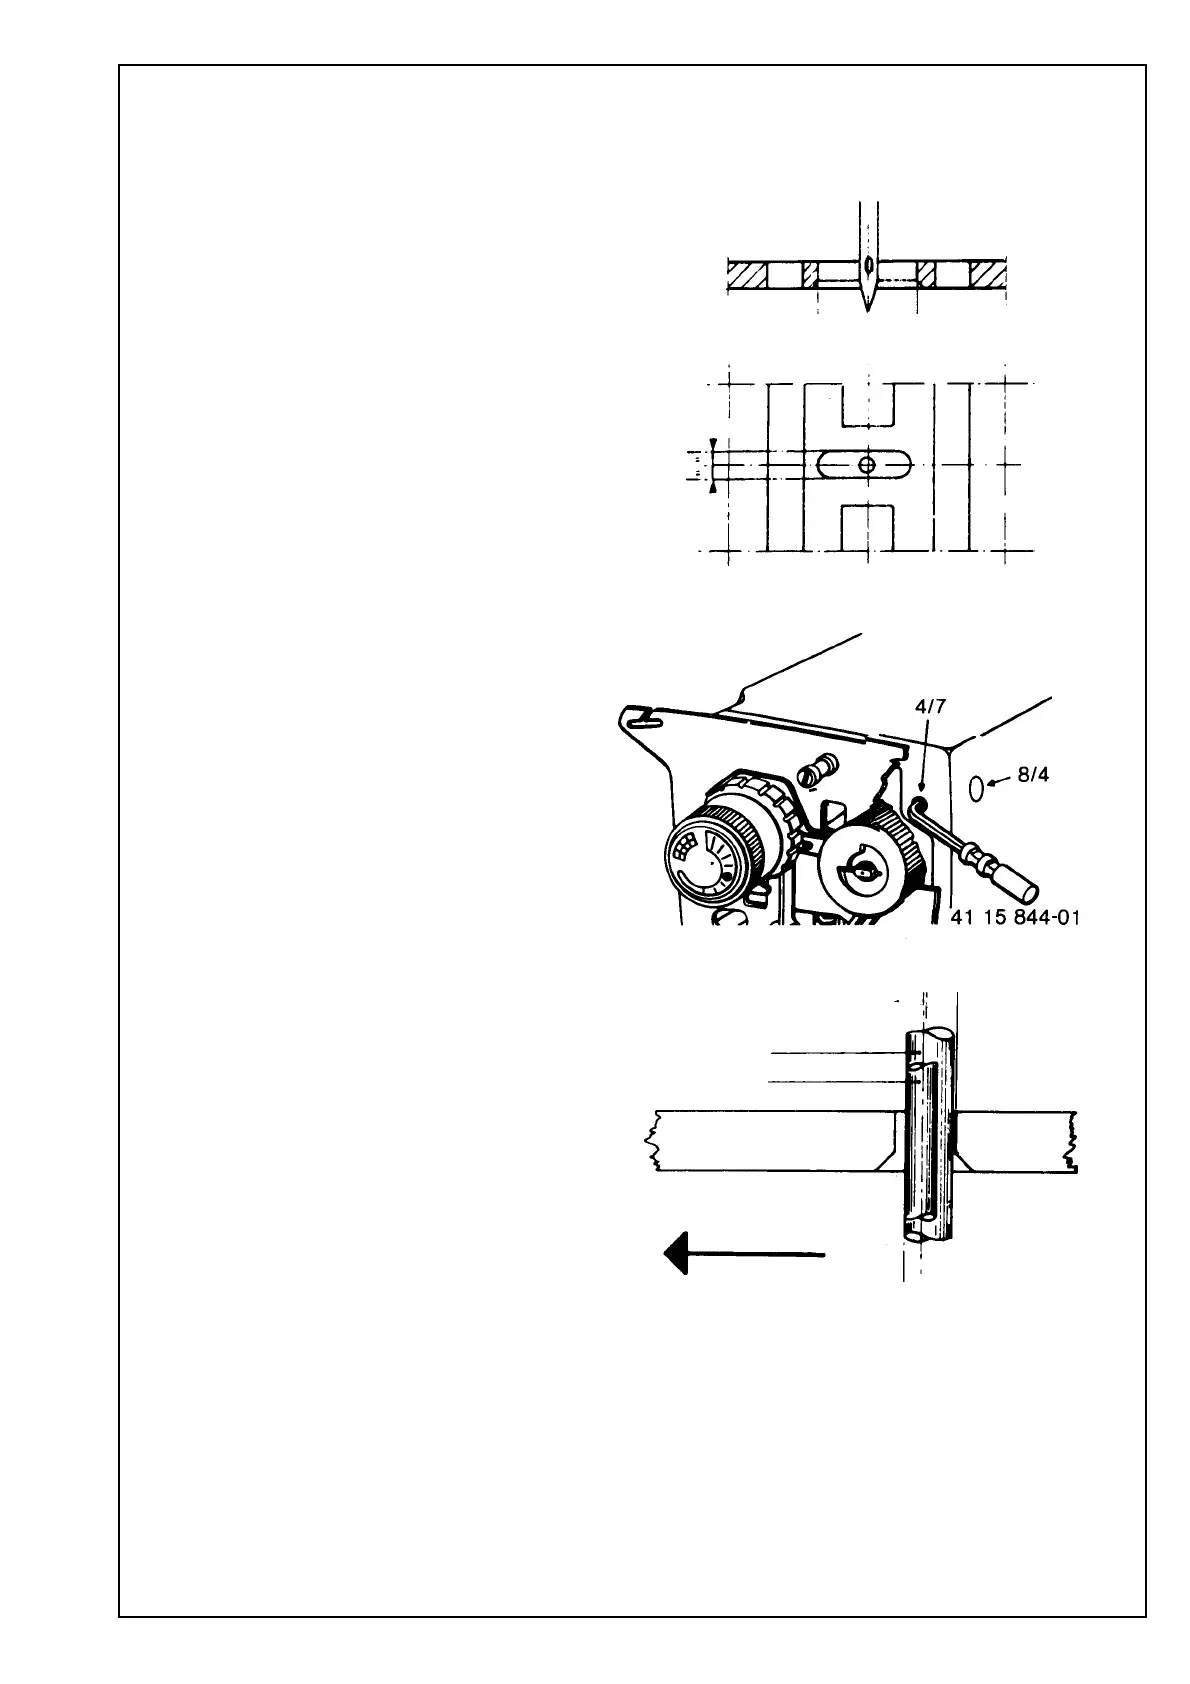
Setting the needle in the feeding direction.
Requirements
The needle should be centred in relation to the
needle hole in the stitch plate.
Adjustment
Connect the machine and turn on the main switch,
Turn the handwheel until the needle is at the same
level as the stitch plate. Remove the cassette and
unscrew the screw (4/43) which holds the front
panel in place. Press the front panel forwards and
remove it. Insert the special screwdriver (Adam key)
411 5844-01 into the opening for the thread take-up
lever and loosen the stop screw (4/7) The shaft (8/4)
which supports the needle bar frame can then be
shifted front to rear until the required needle position
is obtained. Retighten the shaft with the set screw (4/7).
Comment 1
The shaft is eccentric and if turned, it affects
the needle position at right angles to the
feeding direction.
Comment 2
The distance between the centre of the needle
and the shank varies with the size of the needle.
In order that needle 120 will not contact the front
edge of the needle slot, set the needle bar in
such a way that needle (90) is in the middle of
the needle slot. Needle (80) will then be slightly
behind the centre of the needle hole.
Needle 120
Needle 80
Stitch plate
Feeding direction
 Loading...