36
The movement of the needle
bar frame (zig-zag movement)
Pre-setting of the step motor.
Do not mount the step motor but connect the flat
cable from the front panel, the transformer and the
step motor to the circuit in the rear cover. Note that
the wire of the step motor is connected to the upper
outlet on the printed circuit.
Connect the machine and turn on the main switch.
Replace the handwheel but note that the thread
take-up lever shall be at the lowest position. Press
the button for changing the stitch width, causing the
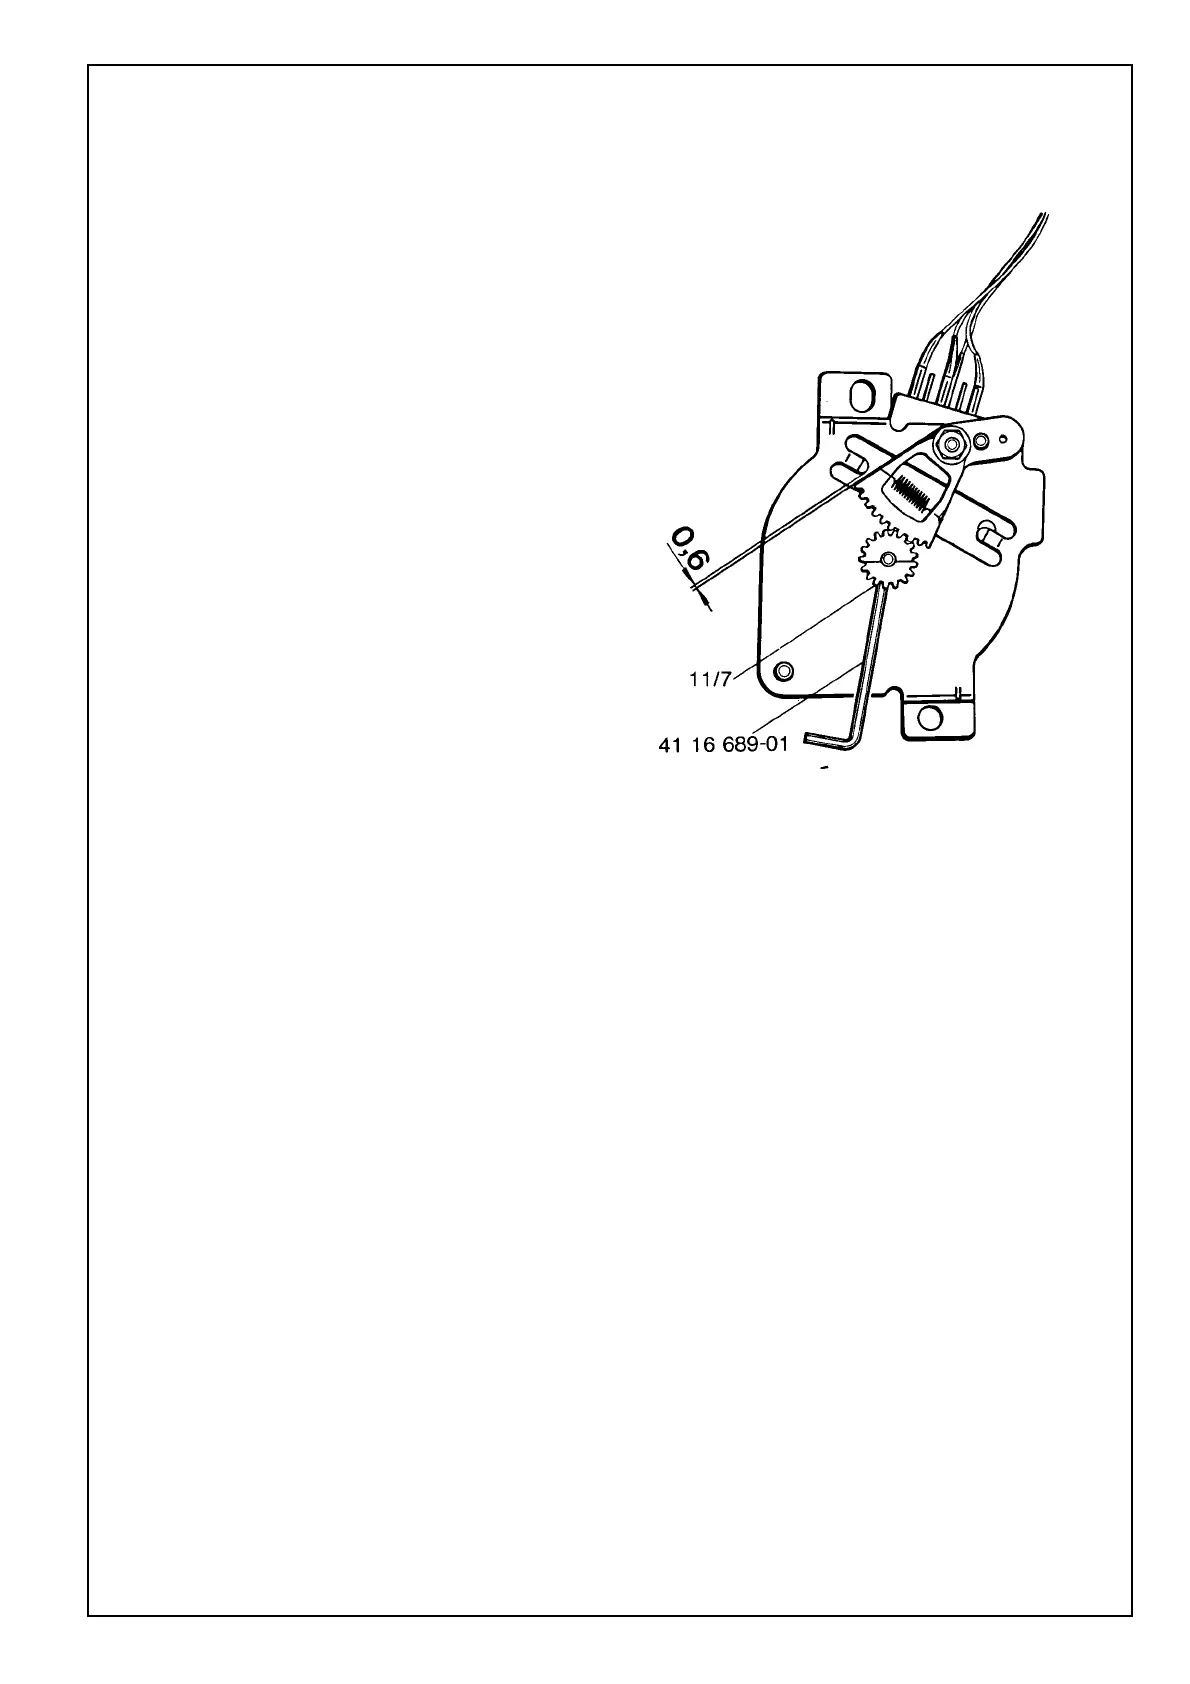
upper light to light up. Hold the drive side of the step
motor towards you and insert a 0.6 mm feeler gauge
at the left projection of the segment and press the
segment against the projection. Turn the handwheel
2-3 revolutions and stop with the needle in the upper
position. The step motor will find its electrical starting
point, i.e. the needle is in the left zig-zag position.
Retain slight axial play in the cogwheel and well
tighten the set screw (11/7) in the driving gear, but do
not overdo it. Press the mirroring button. The
segment will go over to the right-hand position (the
right-hand zigzag position of the needle). Check that
the segment is not touching the projection on any side.
Slow the shaft of the step motor down with your thumb
and repeatedly turn the main switch on and off. Check
that the step motor occupies a stable middle position.
 Loading...