39
Guiding the feeding movement
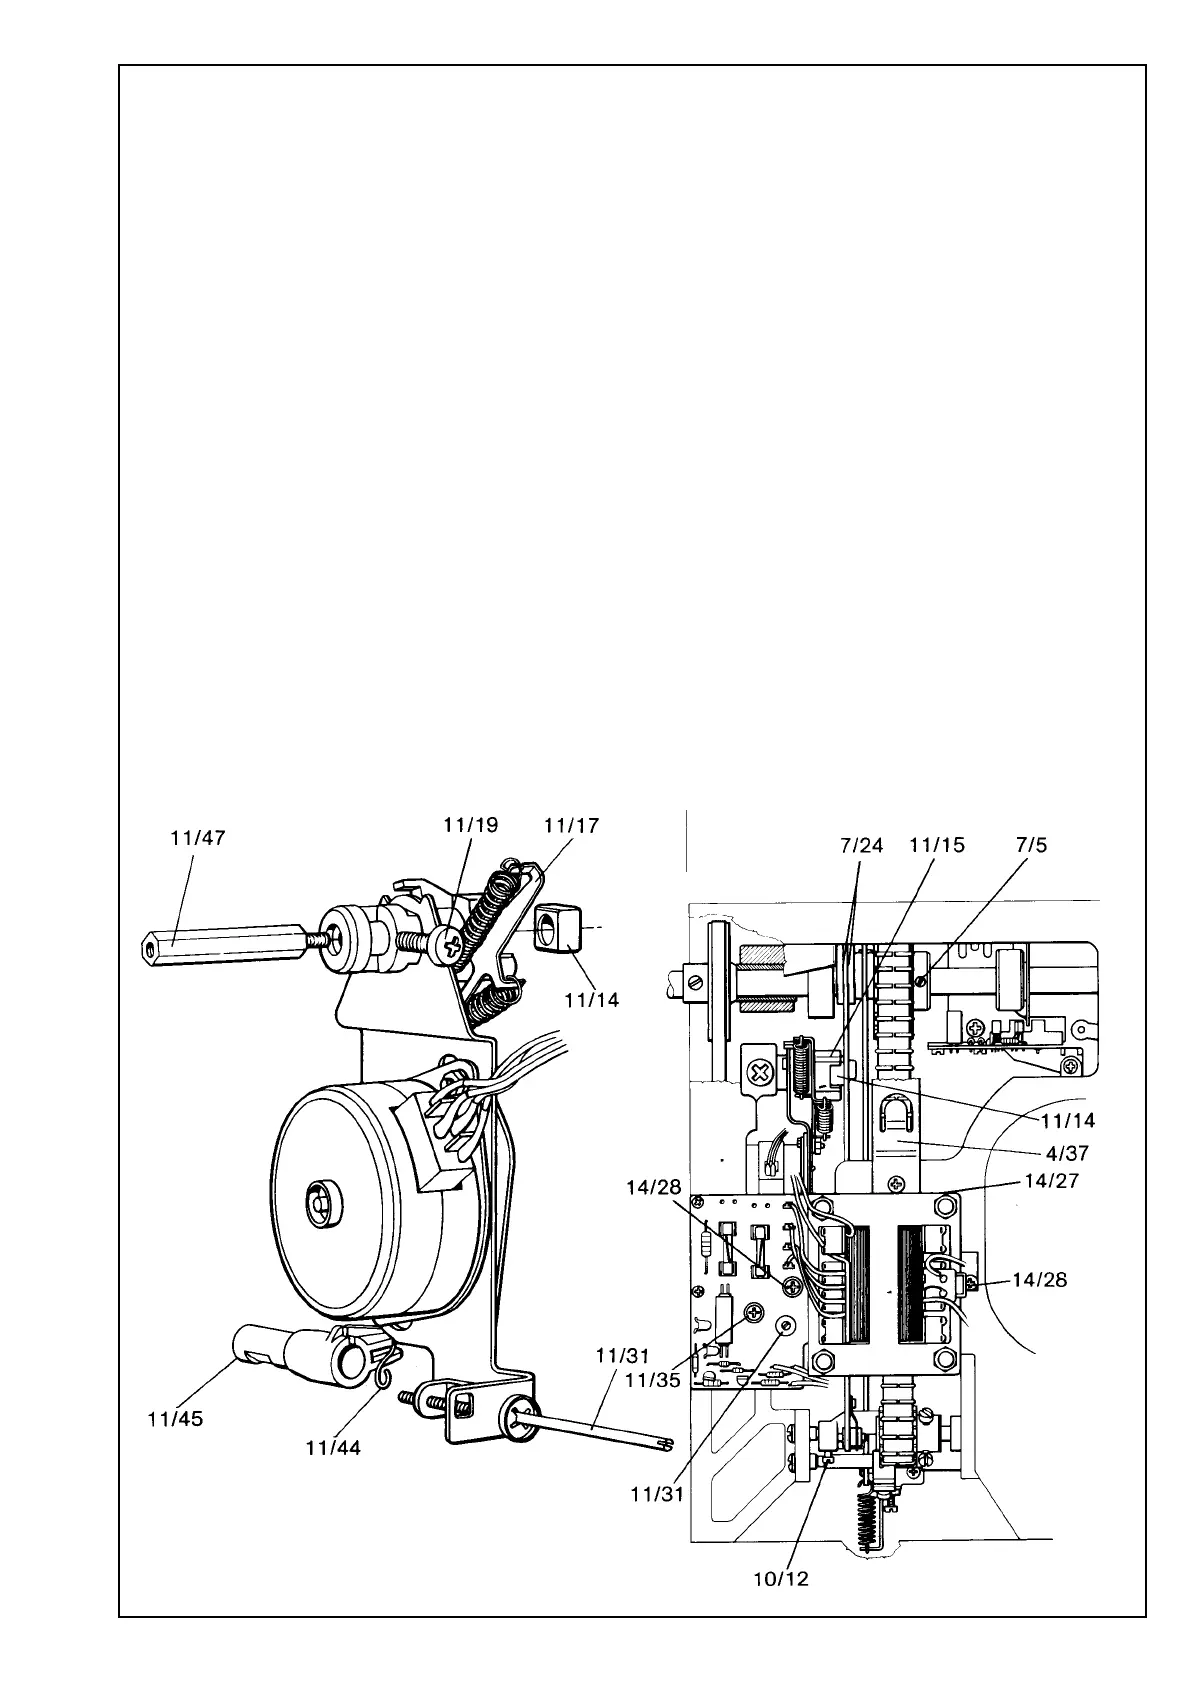
Dismounting the step motor
Remove the handwheel. Remove the rearcover and the belt guard, loosen the stop-right
circuit (4/35) and fold it to one side. Remove the cable holder (4/37). Unscrew the hexagon
support (11/47) in the shaft (11/20) for the guide (11/15). Loosen the screw (7/5) in the chain
wheel (7/6) and push it towards the arm shaft circuit. The plate on the shaft determines the
position but it may be necessary to unscrew the screw, to enable the chain wheel to be
pushed outside the plate. When doing so, see that the chain wheel is not turned and fix it on
the shaft in such a position that it is easy to see which screw shall be against the plate.
Loosen the spring for the fork. Loosen the screw (10/12) in the rocker bar for the shaft stud of
the fork. Keep the block (11/14) in place and push the stud out. Turn the handwheel until the
screw (7/8) in the feeding eccentric (7/9) is accessible and loosen the screw. Keep the block
(11/14) in place and push the fork (7/24) to the right against the chain wheel. If the block is
allowed to come out with the fork, it may be more difficult to take it out of the quide. Unscrew
the two screws (14/28) which hold the fastening plate of the transformer against the arm
(Note, the long screw) and fold the transformer to the side. Remove the screw (11/35), which
is located under the transformer, and which holds the fastening plate of the mechanism in
position. Push the spring (11/44) for the feed dog lowering button (11/45) out of the score in
the button. Loosen the screw (11/19) which holds the bushing to the guide shaft. Remove the
block (11/14) from the guide (11/15) and push the step motor together with the guide
mechanism to the right. Grip the fastening plate at the long adjustment screw (11/31), but not
in the lever arm (11/17) of the cog segment, and remove the mechanism.
Note that the lower part of the fastening plate can pass through the lower outlet and draw the
upper part of the mechanism towards you.
 Loading...