26
The presser bar,
tangential setting
Requirements
The presser bar should be set in such away that
the needle hole in the presser foot coincides
with the needle hole in the stitch plate.
Adjustment
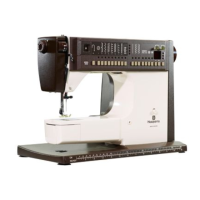
The gauge 411 3161-01 for adjustment of the
presser bar should be placed on the stitch plate.
Drop the feed dog. The presser bar lever should
be lowered and the screw in the presser bar guide
(6/39) loosened. Fit the presser foot into the groove
of the gauge and position the edge of the gauge
parallel with a marking line, according to the sketch.
Check that the underside of the presser bar guide
touches the presser bar level. The screw (6/39)
should then be tightened.
Comments
On the underside of the buttonhole foot
there is a guide, which steers the fabric.
If the position of the presser bar is not
correct in relation to the needle, the
distance between the columns will be affected.
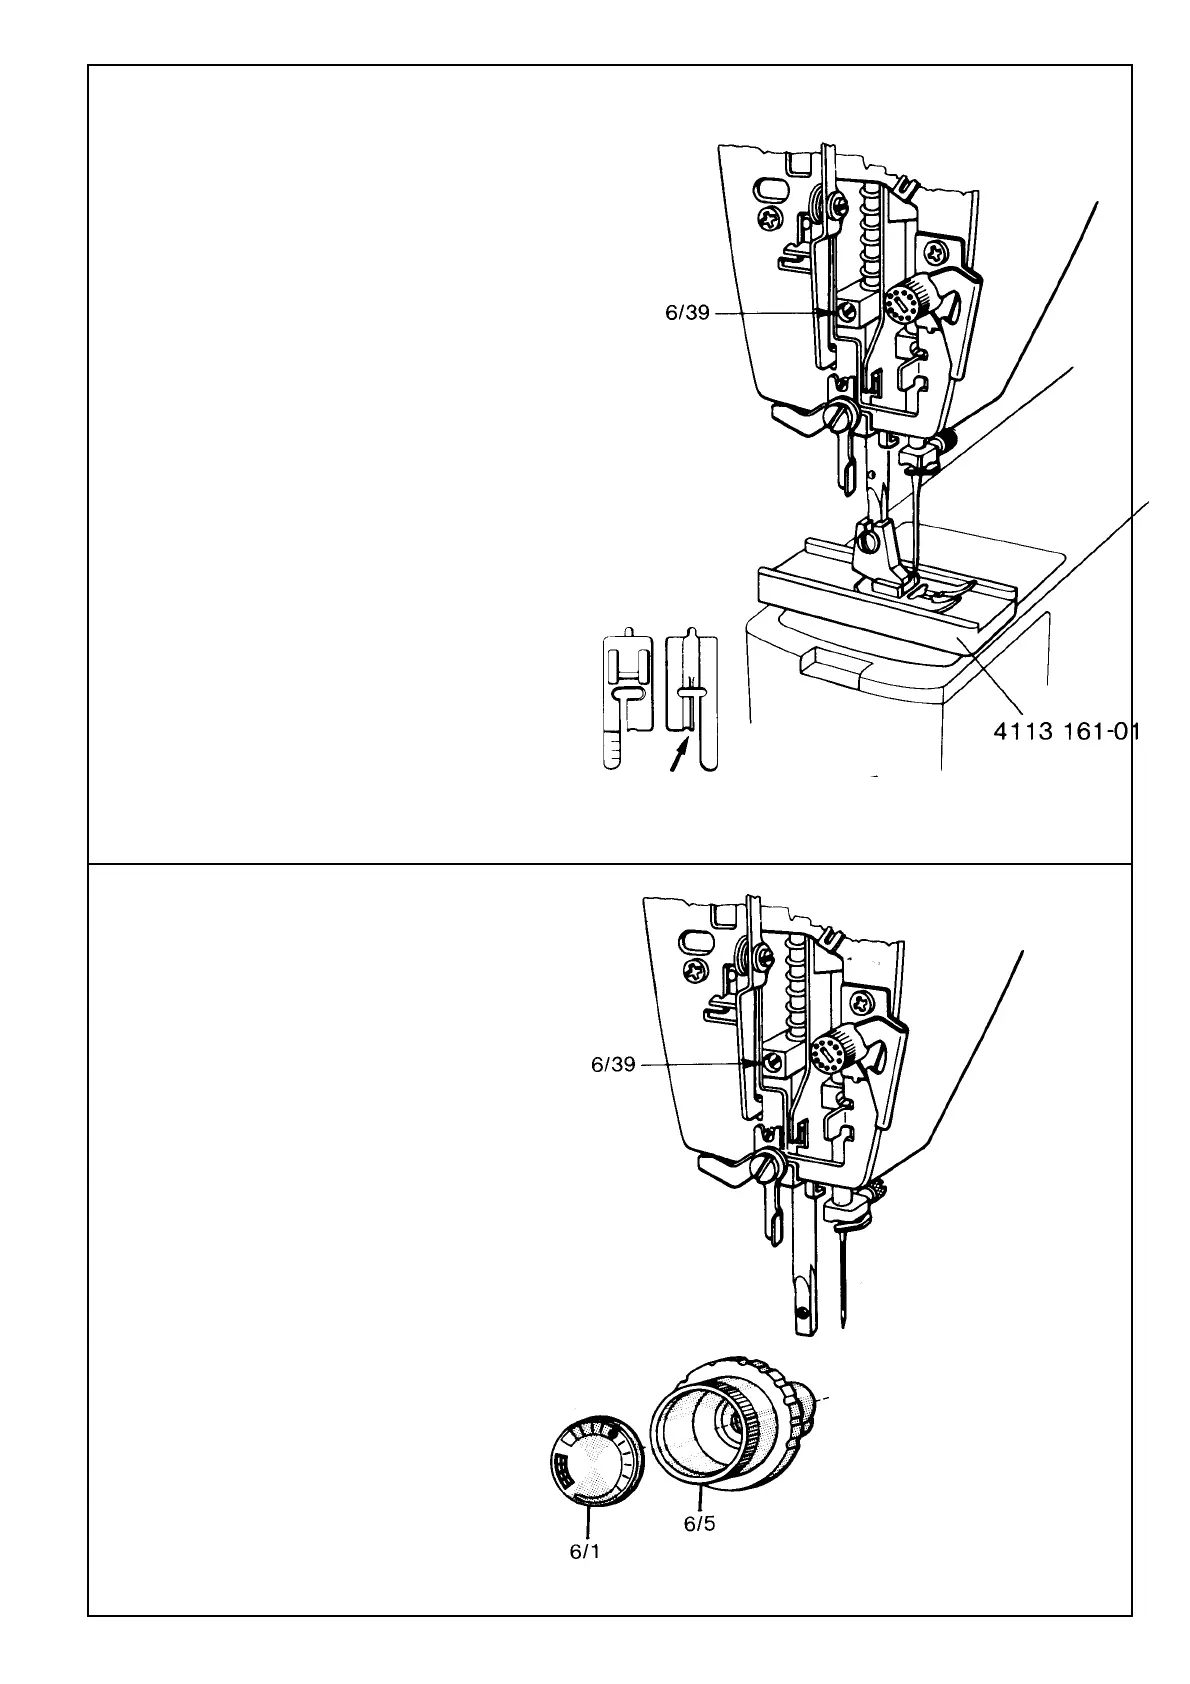
Pressure foot pressure
Requirements
The pressure between the presser foot and the
stitch plate should be sufficient to hold the fabric
in place.
Adjustment
Set the presser bar knob at red and drop the presser
bar. Check that there is no seizing, by lifting the
presser bar with the sole holder. If the required
pressure cannot be achieved by the presser bar
spring, this can be altered by changing the position
of the red dot on the knob cover. This cover (6/1) can
be removed by inserting a sharp tool under the edge
and gently pulling it outwards. Set the required presser
bar pressure and replace the cover, ensuring that
the red dot is in front of the white mark on the
face plate.
Comments
How the fabric is held between the
presser foot and the stitch plate plays an
important role in the stitching.
Spare parts: See RA, page 6.
 Loading...