4
2
6
8
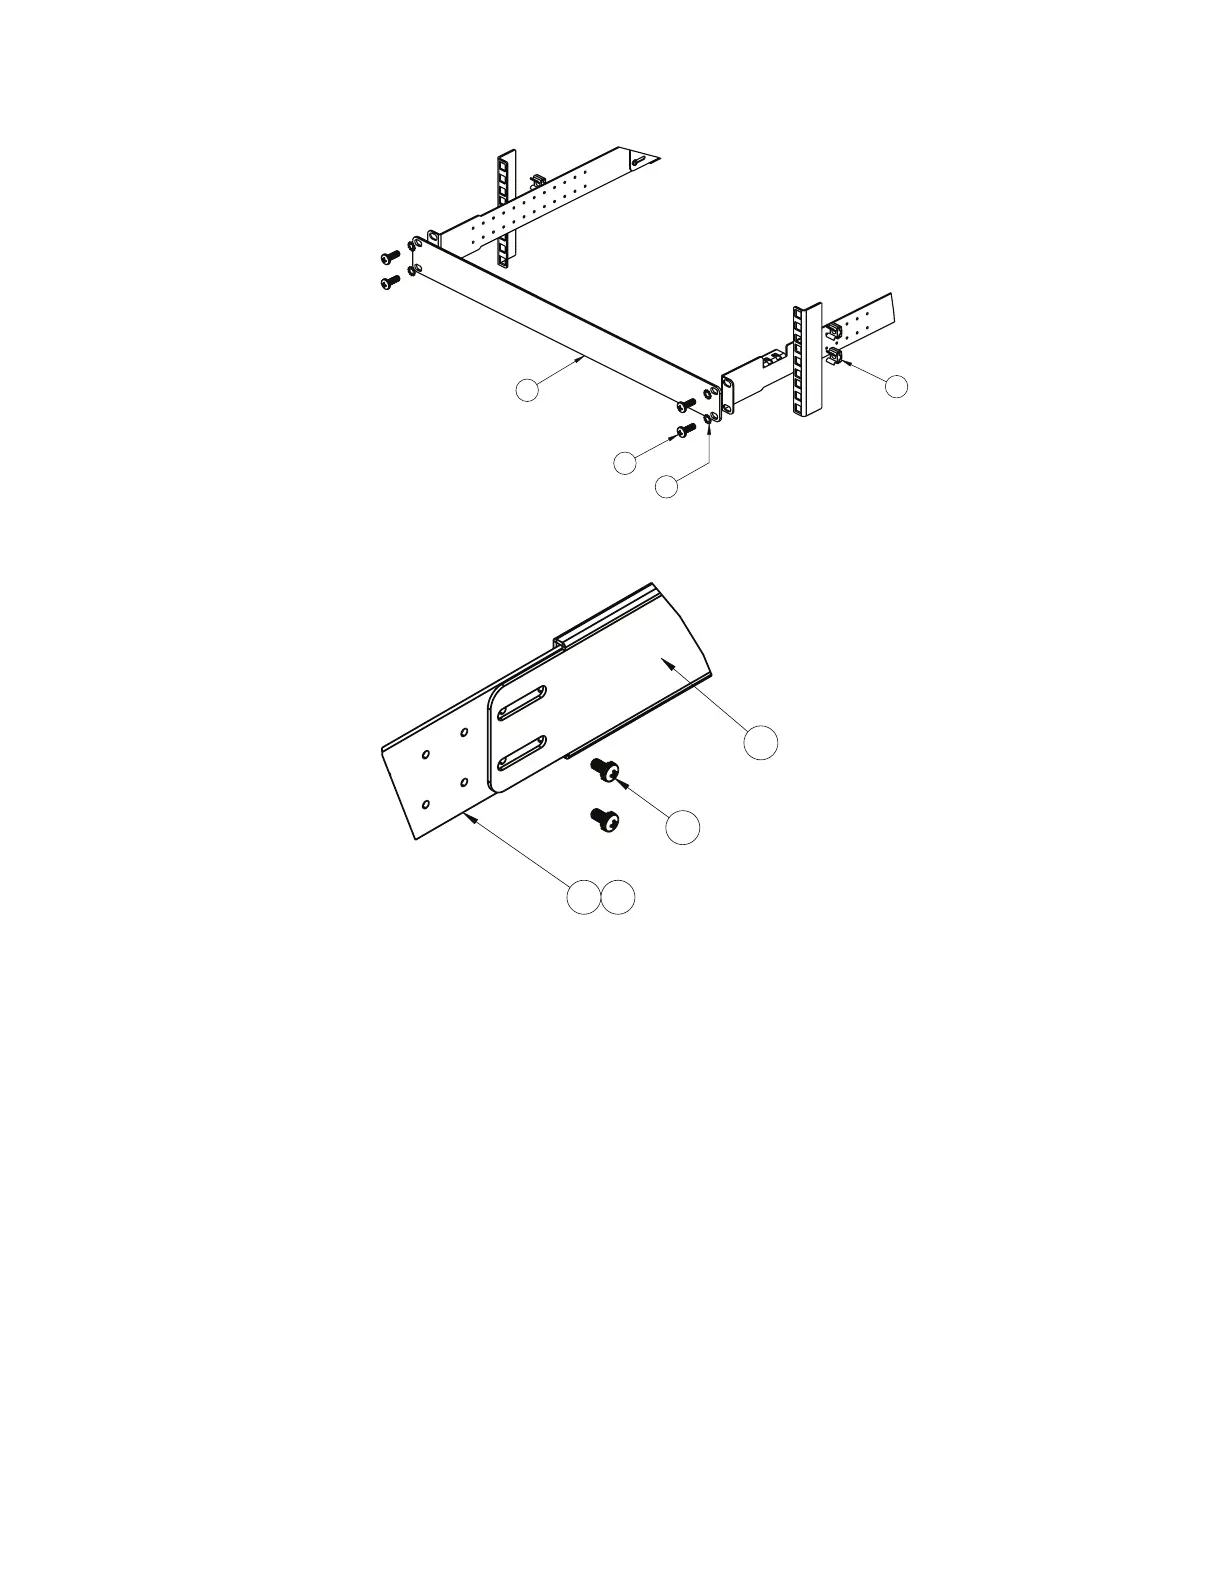
6. Use the M3.5 screws to secure the rear brackets to the front brackets. Torque
the screws to approximately 1.1 Nm +/- 0.1 Nm (10 inch-pounds).
9
10 11
3
7. Connect all the cables.
8. Initialize the switch, see Chapter 4, “Initializing the RackSwitch,” on page 47.
Attention: If this is a switch replacement, make sure that the vital product
data (VPD) is updated to avoid losing the licensed electronic entitlement data of
the RackSwitch. For more information, see “Configuring Vital Product Data after
a switch replacement” on page 43.
Chapter 2. Installing the RackSwitch, components and options 25
 Loading...