3-4 REF ADJUSTMENTS
ADJUSTMENT OPERATION
ADJUSTMENT
ITEM/POINT
VALUE
REFERENCE
FREQUENCY
1 Before starting the adjustment:
Wait for 5 minutes, after turning ON the power.
-PREPARATION- 2• Connect a Frequency Counter to the [REF I/O] terminal. – –
-ADJUSTMENT- 3 1) Push [F-2] (REF).
• Enters to the Reference adjustment menu.
2) Push [F-1] (OSC).
3) Turn the main dial to set the reference frequency.
4) Push [F-7] (SET).
• Returns to the Reference adjustment menu.
[REF OSC]
10.000,000,0
MHz
(±0.1 Hz)
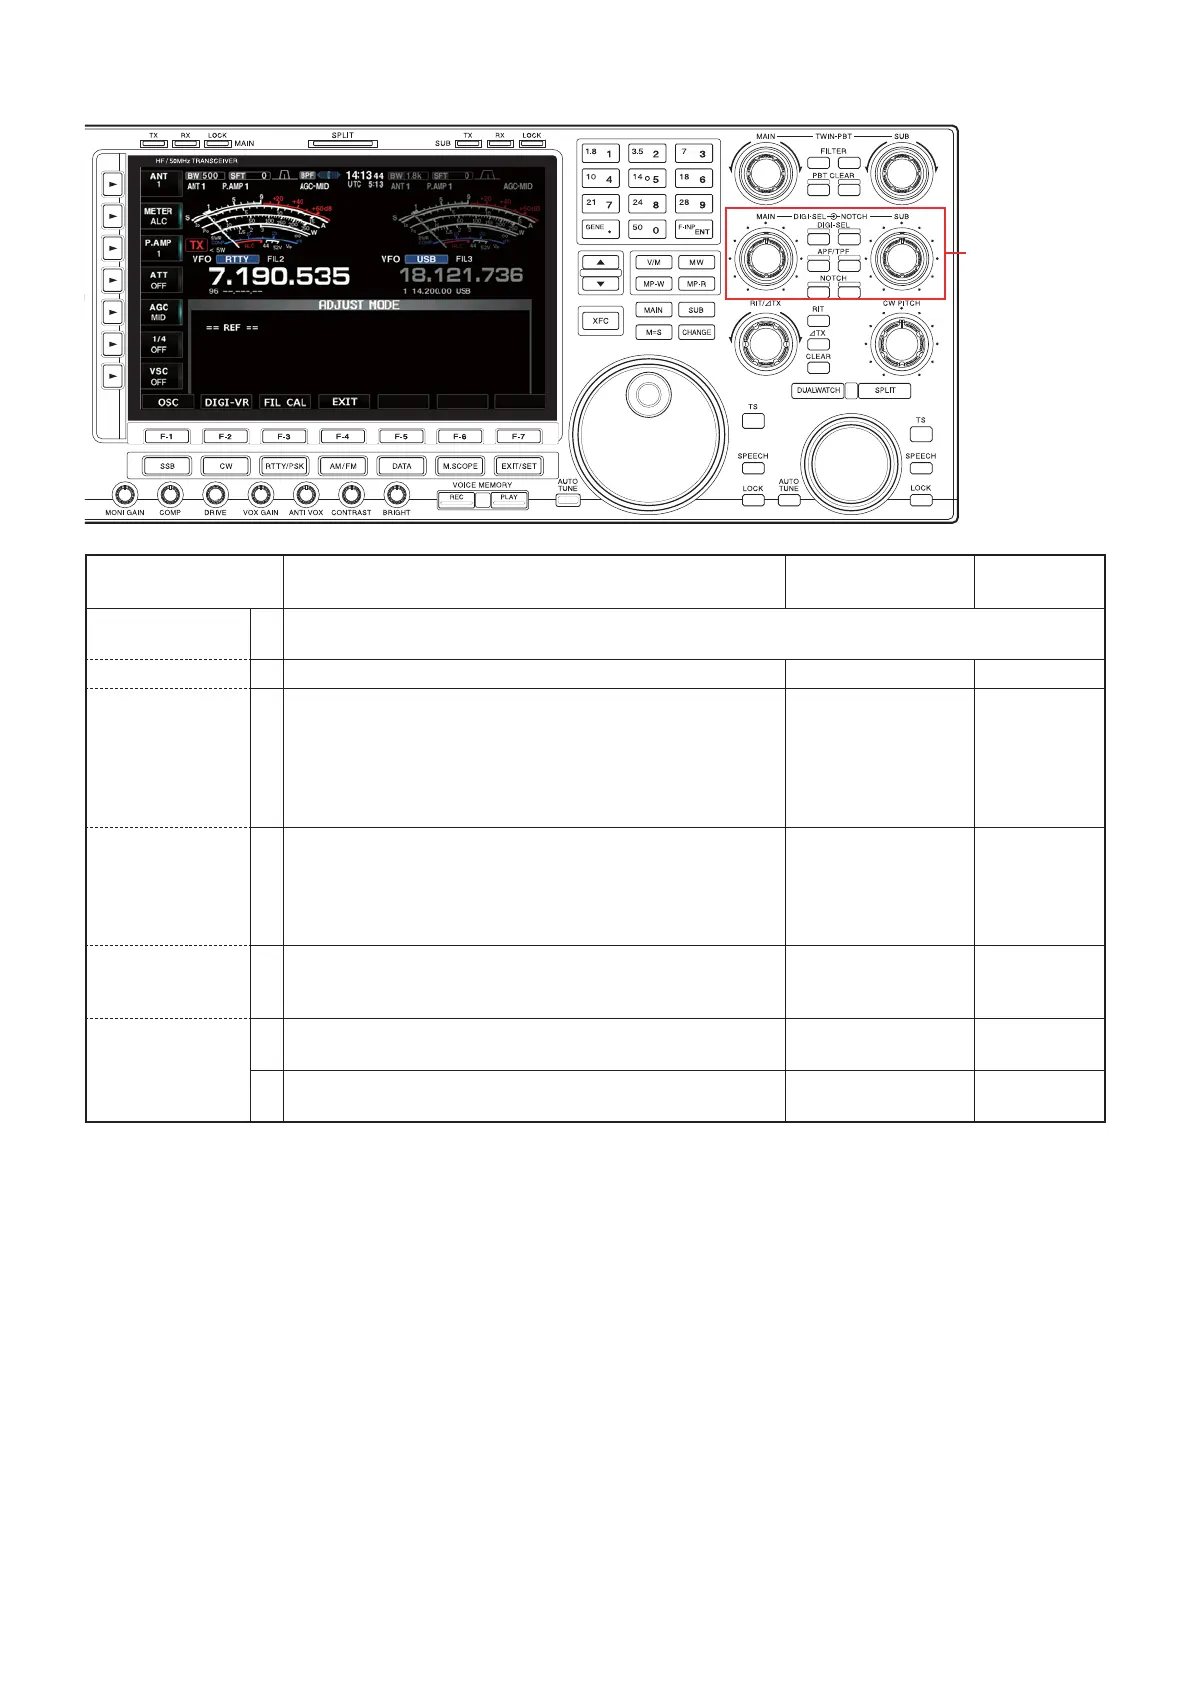
DIGI-SEL knobs 4 1) Push [F-2] (DIGI-VR).
2) Set the DIGI-SEL VR (both main and sub) to the center po-
sition.
3) Push [F-7] (SET).
• Returns to the Reference adjustment menu.
[DIGI-SEL] knobs
Center
position
FILTER
CALIBRATION
(RF-A)
5 1) Push [F-3] (FIL CAL) to enter the fi lter calibration mode.
2) Push [F-7] (SET). [Roofi ng 1.2k(A)]
(Automatic
adjustment)
FILTER
CALIBRATION
(RF-B)
6 • Push [F-7] (SET).
• Returns to the Reference adjustment menu.
[Roofi ng 1.2k(B)]
(Automatic
adjustment)
7 • Push [F-4] (EXIT).
• Returns to the main adjustment menu.
–
Push [F-7].
3-8
• REF adjustment screen
RF-A UNIT
RF-A UNIT
MAIN UNIT
[DIGI-SEL] knobs
 Loading...