User Manual 3-4 V2.0
Application Kit TC3X7 ADAS V2.0 2018-06
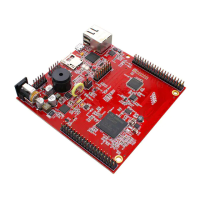
Application Kit Manual TC3X7 ADAS
Hardware: Application Kit TC3X7 ADAS V2.0
Application Kit Information
3.5 Micro SD card
The board has a slot to use the board with an micro SD card. If the assembled CPU contains a SDMMC module then
this is connected directly to the SD card. In this case R251 up to R256 are assembled instead of R261 up to R268.
If the assembled CPU don’t support SDMMC then the card will be used in SPI mode only. In this case is the SD
connected to QSPI1 with chip select 9 (P10.5) of QSPI1.
Please see additional literature how to use a SD card in SPI mode.
3.6 LEDs
There are 8 LEDs on board:
– D107 up to D110 (blue) -> toogle LEDs connected to P33.1 ... P33.4
– D106 ESR0 (red) -> RESET LED indicate the reset state of the board
– D105 +3V3 (green) -> +3,3V power supply indication
– D104 SS0 (green) -> safe state signal of TLF3068x (not available with TLF30682QVS01)
– D302 ACT (green) -> on board miniWiggler JDS is ACTIV
– D301 RUN (blue) -> Debug RUN mode (switched by DAS Server)
3.7 Clock
On the board is a fixed crystal with 20MHz assembled. You can change this by replacing Y101 (soldered).
3.8 USB Connector
The USB connector is used for connection to a PC. Via the USB it is possible to power the board, using the ASCLIN0
as serial connection via USB and Debugging via DAS. For the pinout of USB socket see Figure 6-3.
NOTE: Before connecting the board to the PC, make sure that the actual DAS software is installed on the PC. For
actual DAS software please contact your local FAE.
The software can also be found on:
DAS website
3.8.1 Serial Connection to PC
After the first connection of USB to a PC the needed driver will be installed automatically. During this there will
be created a new COM port on PC. This COM port can be used to communicate with the board via ASCLIN0 of the
device. Per default the ASCLIN0 is used on P14.0 and P14.1 (e.g. Generic Bootstrap Loader) .
3.8.2 miniWiggler JDS
The miniWiggler JDS is a low cost debug tool which allows you access to the JTAG of the device. Make sure that
you have the latest DAS release. Debugging is possible via the DAS Server ‘UDAS‘. Please contact your prefered
debug vendor for support of DAS.
If you have connected the board to the PC and there runs the DAS server, then a working connection is visible via
the green ACTIV LED.
The status RUN LED is switched on/off through the DAS Server, depending on the used debugger (client).
IMPORTANT: Make sure that there is no or a tristated connection on X301 (OCDS1) and X302 (DAP) if the ACTIV LED
is on.
 Loading...