70
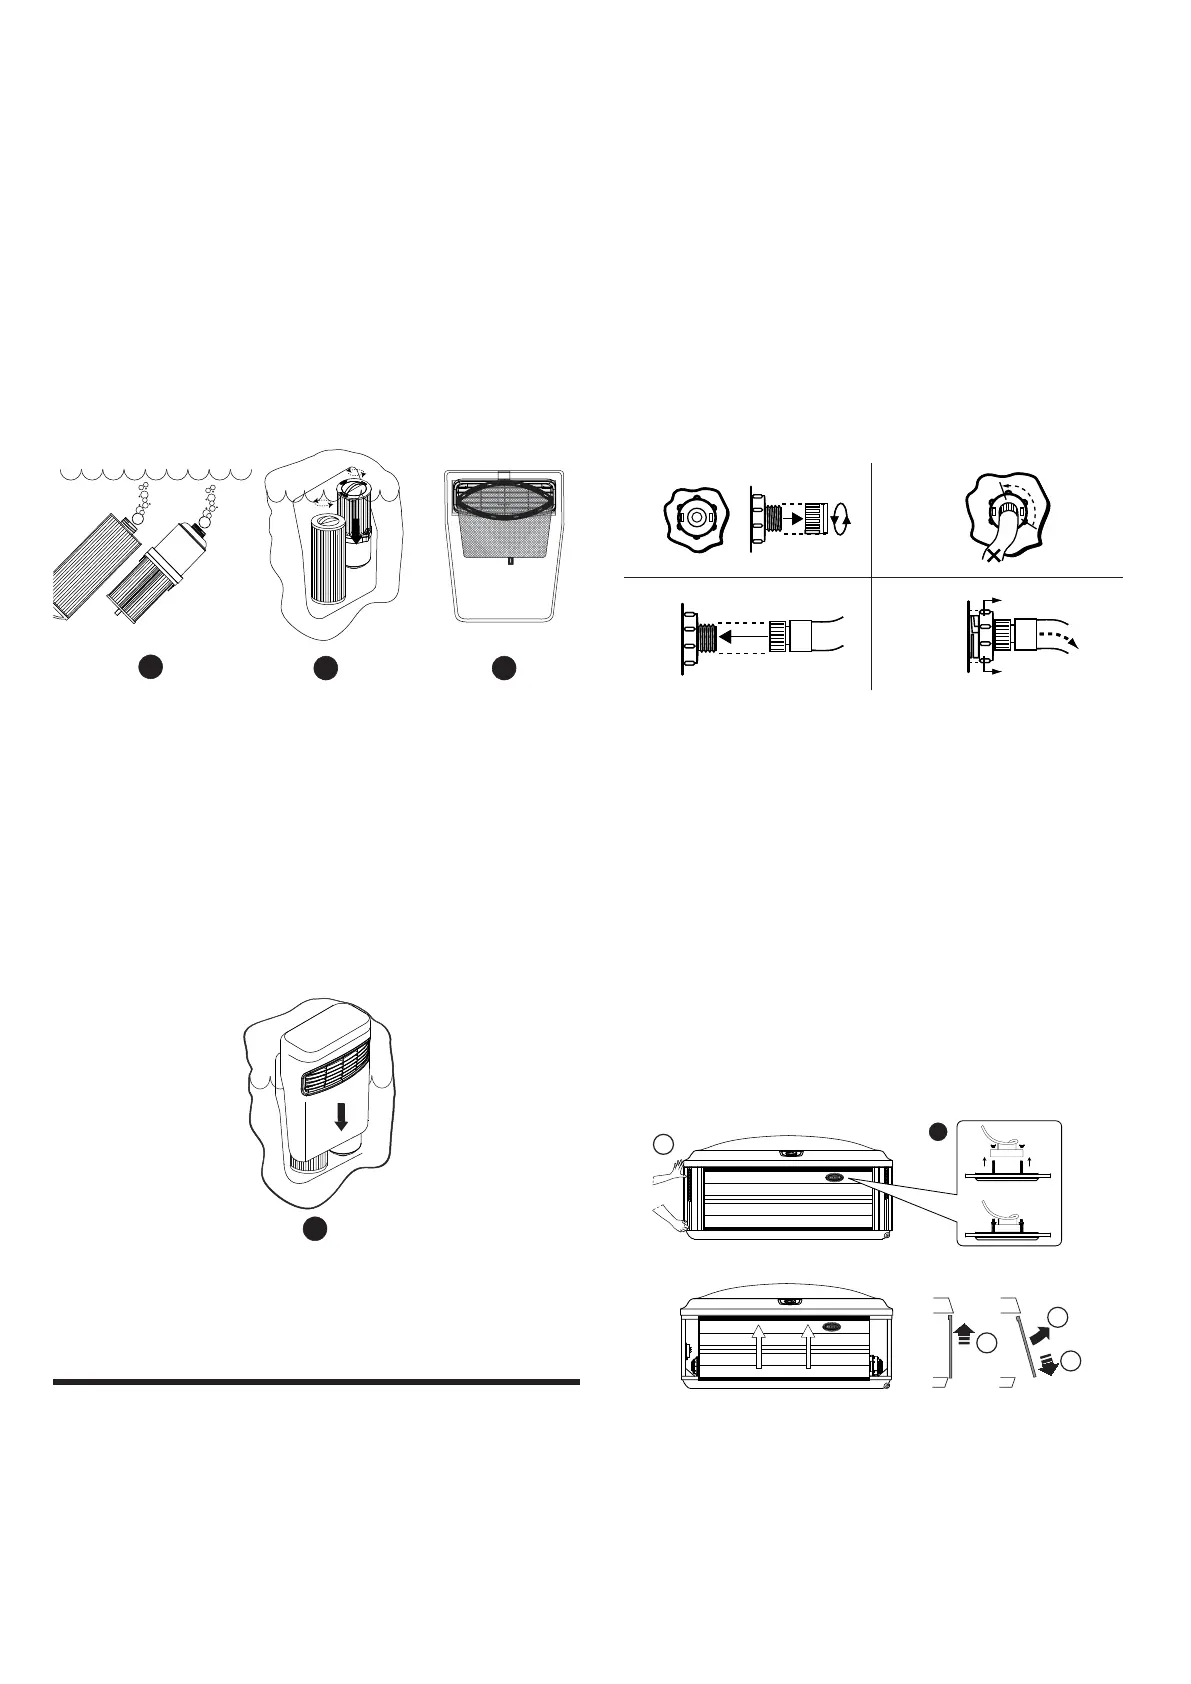
H. Once the filter pin is removed, rotate the filter cartridge handle
counterclockwise to unthread from the filter canister. You can clean
the filter (1) and canister (3) , but you must replace the ProClarity
Depth Filter (2) every 3 to 4 months.
I. Rinse debris from filter pleats using a garden hose and high-pres-
sure nozzle. Start at the top and work downward towards handle.
Repeat until all pleats are clean. Rinse out any debris from the
canister.
J. Reassemble the ProClarity Filter. Remember to replace the
depth filter with a new one. Once the filter is assembled, secure it
with the filter pin (1).
L
M
K
K. Submerge both filter cartridges in spa. Tilt threaded end upward
to remove trapped air bubbles, then keep cartridges submerged
to prevent air entrapment during installation.
L.
Reposition each cartridge in the relevant fitting (P-r and
P-hy, see figure)
then turn the handles clockwise to screw them
back into position.
N.B.: do not overtighten!
M. Install clean debris bag back onto the filter cover clips as shown.
N
N. Reinstall the skimmer shield over the filters. Then turn power
to spa back on.
Draining and Relling
About every 3 months, you will want to replace the water in the
spa. Frequency of water replacement depends on frequency of
use, care taken in maintaining water quality, etc.
You will know it is time for a change when you cannot control
sudsing and/or you can no longer see the normal sparkle to the
water, even though the key water balance measurements are all
within the proper parameters.
WARNING! Turn off power to spa before draining it. Do not
turn the power back on until your spa has been refilled.
If it is extremely cold, and the spa is outdoors, freezing could occur in
the lines or the equipment (see the section on “Winterizing”). If instead
it is very warm, do not leave the spa exposed to direct sunlight.
To drain your spa, perform the following steps:
1. Turn off power to spa at breaker.
Emptying the hot tub (standard drain)
2.
3.
4.
5.
2. Identify the drain valve (A) on the front left corner of the
support base.
Hold the larger (rear) drain valve body to prevent it from turning,
then loosen and remove the front cap to expose the underlying
male hose threads.
3. Attach a garden hose to the exposed threads.
5. Pull the larger (rear) body outward as shown to open drain.
6. After the spa drains, perform steps 2-5 in reverse order to close
the drain prior to refilling the spa.
After refilling, turn on power to the spa and follow the steps listed
under “Spa Fill Up Procedures”. Always fill your spa through both
filter buckets.
Emptying the hot tub (Quick Drain™)
Grip one of the corner panels from the bottom and pull it gently
outwards to release it; then, lower the panel and remove it.
Do the same for the other corner panel.
Then, grip the front panel from the bottom and lift it up slightly to
release it from the support; then, pull it forwards to remove it as
shown.
Note: take care not to tear the light cables (optional accessory)
which
may be on the back of the panels.
100
6:45p
100
6:45p
2
1
L
3
4
Note: when removing the front panel, you must dismantle the
lighting (L) from the panel as shown.
1. Locate the QuickDrain valve (C).
 Loading...