44
Electrical connections
Please refer to the pre-installation instructions for informa-
tion regarding connections and current absorption for the
different models.
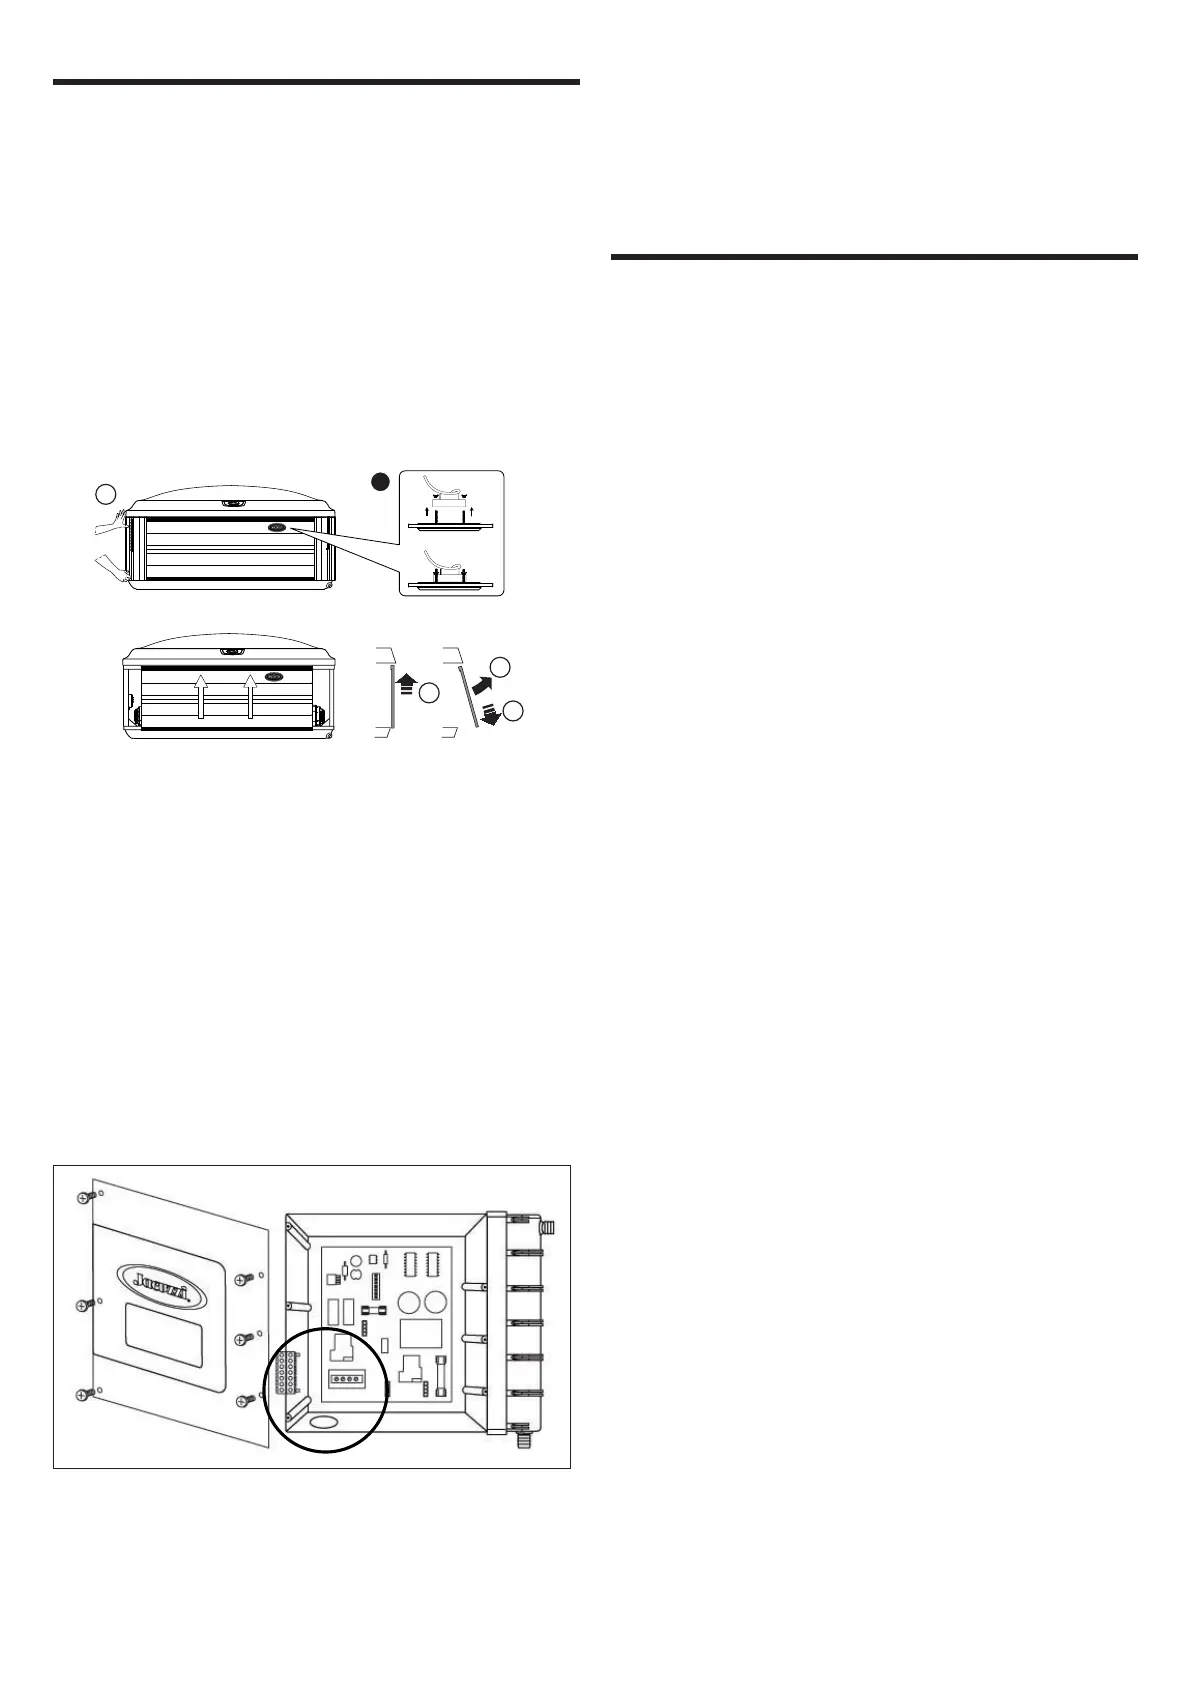
Grip one of the corner panels from the bottom and pull it gently
outwards to release it; then, lower the panel and remove it.
Do the same for the other corner panel.
Then, grip the front panel from the bottom and lift it up slightly to
release it from the support; then, pull it forwards to remove it as
shown.
Note: take care not to tear the light cables (optional accessory)
which may be on the back of the panels.
100
6:45p
100
6:45p
2
1
L
3
4
Note: when removing the front panel, you must dismantle the
lighting (L) from the panel as shown.
Then remove the six door screws on the control box. Place the
panel is a safe location to prevent damage.
Select the power supply entrance you want to use. Make sure
to install a 3/4” electrical fitting and conduit through the large
opening provided in the bottom of the control box so you can
feed the cable through to the terminal block.
- Connect the power supply line, making reference to the wiring di-
agram and the chapters “Connecting the electrical power supply” and
“Electronic board connections-Setting the dip switches”.
Install control access box door and reinstall the cabinet panel(s).
Q
In the event that not enough electricity is available, it is still possi-
ble to activate an electronic consumption limiter, operating within
the electronic control box (please refer to the wiring diagrams in-
cluded in this manual).
This operation can only be performed by authorised Jacuzzi® technicians.
Spa Fill Up Procedure
For best results, read each step in its entirety before pro-
ceeding with this procedure.
QPrepare The Spa For Filling
- Clear all debris from the spa. (Although the spa shell has been
polished at the factory, you may want to treat it with a specially
formulated spa cleaner.)
Consult your authorized Jacuzzi dealer for additional informa-
tion prior to filling spa.
- Remove both ProClarity™ and ProClear™ Plus skimmer, pol-
ishing filter lids and filters as illustrated in Section “Cleaning
the Filter Cartridges”.
QFill Spa
Place the end of your garden hose into empty skimming filter
bucket (filter bucket on your left) as you stand next to the spa.
Fill spa half way, then place the garden hose into the oppo-
site filter bucket (filter bucket on your right) while adding the
remaining fill water.
Fill until water covers all jets but does not touch the bottom of
the lowest headrest (DO NOT OVERFILL!).
CAUTION: TO DECREASE BUILD UP ON COMPONENTS AND
MINIMIZE ACRYLIC DAMAGE.
Never fill with water from a water softener. If your water is
extremely “hard,” it is preferable to fill half-way with hard water
and the rest of the way with softened water. Water that is too
soft can be corrosive to metal components.
IMPORTANT: Always fill your spa through both filter buckets
after draining. Failure to do so may cause air to be trapped
in either pump, preventing the pump from circulating water.
Remove the hose and replace both filter cartridges as illus-
trated in Section “Cleaning the Filter Cartridges”.
QTurn on Power
Activate the light using the relevant switch
(es). The heater and
filter/recirculation pump are activated automatically.
If the screen displays either a “Cool Warning” or “Freeze Protec-
tion” error, this is normal. Normally, at the initial fill, the water
tends to be cold.
Refer to “Error/Display Messages” for additional information.
QActivate Jets Pumps
Turn on jet pumps when adding chemicals (see Section “Acti-
vating the Jets Pumps” to activate jets).
NB: do not start the pump(s) if the water does not cover the highest
pump nozzles.
- Open all of the air controls and turn all of the massage selector
knobs to the central position.
 Loading...