Use the numeric key to set the format directly.
12) SET11 filtering setting: 1,2,3,4
Set the filtering level in which the stable indication turns on .The higher the setting, the
slower stabilization time.
13) SET12 Precondition for zeroing or taring setting: stable, auto, always
stable :Taring or zeroing can be not action without stable indication after pressing the key
TARE or ZERO
always:Taring or zeroing can be action without stable indication after pressing the key
TARE or ZERO
auto: Press key TARE or ZERO, but it works only when get the stable indication.
14) SET13 weight memory parameter: on,off
On: display the last weight when powering on again
Off: do not display the last weight when powering on again
15) SET14 the kinds of checking: Qty.ck,Wt.ck
Qty.ck: start amount checking
Wt.ck: start weighing checking
16) SET15 parameter initialization
press key G N/SET then key M+/SAVE to start initialization. It is finished when
displaying OK.
6. Single and Multi-point Calibration
Note: Before calibration, please set the capacity first. The unit used in calibration is the one
that has been set before. During the calibration procedure, LONG press ZERO/ESC to
return to normal weighing mode without saving.
Here we take 3kg/0.2g as an example
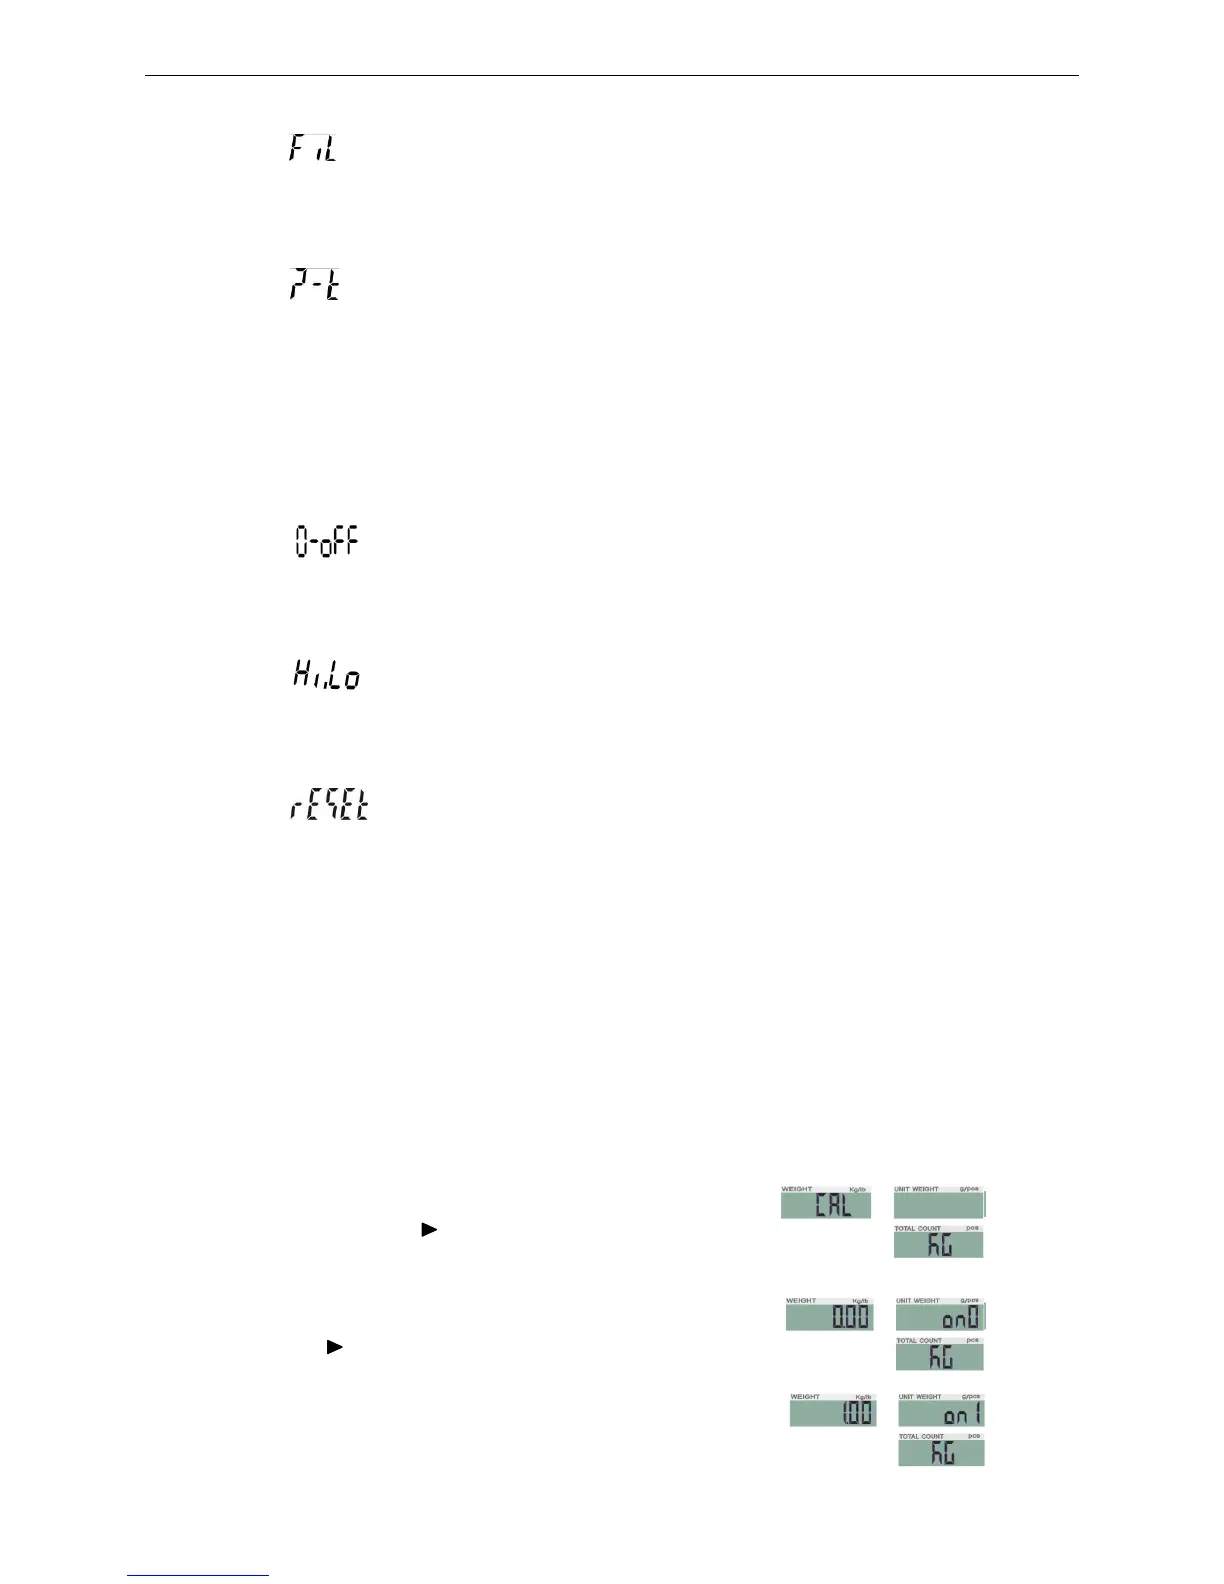
1. Press and hold TARE/ while powering on.
Do not release it till the window displays ―CAL”
2. With no load on the weighing pan,
press TARE/ to start zero point calibration.
3. Wait till the window displays the first calibration value.
Note: The first calibration value is default. If the value
has been changed, the default value is 1/3 of full load.
 Loading...