18
• Delete Connection: Select this option to delete a network from
the system. Deleting a network stops the JBL On Air Wireless from
automatically connecting to the network’s server and deletes all saved
information related to the network.
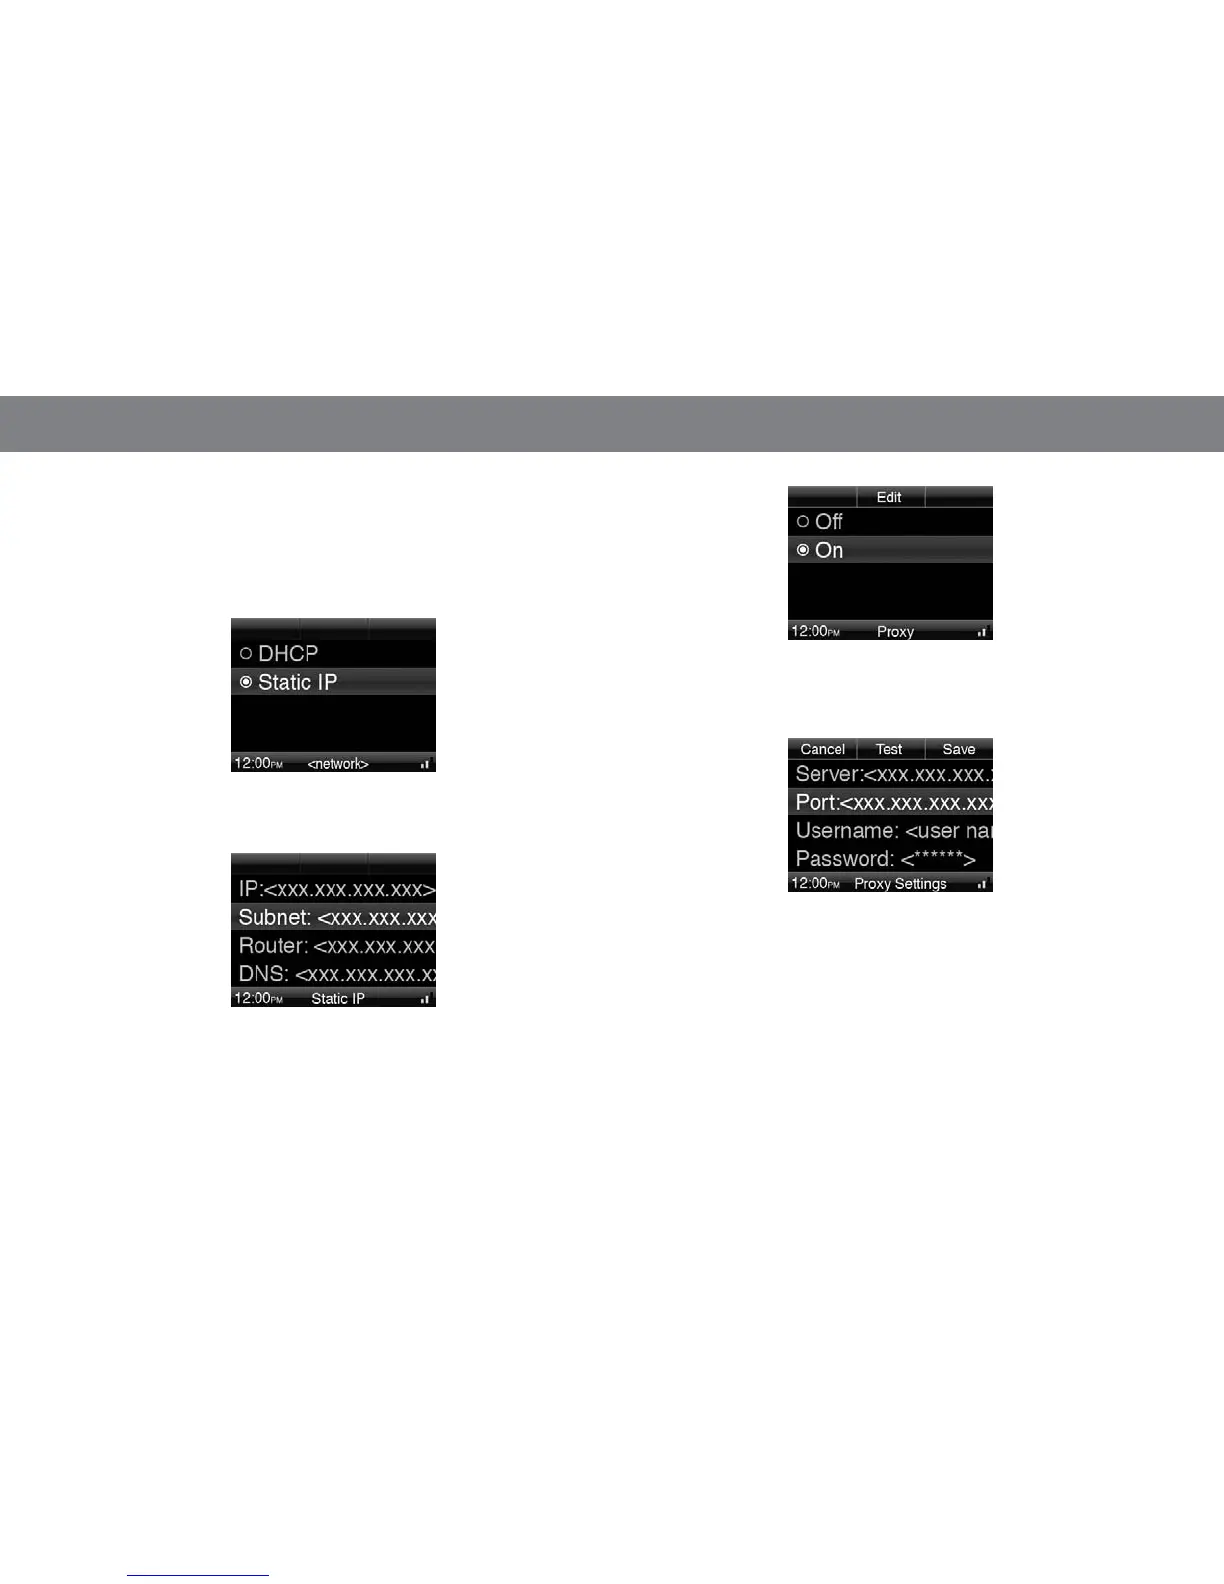
• IP Address Configuration: Select this to option configure the
network’s IP address. The IP Address screen will appear:
Select “DHCP” to configure the network from the server automatically.
Select “Static IP” to configure the network manually. The Static IP
screen will appear:
Select and manually enter the network’s IP, Subnet, Router and DNS
addresses. A data-entry screen will appear for each one. Select the
Right Soft (Save) button when you have finished entering each address.
• Proxy: Select this option to configure the network for a proxy server.
The Proxy screen will appear:
Select “Off” if the network does not have a proxy server. Select “On”
if the network does have a proxy server. Select the Center Soft (Edit)
button to enter the proxy server settings manually. The Proxy Settings
screen will appear:
Select and manually enter the proxy server’s server address and port
address, the proxy user name and the proxy password. A data-entry
screen will appear for each one. Select the Right Soft (Save) button
when you have finished entering each item.
When you have finished entering all the information, select the Center
Soft (Test) button to test the proxy settings. The JBL On Air Wireless will
attempt to connect to the proxy server using the settings you entered.
If it is successful, it will save the settings and display the previous menu
screen. If it is unsuccessful, it will display the error message returned by
the proxy server and you will need to correct the information you entered.

 Loading...