50 - 3
Assembly
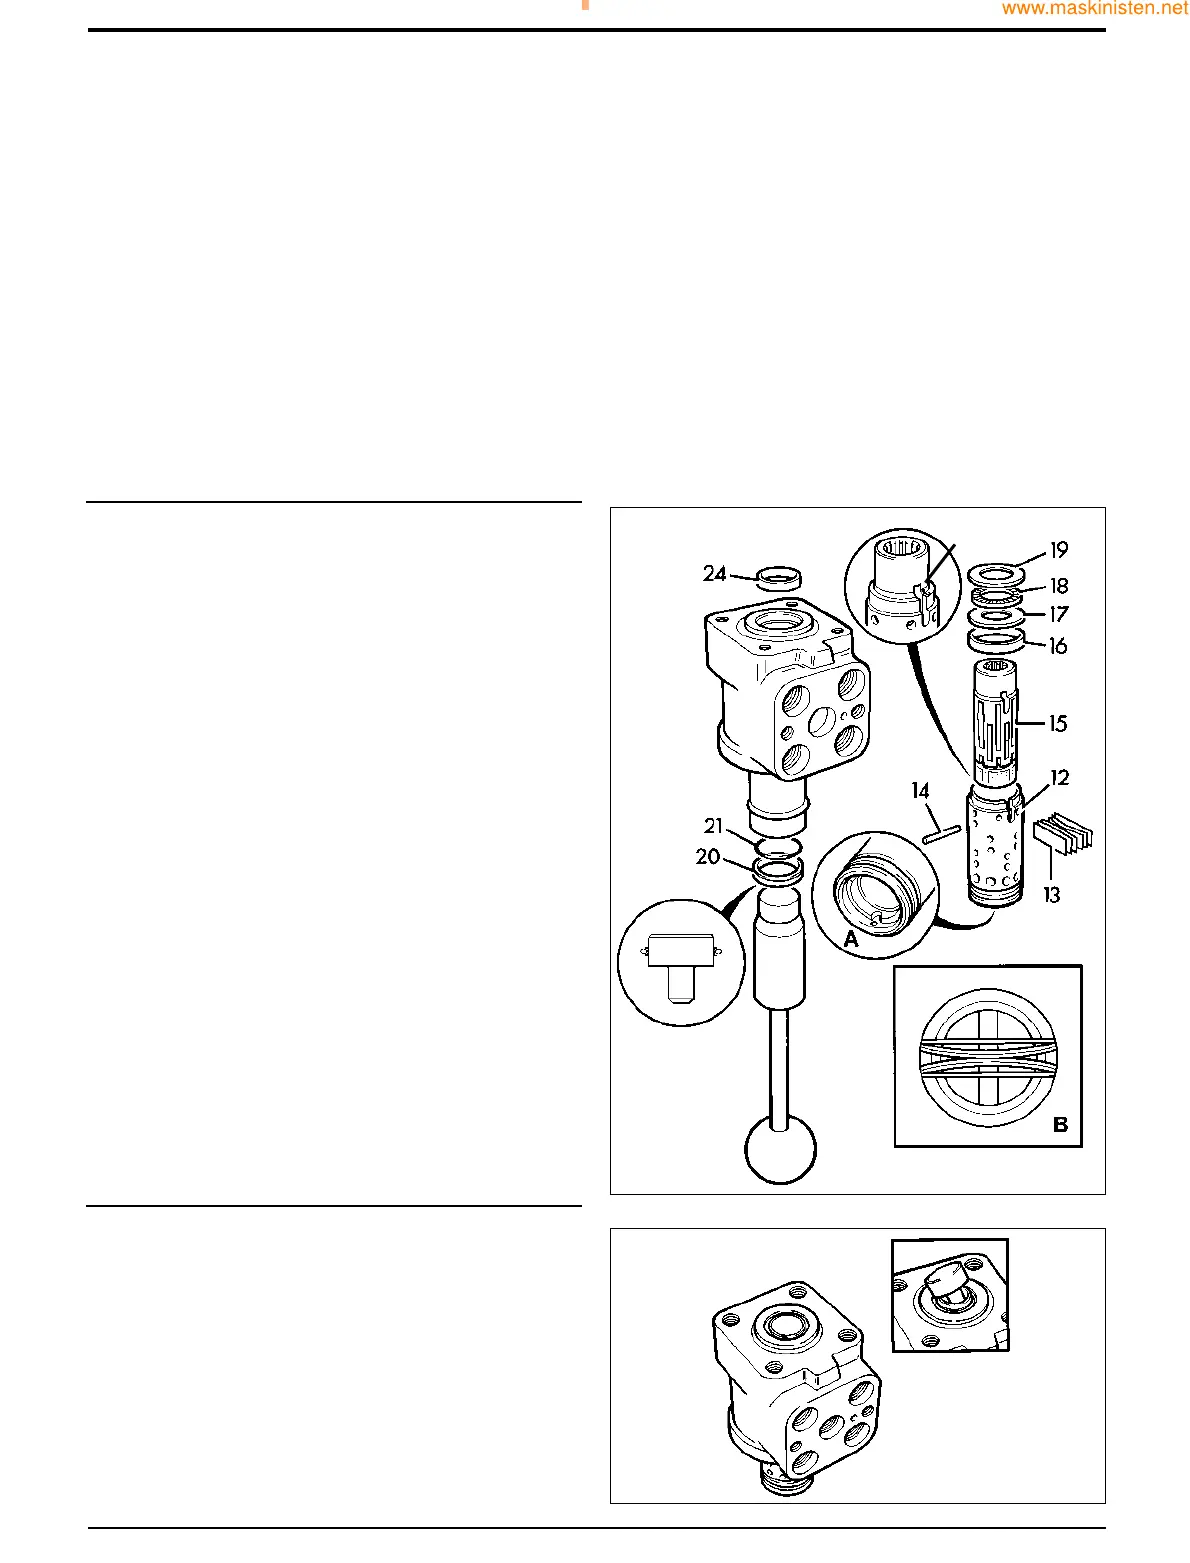
1 Fit spool 15 into sleeve 12, aligning slots for centring
springs 13 and checking that the small marks X are
aligned. Ensure that three slots in spool partially
uncover three holes in sleeve, as at A.
2 Fit two flat centring springs 13 with four curved springs
between them, as shown at B.
3 Fit seal 24 into steer unit body and insert sleeve of
service tool 892/00180. Fit back up ring 20 and seal 21
onto plastic boss, and position on tool spindle, as
shown.
4 Lower steering unit body and tool sleeve over tool
spindle until plastic bush is flush with end of bore.
Assemble sleeves 12 and 15 with cross pin 14 and
centring springs 13. Fit bearing components 16 to 19
with chamfered face of 17 facing away from bearing 18.
5 Remove body from tool leaving plastic bush in position,
and lower body over assembled spool.
6 Apply downward pressure on body until plastic boss is
forced out of bore, leaving seals correctly located.
Section H Steering
9803/7130
Section H
50 - 3
Issue 1
Hydraulic Steer Unit
Dismantling and Assembly
The numerical sequence shown on the illustration is intended as a guide to dismantling.
Note: 1 During manufacture, a small mark X will have been made on sleeve 12 and spool 15, close to one of the slots for the
centring springs 13. Before removing the centring springs, check that this mark is visible; if not, make a new mark to ensure
correct assembly.
Note: 2 Shock valves (items 29 to 35) are pressure set during manufacture and the adjusting screw 31 secured with Loctite.
Due to the difficulty of resetting the pressure it is recommended that the valves are not disturbed. If dismantling is
unavoidable, however, measure and record the depth of adjusting screw 31 below the top face of the steering unit before
removing the screw.
Note: 3 The unit illustrated in the following sequence represents a typical hydraulic steer valve. The relief valve (items 25 to
28) and shock valves (items 29 to 35) are not therefore shown in the following illustrations.
X
S229680
S229690

 Loading...