35
Inserting zippers
Use the standard presser foot (A) to sew.
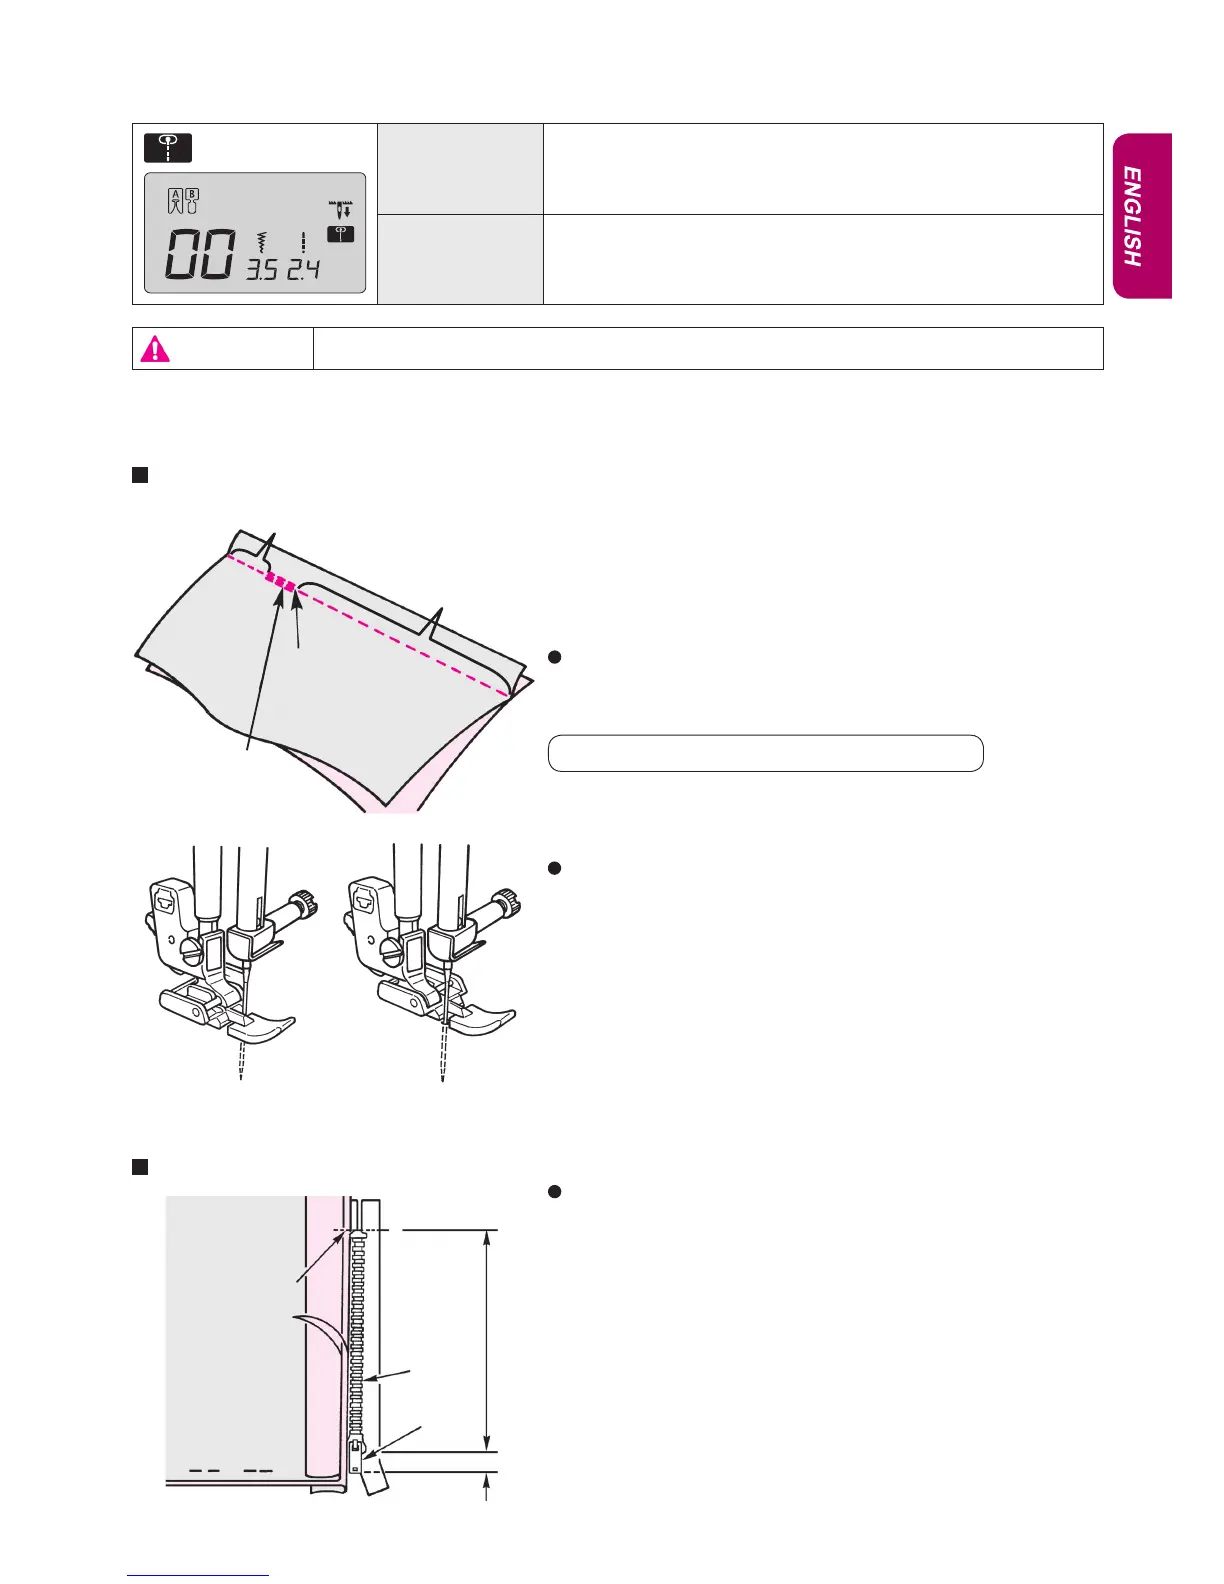
Place the fabrics face-to-face. Check the runstitching length and the
length of the zipper to be inserted. Machine baste the zipper onto the
fabrics.
Machine basting = zipper opening length + 1 cm
Machine basting ... Stitch length “4”
Fabric (wrong side)
Crotch end
Reverse stitch (1cm)
Runstitching ... Stitch length “Automatic”
Preparation before attaching zipper
Pattern No. Practical 00
Presser foot Zipper presser foot (B)
Zippers are set in two different ways: by inserting into the side seam of the garment and by centering in position.
* Make sure to use center needle position (Stitch pattern No. Practical 00).
Attention
Turn OFF the power switch before replacing the presser foot.
1
(right) (left)
Attach the zipper presser foot (B) to the machine.
When sewing the left side of the zipper, place the zipper under the right
portion of the zipper presser foot. When sewing the right side of the
zipper, place the zipper under the left portion of the foot.
2
Open the seam allowance.
Neatly open the seam allowance. Adjust the back seam allowance
so that it projects 3 mm from the seam. Press with an iron to make a
crease. Fit the crease along the edge of the teeth.
Zipper
Fabric
(wrong side)
Zipper
opening
size
1 cm
Teeth
Slider
0.3 cm
Crotch end
Lapped insertion
1

 Loading...