−
10
−
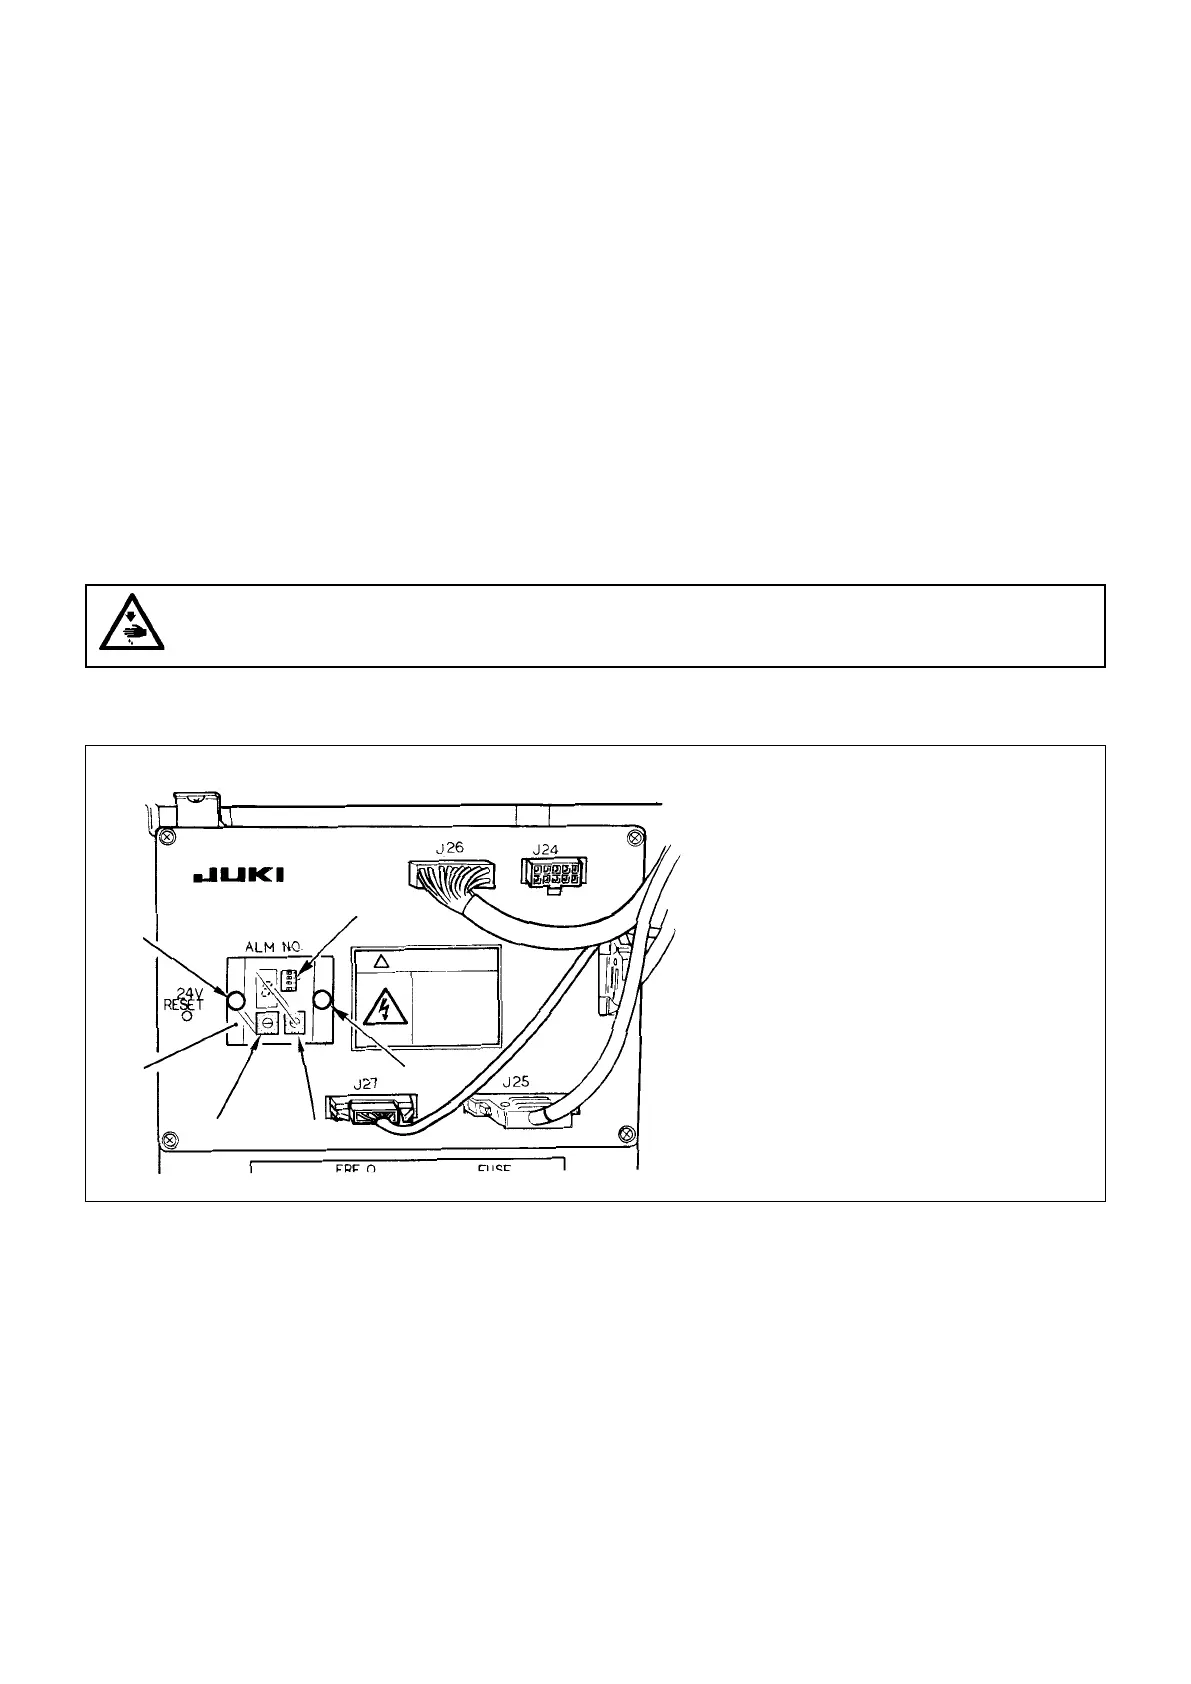
5.HowtosettheDIPswitchesandthedigitalswitches
Loosen two screws
, and open panel
as illustrated in the following figure to change the setting of the respective
switches.
Buttonfeederunitcontrolbox
DIP switch (DIP-SW)
Digital switch (DEG-SW-1)
Digital switch (DEG-SW-2)
4.Operation
(Caution) Movethebuttonclampjawleversneartothepositionoftheneedlecenterinadvance.
1) Turn ON the power to the main unit of the sewing machine.
At this time, the alarm indication on the button feeder unit control panel ashes on and off, and the alarm indication on
the button feeder unit control box indicates “0” (ashing).
2) Press the [Ready] key on the sewing machine operation box, and the sewing LED lights up to release the alarm indica-
tion on the unit. Then the button clamp jaw levers move to the origin and go up. (A state that the sewing is possible.)
3) Press the manual operation switch on the button feeder unit control panel, and supply the button clamp jaw levers with a
button. If the button is not supplied to the button clamp jaw levers, press the manual operation switch again.
4) When depressing the pedal to the rst step, the button clamp jaw levers come down. At this time, make sur of the sewing
position. (If you release your foot from the pedal, the button clamp jaw levers go up.)
5) Furthermore depressing the pedal makes the sewing machine perform sewing the button in accordance with the pattern
No.
6) When the sewing is completed, the button clamp jaw levers go up, the button carrier of button supply unit turns, and a
button is supplied.
WARNING :
Turn OFF the power before starting the work so asto prevent accidents caused by abrupt start of the
sewingmachine.
BR35
 Loading...


