−
24
−
13. Replacing the button feeder components and positioning them
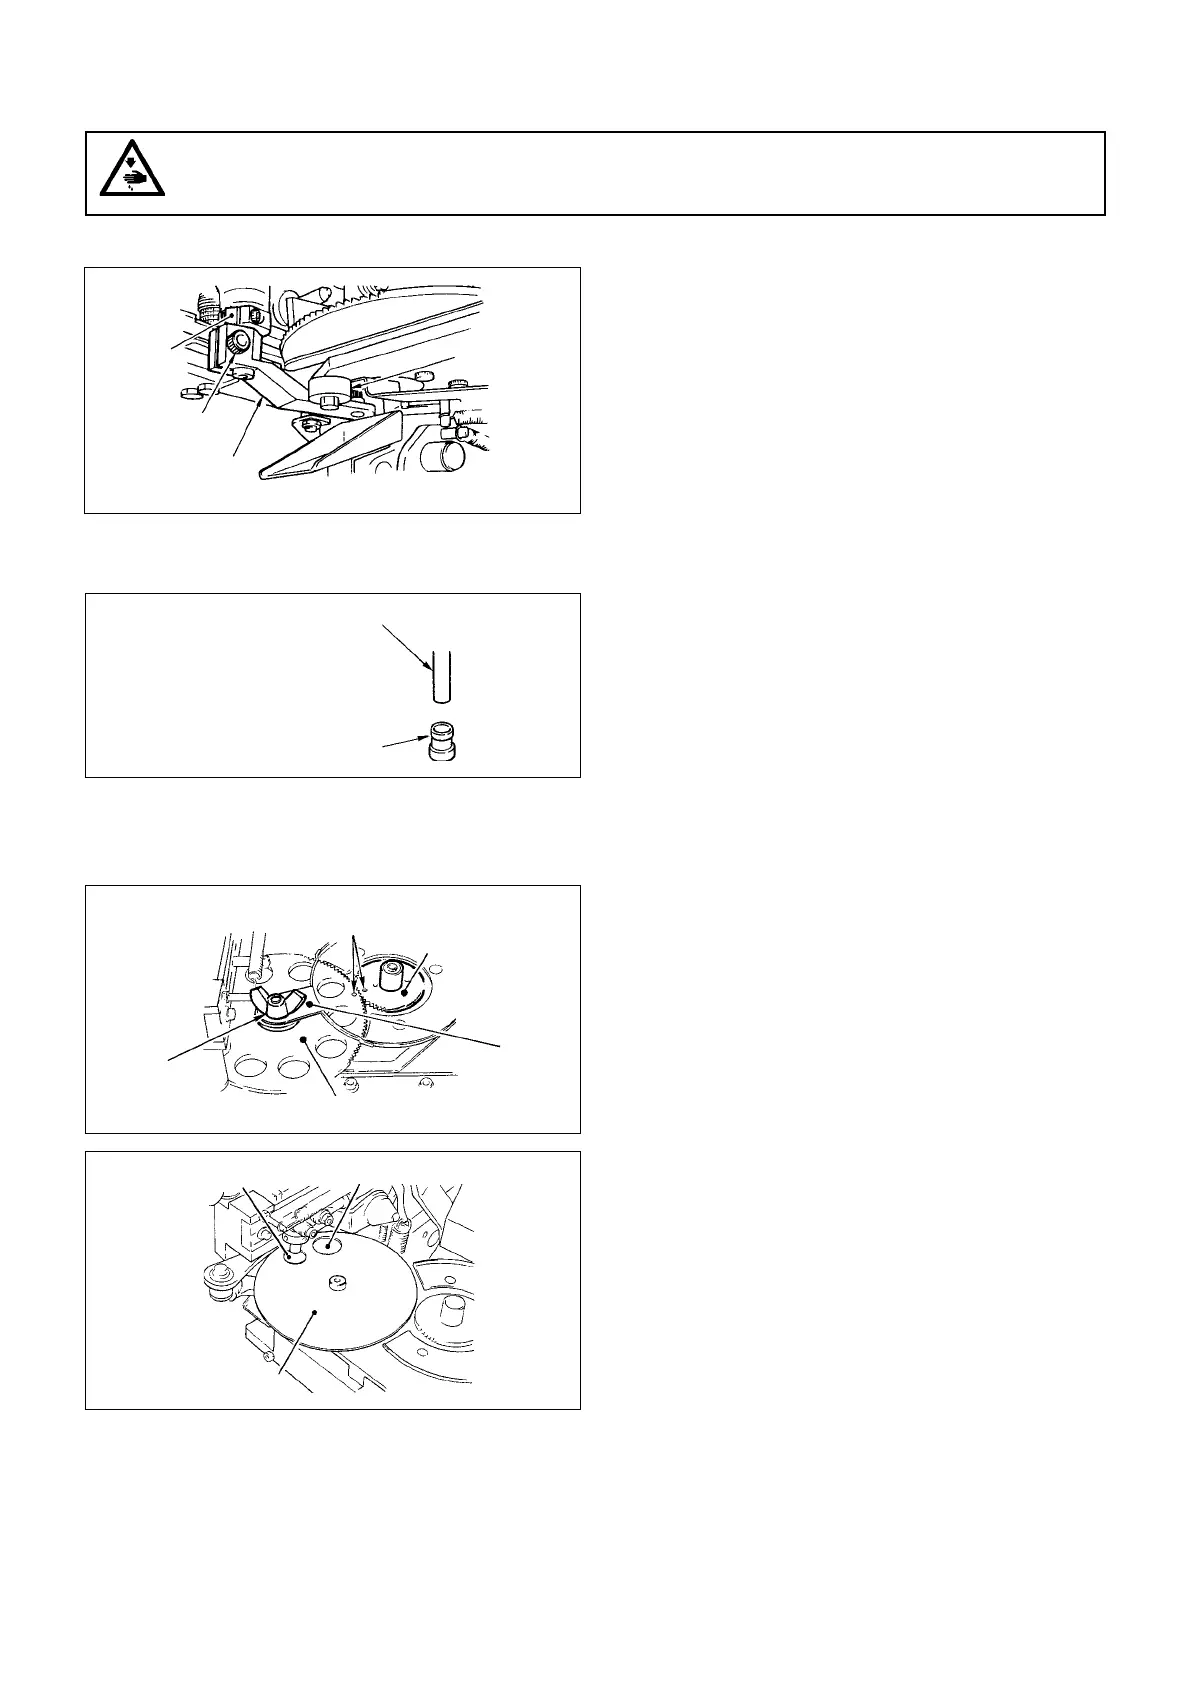
(1) Replacing the button carrier and positioning it
To replace the button carrier, loosen screw
, then remove
the button carrier. Replace the button carrier with one with
a proper center-to-center distance, and t the button carrier
with a proper center-to-center distance to eccentric cam
,
and simultaneously make the top face of the carrier come in
contact with nut
. Now x the carrier by screw
.
(Caution)
The above-statedpositioning procedure shouldbe
carriedoutwiththesewingmachinesettotheorigin.
WARNING :
Turn OFF the power before starting the work so as to prevent accidents caused by abrupt start of the
sewing machine.
Buttoncarrier
(2) Replacing the work attachment
Remove the work attachment currently attached on the
sewing machine from the rotary rod. Then attach the work
attachment of another type on the machine. At this time,
be sure to conrm that the work attachment securely ts in
position.
Workattachment
Rotaryrod(nepositioningshaft)
(3) Replacing the feed plate and positioning it
Replacingthepan
1) Remove buttery nut
, take out cap
, and replace the
feed plate.
Use the feed plate of ø16 mm when sewing buttons of
which diameter is ø10 to ø15 mm. If the outside diameter
of the button is ø16 to ø18 mm, use the feed plate of ø22
mm.
To adjust the position of the feed plate, conrm that the
pinion is in its origin and attach the feed plate at the
position where the matchmark (countersinking) on the
pinion aligns with the matchmark on the feed plate. At this
time, align the hole in the pan with the hole in the feed
plate on the triple pawl.
2) It is necessary to adjust the pan located under the feed
plate to the diameter of the hole in the feed plate. The pan
is provided with two holes, one is ø16 hole and the other
is ø22 mm hole. When using the feed plate of ø16 mm,
attach the pan by turning it over so that its ø16 mm hole
comes this side with respect to the rotational direction
of the feed plate. When using the feed plate of ø22 mm,
attach the pan by turning it over so that its ø22 mm hole
comes this side with respect to the rotational direction of
the feed plate.
3) Adjust the initial position of the triple-pawl taking the value
which is obtained by adding 1 mm to the diameter of the
button hole in the feed plate used as reference.
Make the adjustment using the positioning stopper screw.
Alignwithmatchmarks.
Feedplate
Pan
Pinion
ø16
ø22
 Loading...