−
23
−
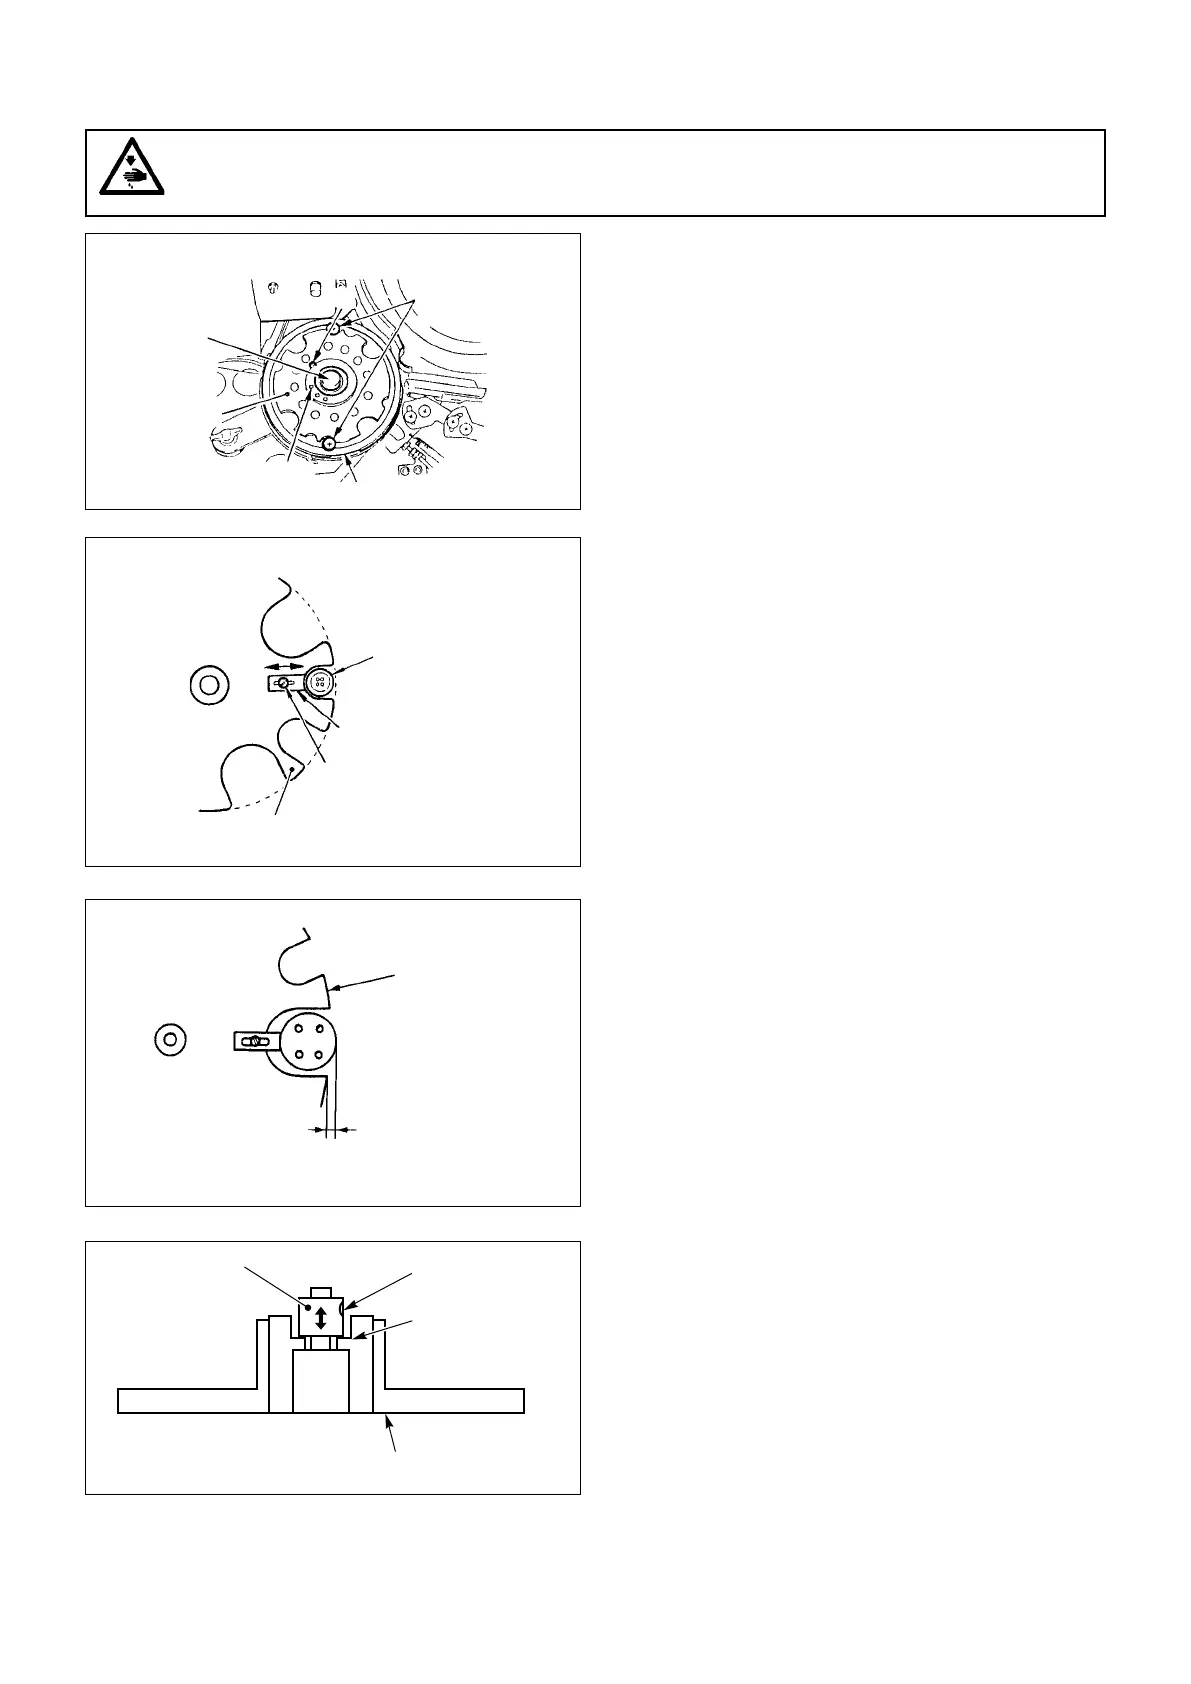
When sewing a ø15 mm button, protrude the adjusting plate
by 1 mm from the aforementioned setting of the adjusting
plate. (To smoothly drop the button into the index gear.)
When there is a vertical play on the feed plate A, loosen
setscrew
, and strike the lock collar
to the feed plate A to
remove the play. After removing the play, tighten screw
.
(Caution)
Becarefulnottoexcessivelystrikelockcollar
to
thefeedplateA.
12. Adjusting the feed plate of the index unit
1) Conrm that the index unit is in its origin. Then loosen
the lock screw, and remove feed plate A. Loosen screws
and screw
, and remove frame
and adjusting
plate
.
2) Select one hole from among three holes with different
diameters (ø22, ø16 and ø12) in feed plate A, and nely
adjust the hole selected to the buttons to be used using
the adjusting plate. Adjust so that the periphery of the
button is ush with the periphery of feed plate A.
3) Adjust the clearance into which the button is placed using
adjusting plate
. Adjust the clearance to allow only one
button to go through it. Once the feed plate is correctly
positioned, x it by tightening screw
.
Close the other holes using frame
, and x the frame
using screws
.
4) Install feed plate A which has been properly adjusted on
the feeder. At this time, be careful to set feed plate A so
that the button hole in feed plate A to be used meets the
outlet of the feeder bowl. Then tighten the lock screw.
(Caution)
Tightenthescrewwithcaresincethescrewislikely
tobreak.
WARNING :
Turn OFF the power before starting the work so as to prevent accidents caused by abrupt start of the
sewing machine.
Lockscrew
Pinhole
Button
Adjustingplate
Fixingscrew
FeedplateA
Removetheplay.
FeedplateA
FeedplateA
1mm
Adjustmentofø15mmbutton
 Loading...


