– 6 –
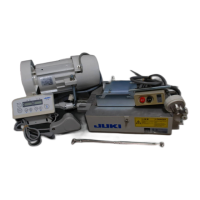
3) Connect 14P code
4
coming
from the machine head to con-
nector
5
(CN36).
When the optional AK device
is attached, connect 2P con-
nector
6
coming from the AK
device to connector
7
(CN37).
Insert connector
8
coming
from the detector into connec-
tor
9
(CN33).
Connect 9P connector
!0
com-
ing from the motor to connector
!1
(CN30) on the circuit board.
Proceed to step 5).
(Caution)
WhenusingtheAKdevice,setwhethertousetheAKdeviceafterconrminghowtoselectthe
auto-lifter function. (Refter to “
#
-11. Setting of the auto lifter function” p. 48.)
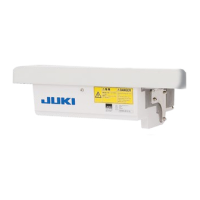
2) Loosen screw
B
in cover
3
with a screwdriver to
open the cover.
For the direct-motor type machine head, proceed
to step 4).
48
6
3
B
9
!0
!1
1
A
2
5 7
1) Pass cords
1
of the thread trimmer solenoid,
reverse feed solenoid and detector cords
2
through table hole
A
and route them under the
table. (Detector cord
2
is not provided for the
direct-motor type machine head.)
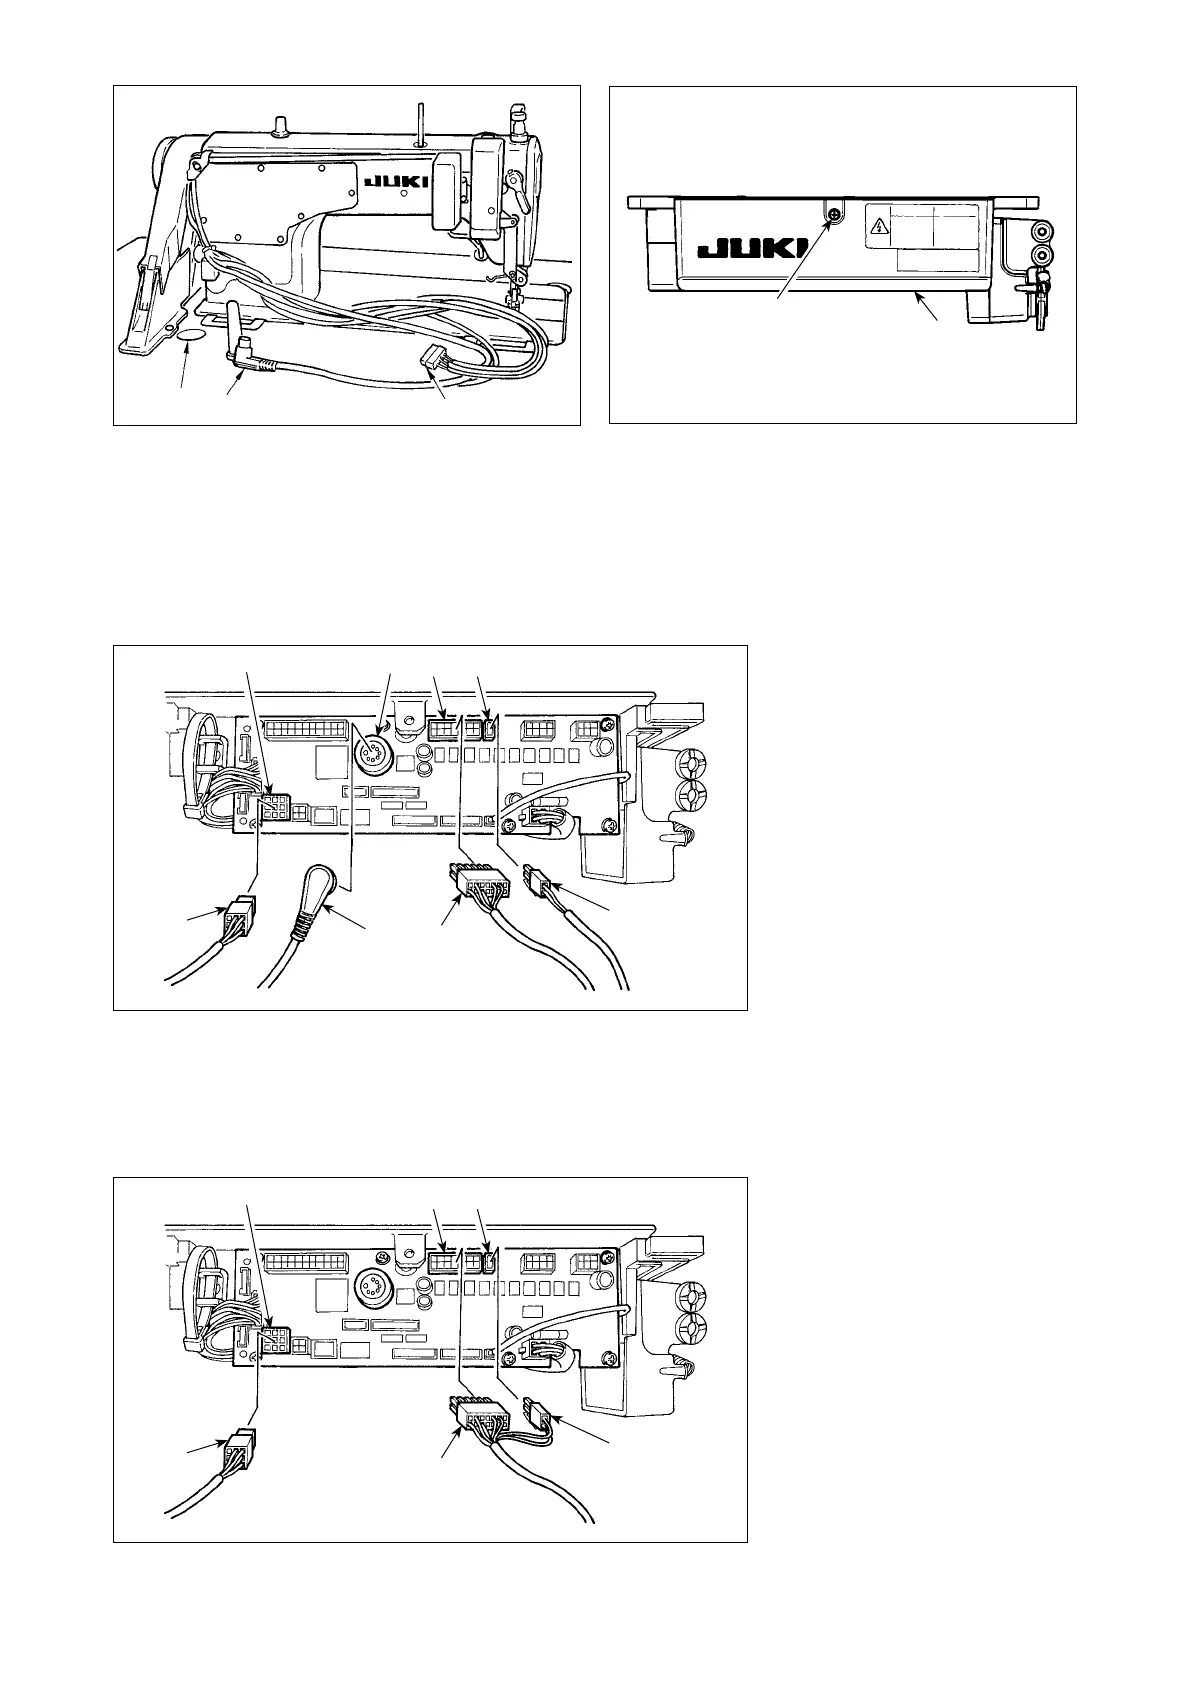
[For the direct-motor type machine head]
4) Connect 14P cord
4
coming
from the machine head to con-
nector
5
(CN36). Connect 2P
connector
6
to connector
7
(CN37).
Connect 9P connector
!0
coming from the motor to con-
nector
!1
(CN30) on the circuit
board.
Proceed to step 5).
4
6
!0
!1
5 7
[For the belt-drive type machine head]
 Loading...