supply is correctly installed and functioning normally, the AC OK and DC OK LEDs light
steadily and the PS FAIL LED is not lit.
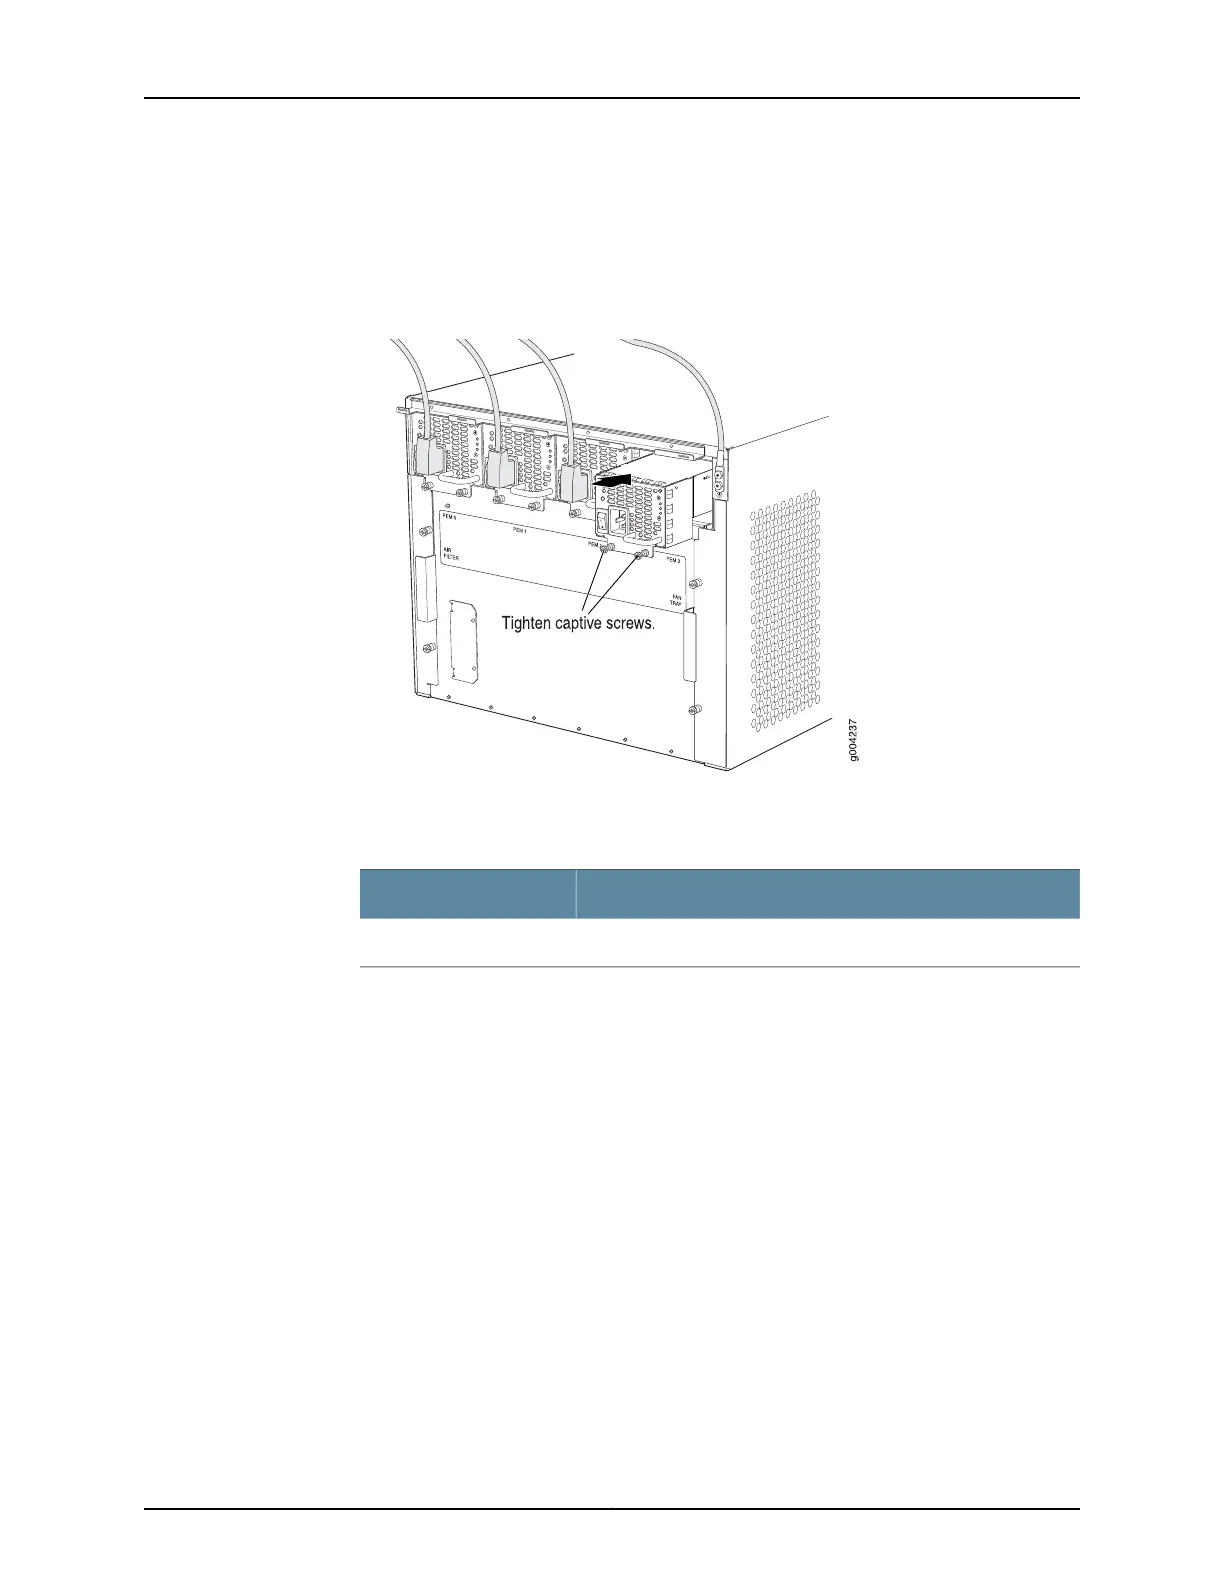
Figure 9: Installing an AC Power Supply
Connect Power to a DC Router with Normal-Capacity Power Supplies
Table 2: MX480 DC Power System Input Voltage
SpecificationItem
Operating range: –40.5 to –72 VDCDC input voltage
1. Ensure that the voltage across the DC power source cable leads is 0 V and that there
is no chance that the cable leads might become active during installation.
2. Secure the power cable lugs to the terminal studs, first with the split washer, then
with the nut. Apply between 23 lb-in. (2.6 Nm) and 25 lb-in. (2.8 Nm) of torque to
each nut. Do not overtighten the nut. (Use a 7/16-in. [11 mm] torque-controlled driver
or socket wrench.)
a. Attach the positive (+) DC source power cable lug to the RTN (return) terminal.
b. Attach the negative (–) DC source power cable lug to the –48V (input) terminal.
Copyright © 2015, Juniper Networks, Inc.18
MX480 3D Universal Edge Router Quick Start

 Loading...


