NOTE: All power supplies need to be turned on at the same time.
Connect Power to a DC Router with High-Capacity Power Supplies
To install a DC power supply:
1. Ensure that the voltage across the DC power source cable leads is 0 V and that there
is no chance that the cable leads might become active during installation.
2. Move the power switch on the power supply faceplate to the off (O) position.
3. Using both hands, slide the power supply straight into the chassis until the power
supply is fully seated in the chassis slot. The power supply faceplate should be flush
with any adjacent power supply faceplate or blank installed in the power supply slot.
4. Using a screwdriver, loosen the captive screw holding the metal cover over the input
mode switch. Rotate the metal cover away from the input mode switch to expose the
switch.
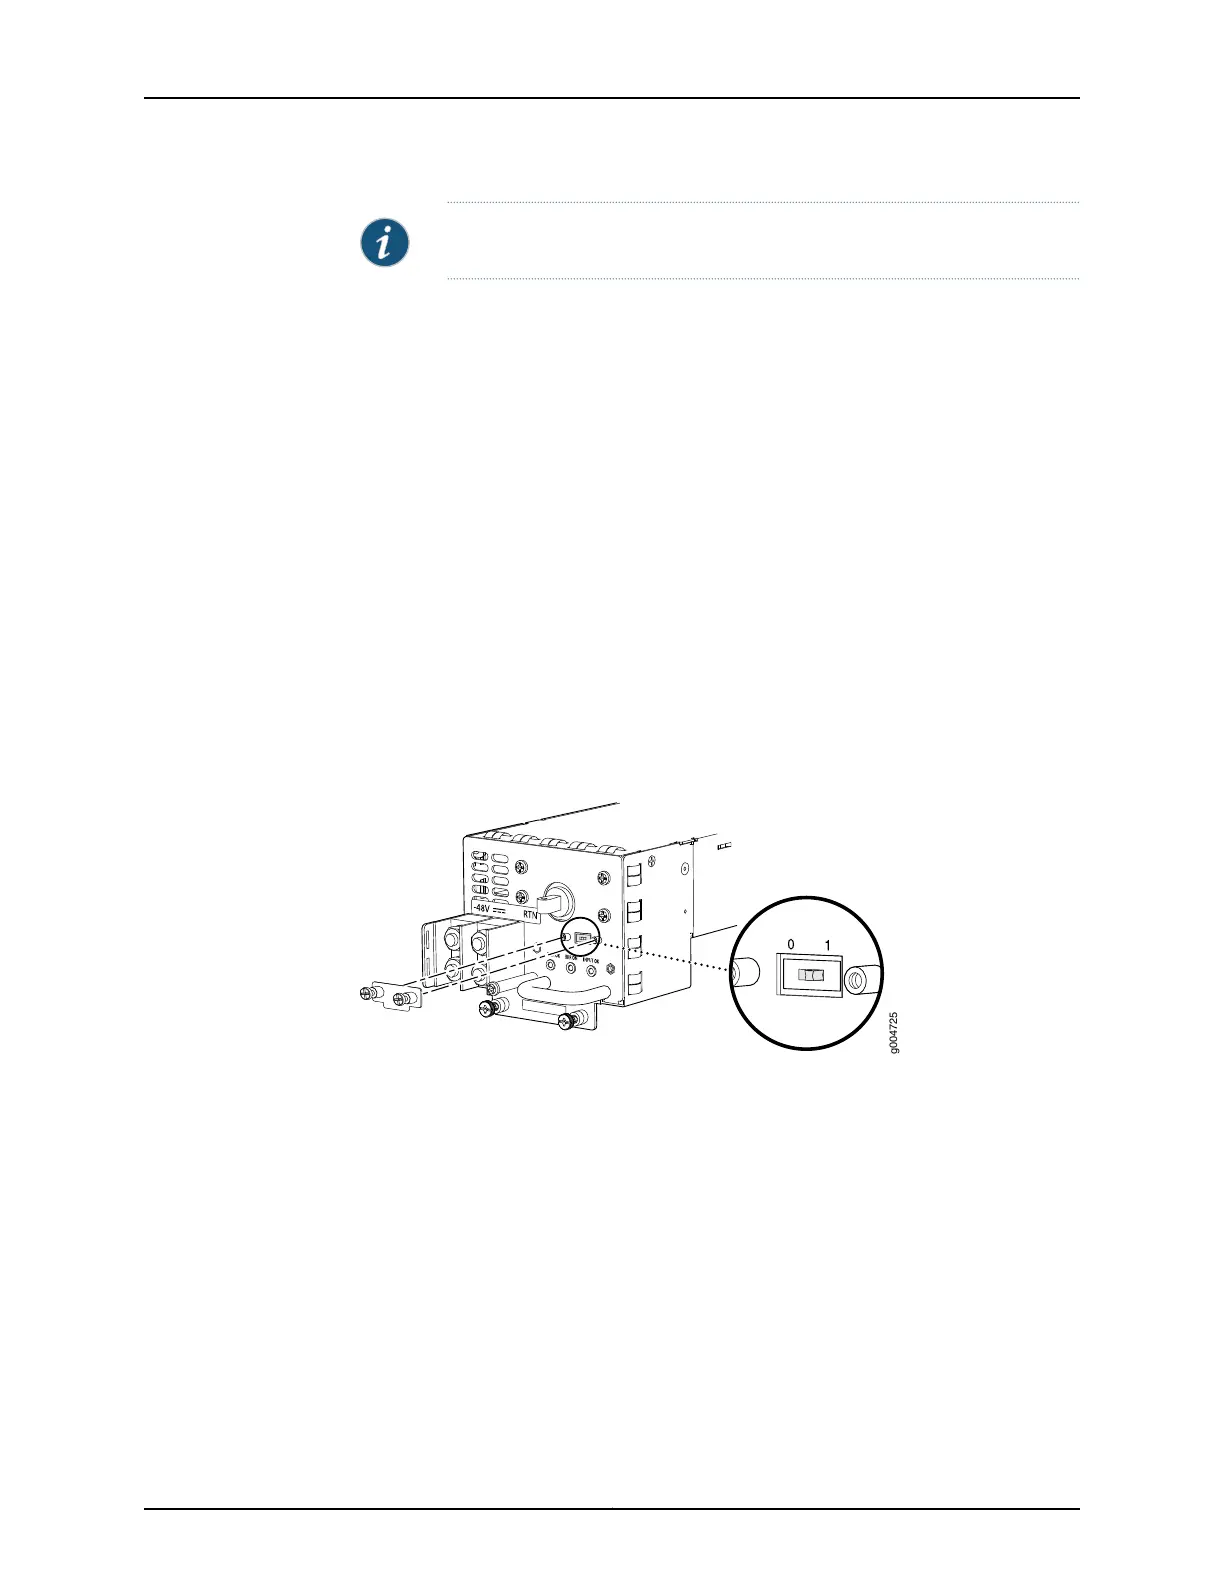
5. Check the setting of the input mode switch. Use a sharp, nonconductive object to
slide the switch to the desired position. Set the input mode switch to position 0 for
60-A input and position 1 for 70-A input. This setting is used by the power management
software and needs to be set before on the power supply. See Figure 11 on page 20.
Figure 11: DC High-Capacity Power Supply Input Mode Switch
6. Rotate the metal cover over the input mode switch, and use a screwdriver to tighten
the captive screw.
7. Tighten the captive screws on the lower edge of the power supply faceplate.
8. Remove the clear plastic cover protecting the terminal studs on the faceplate.
9. Remove the nut and washer from each of the terminal studs.
10. Secure each power cable lug to the terminal studs, first with the flat washer, then
with the split washer, and then with the nut (see Figure 12 on page 22). Apply between
23 lb-in. (2.6 Nm) and 25 lb-in. (2.8 Nm) of torque to each nut. Do not overtighten the
nut. (Use a 7/16-in. [11 mm] torque-controlled driver or socket wrench.)
a. Secure the positive (+) DC source power cable lug to the RTN (return) terminal.
b. Secure the negative (–) DC source power cable lug to the –48V (input) terminal.
Copyright © 2015, Juniper Networks, Inc.20
MX480 3D Universal Edge Router Quick Start

 Loading...


