Chapter 3: Installation
14 J100 Hardware Manual
3.2 Rack Mount Installation
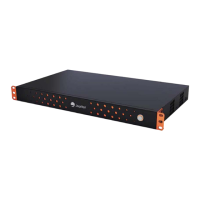
The J100 chassis are designed for standard 19-inch racks.
To secure the rack, refer to the instructions that came with it from the rack manufacturer. One method for
securing the rack is to bolt it to the floor or wall. Another method for securing the rack is to fasten it to another
rack that is bolted to the floor or the wall, or to anchor the rack to something stable.
WARNING! If a rack is not properly secured, adding the J100 chassis or other equipment to the rack may
make the rack unstable.
CAUTION: Adhere to the following guidelines for optimal and safe use of the system.
1 Keep the maximum recommended ambient temperature (TMRA) below +40° C (104° F)
a Beware of elevated operating ambient temperature
If the J100 chassis is installed in a closed or multi-unit rack assembly, the operating ambient tem-
perature of the rack environment may be greater than room ambient. Therefore, consideration
should be given to installing the J100 chassis in an environment compatible with the TMRA.
b Beware of reduced air flow
Installation of the J100 chassis in a rack should be such that the amount of airflow required for safe
operation of the J100 chassis is not compromised.
2 Be aware of uneven mechanical loading
Mounting of the J100 chassis in the rack should be such that a hazardous condition is not achieved
due to uneven mechanical loading. Consult rack manufacturers loading instructions for proper load dis-
tribution.
3 Be aware of circuit overloading
Consideration should be given to the connection of the J-Series chassis to the supply circuit and the
effect that overloading of circuits might have on over current protection and supply wiring. Appropriate
consideration of the J100 chassis nameplate ratings should be used when addressing this concern.
4 Make sure the J100 chassis is reliably grounded
Reliable grounding (earthing) of the J100 chassis should be maintained. Particular attention should be
given to supply connections other than direct connections to the branch circuit (i.e. use of power
strips).
3.2.1 Rack Mounting J100 Models
J100 Models are shipped with the mounting ears attached. Mounting J100 models in a standard 19 inch rack
requires the following parts:
• Four 10-32 clip-on nuts (if needed, not provided)
• Four 10-32 x 1/2” front panel screws (not provided)

 Loading...