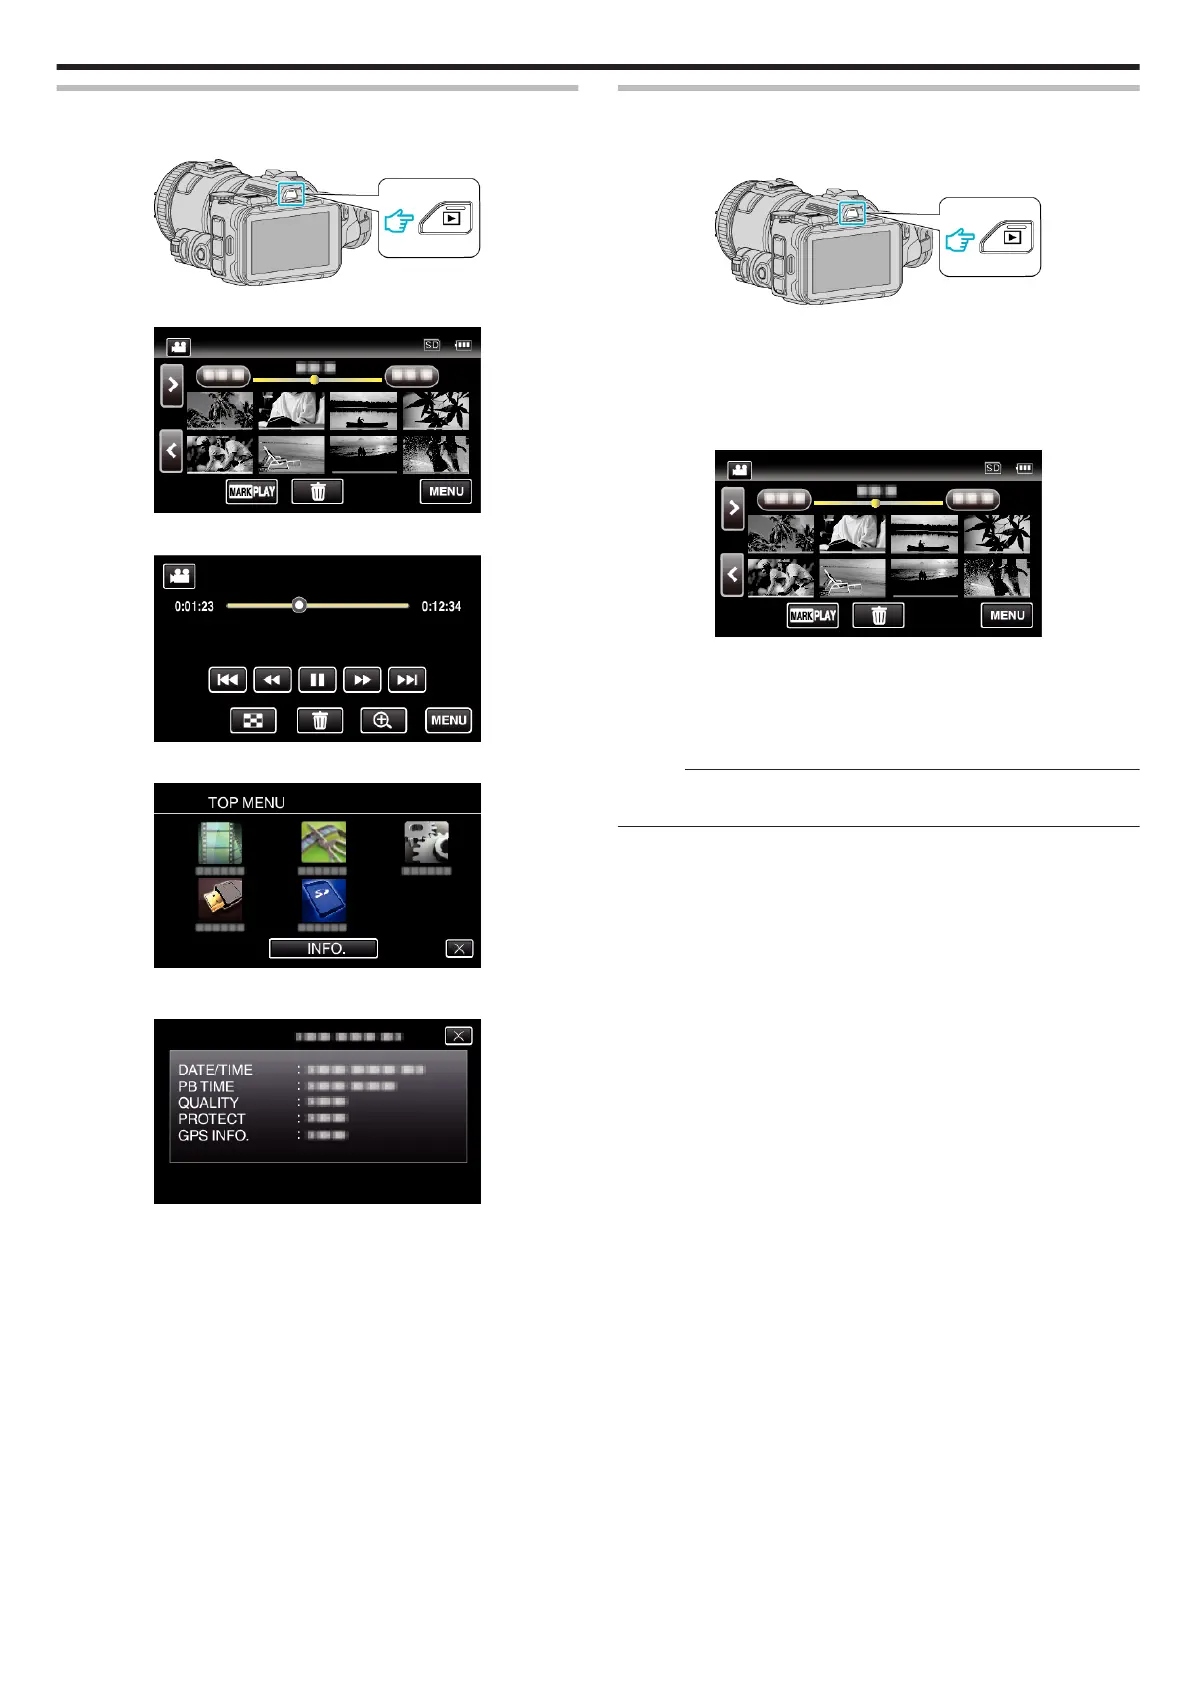
Checking the Recording Date and Other Information
1
Press the L button to select the playback mode.
.
2
Tap on the file to start playback.
.
3
Tap “MENU”.
.
4
Tap “INFO.”.
.
0
Tap L to exit the menu.
You can display the recording date and duration of the selected file.
.
0
The screen is a display when “VIDEO REC FORMAT” is set to
“AVCHD”.
0
“FILE” and “FOLDER” are added when “VIDEO REC FORMAT” is set
to “MP4/MOV”.
0
“FILE”, “FOLDER”, “DATE/TIME”, “SIZE”, “PROTECT” and “GPS
INFO.” are displayed in still image mode.
Normal Playback
Plays back the recorded videos.
1
Press the L button to select the playback mode.
.
0
Check if the playback mode is A.
0
If the mode is B still image, tap B on the playback screen to display
the mode switching screen.
Tap A to switch the mode to video. (You can also use the A/B button
on this unit.)
2
Tap on the file to start playback.
.
0
Tap e to pause.
0
Tap u to return to the index screen.
0
L appears on the last image played back.
0
Lines in different colors are displayed under the thumbnail display to
distinguish the recording date.
Memo :
0
Other than using the touch panel, forward slow-motion, forward search
and reverse search can be performed by using the SET button.
Playback
53
 Loading...