I BasicRecording
NOTE:
Before continuing, perform the procedures listed below:
• Power (!_ pg. 6)
• Leading A Cassette (_:_pg. t0)
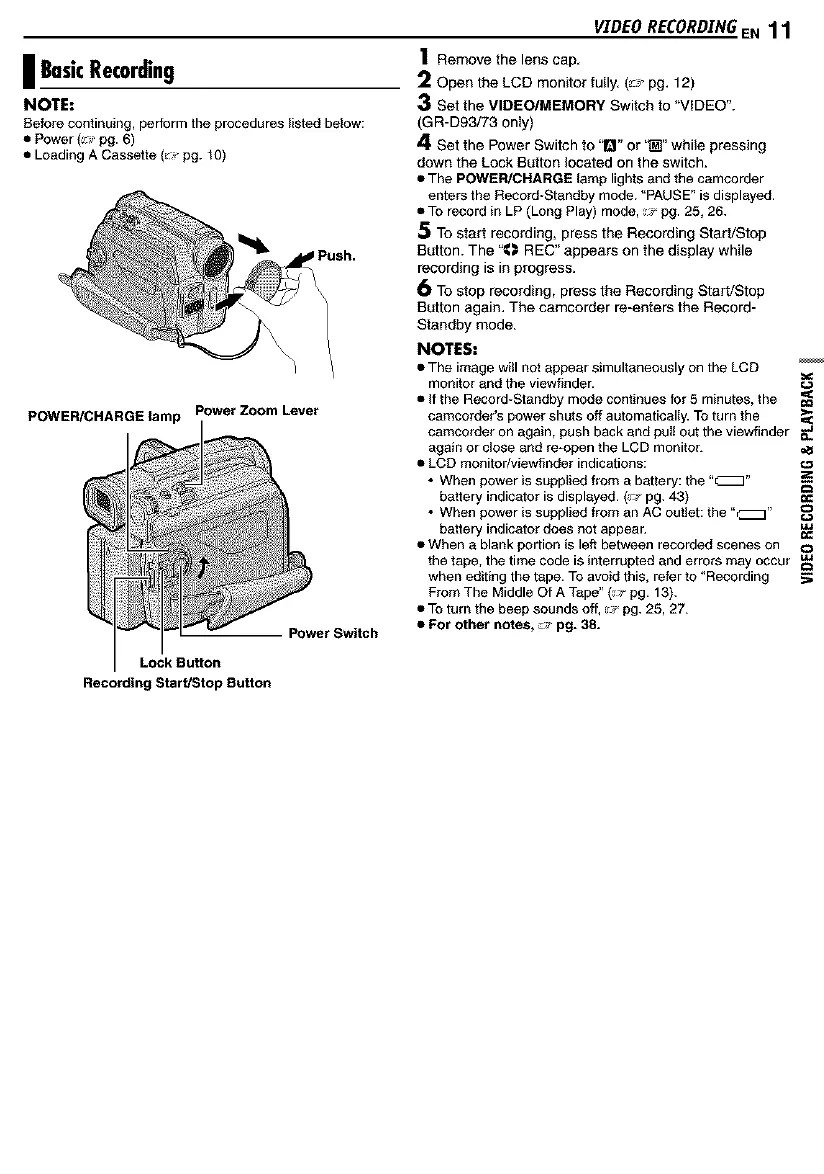
POWER/CHARGE lamp Power Zoom Lever
Power Switch
VIDEO RECORD.[NGE N 11
1 Remove the lens cap.
2 Open the LCD monitor fully. (_:_ pg. 12)
3 Set the VIDEO/MEMORY Switch to "VIDEO".
(GR-D93/73 only)
4 Set the Power Switch to '1_1"or "_" while pressing
down the Lock Button located on the switch.
• The POWER/CHARGE lamp lights and the camcorder
enters the Record*Standby mode. "PAUSE" is displayed.
• To record in LP (Long Play) mode, _ pg. 25, 26.
5 To start recording, press the Recording Start/Stop
Button. The "_ REC" appears on the display while
recording is in progress.
6 To stop recording, press the Recording Start/Stop
Button again. The camcorder re-enters the Record-
Standby mode.
NOTES:
• The image witl not appear simultaneously on the LCD
monitor and the viewfinder.
• If the Record_Standby mode continues for 5 minutes, the _=_
camcorder's power shuts off automatically. To turn the
camcorder on again, push back and pul! out the viewfinder _e.
again or close and re-open the LCD monitor.
• LCD monitor/viewfinder indications: c._
• When power is supplied from a battery: the "_"
o
battery indicator is displayed. (_,_.pg. 43) ¢_
• When power is supplied from an AC outlet: the "_"
battery indicator does not appear.
• When a blank portion is left between recorded scenes on o
the tape, the time code is interrupted and errors may occur
when editing the tape. To avoid this, refer to "Recording ._
From The Middle Of A Tape" (_ pg. 13).
• To turn the beep sounds off, _ pg. 25, 27.
• For other notes, :.,' pg. 38.
Lock Button
Recording Start/Stop Button
 Loading...