Recording Files
Preparation: Set the power/mode switch to ON.
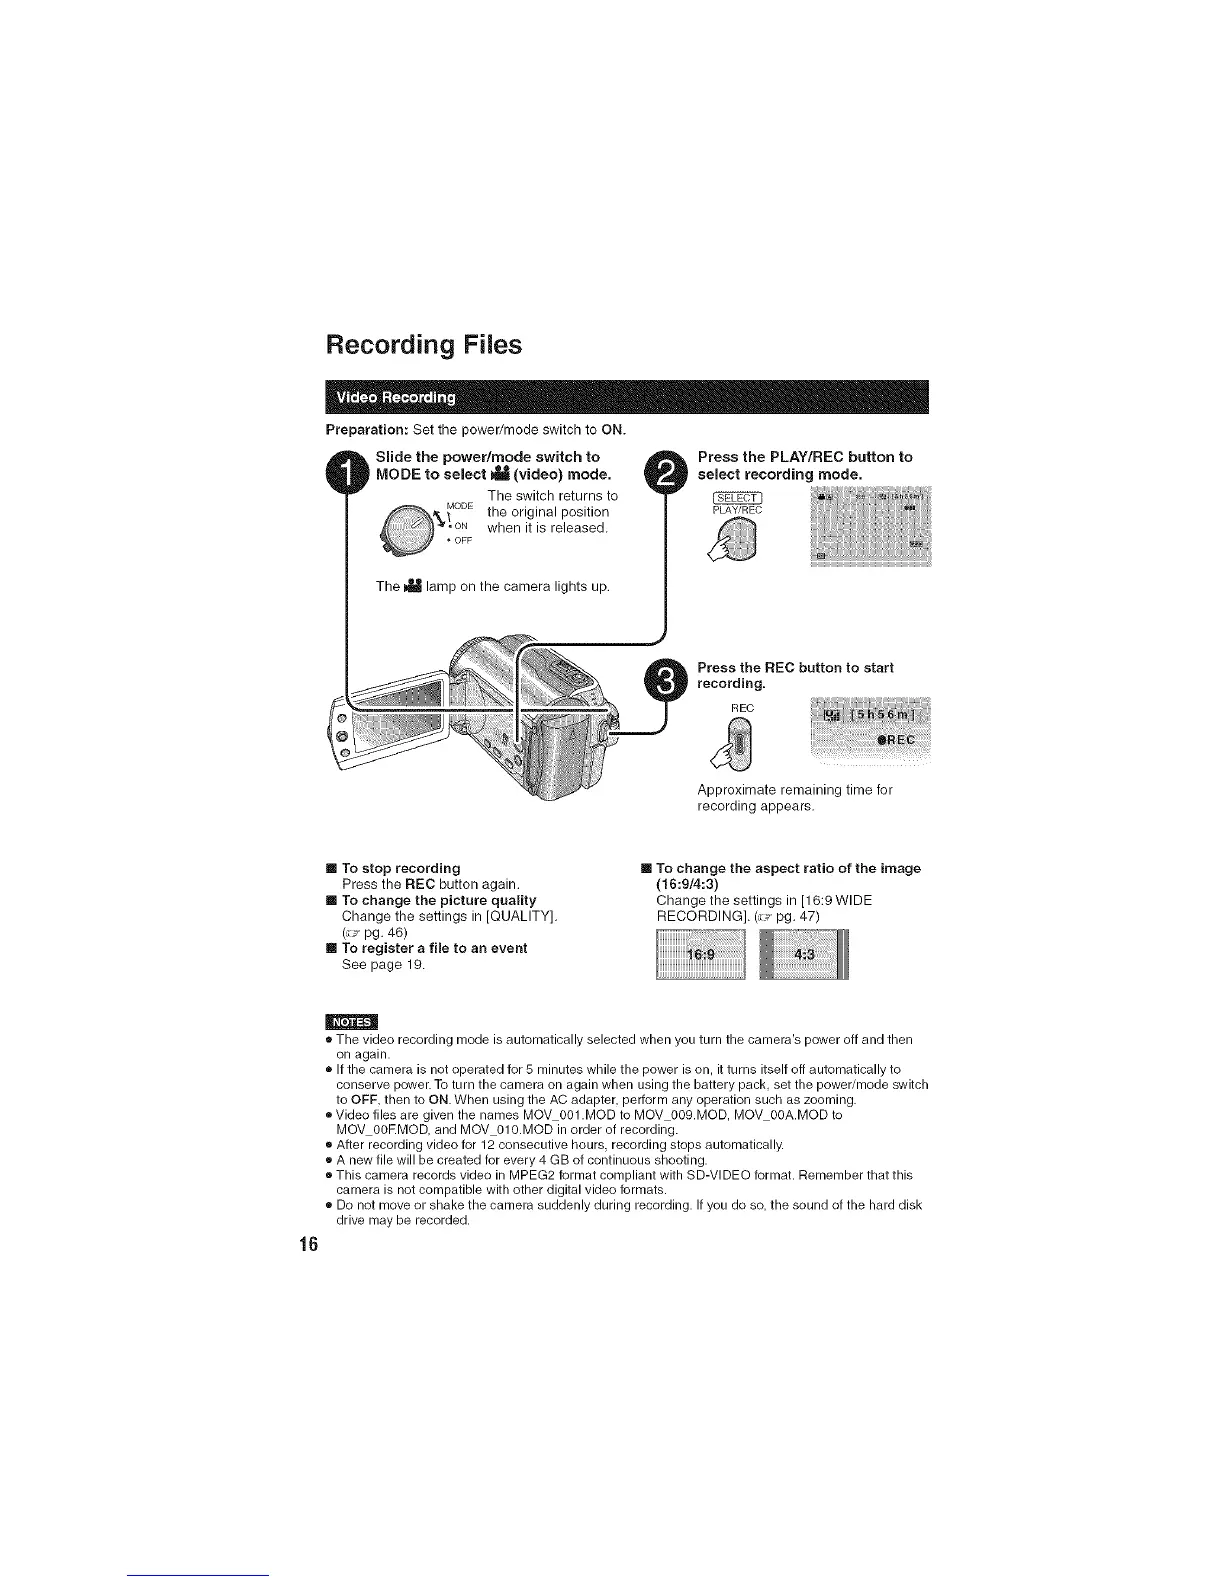
Slide the power/mode switch to
i MODE to select _ (video) mode,
The switch returns to
the original position
when it is released.
The _ lamp on the camera lights up.
Press the PLAY/REC button to
select recording mode.
PLAY/REC
Press the REC button to start
recording.
REC
Approximate remaining time for
recording appears.
[] To stop recording
Press the REC button again.
[] To change the picture quality
Change the settings in [QUALITY].
(_, pg. 46)
[] To register a file to an event
See page 19.
[] To change the aspect ratio of the image
(16:9/4:3)
Change the settings in [16:9 WIDE
RECORDING]. (u pg, 47)
16
• The video recording mode is automatically selected when you turn the camera's power off and then
on again.
® If the camera is not operated for 5 minutes while the power is on, it turns itself off automatically to
conserve power. To turn the camera on again when using the battery pack, set the power/mode switch
to OFF, then to ON. When using the AC adapter, perform any operation such as zooming.
®Video files are given the names MOV001 .MOD to MOV 009.MOD, MOV00A.MOD to
MOV 00RMOD, and MOV 010.MOD in order of recording.
• After recording video for 12 consecutive hours, recording stops automatically.
• A new file will be created for every 4 GB of continuous shooting.
• This camera records video in MPEG2 format compliant with SD-VlDEO format. Remember that this
camera is not compatible with other digital video formats.
® Do not move or shake the camera suddenly during recording. If you do so, the sound of the hard disk
drive may be recorded.
 Loading...