ENGLISH 43
CONNECTION/INSTALLATIONCONNECTION/INSTALLATION
V CAUTION
Install this unit in the console of your vehicle.
Do not touch the metal part of this unit during and
shortly after the use of the unit. Metal parts such as
the heat sink and enclosure become hot.
R Supplied accessories for installation
1 Wiring harness x 1
2 Trim plate x 1
3 Extension wire (2 m) x 1
4 Flat head screws (M5 x 8 mm) x 6
5 Round head screws (M5 x 8 mm) x 6
6 Microphone (3 m) x 1*
* Only for KW-V41BT/KW-V21BT.
R Installation procedure
1 To prevent a short circuit, remove the key
from the ignition and disconnect the
·
battery.
2 Make the proper input and output wire
connections for each unit.
3 Connect the speaker wires of the wiring
harness.
4 Connect the wiring harness wires in the
following order: ground, battery, ignition.
5 Connect the wiring harness connector to
the unit.
6 Install the unit in your car.
7 Reconnect the · battery.
8 Press the reset button.
9 Configure <Initial Settings>. (Page4)
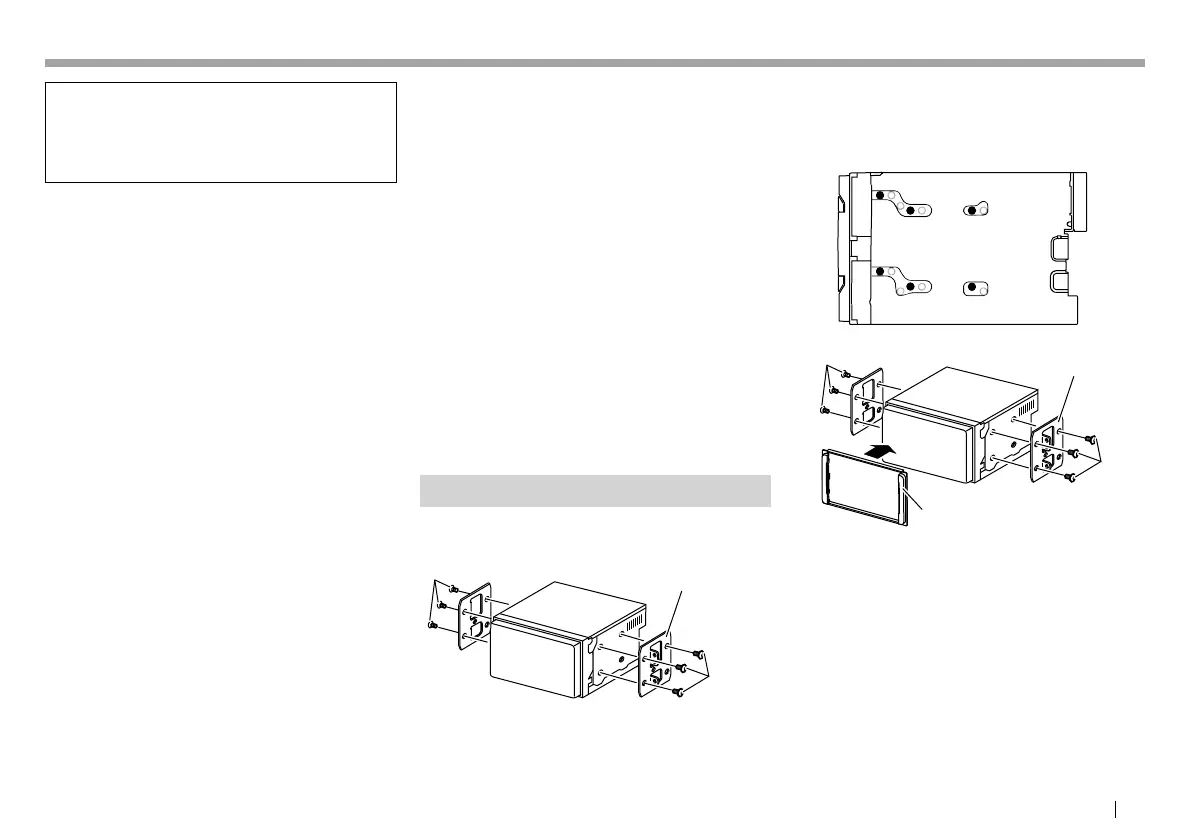
Installing the unit
R Installing the unit using the mounting
bracket removed from the car
Car Bracket
4 or 5
4 or 5
• Select the appropriate type of screw for the
mounting bracket: flat head (4) or round head
(5).
R Installing in Toyota cars
Install onto the car bracket using the supplied
screws (5). Use the mounting holes (A or B) that fit
the car bracket. Then, install the trim plate (2).
A/B
A/B
A
A
B
B
Car Bracket
2
5
5
KW-VEntryU.indb43KW-VEntryU.indb43 2014/09/1019:502014/09/1019:50
 Loading...