1-12 (No.MB519)
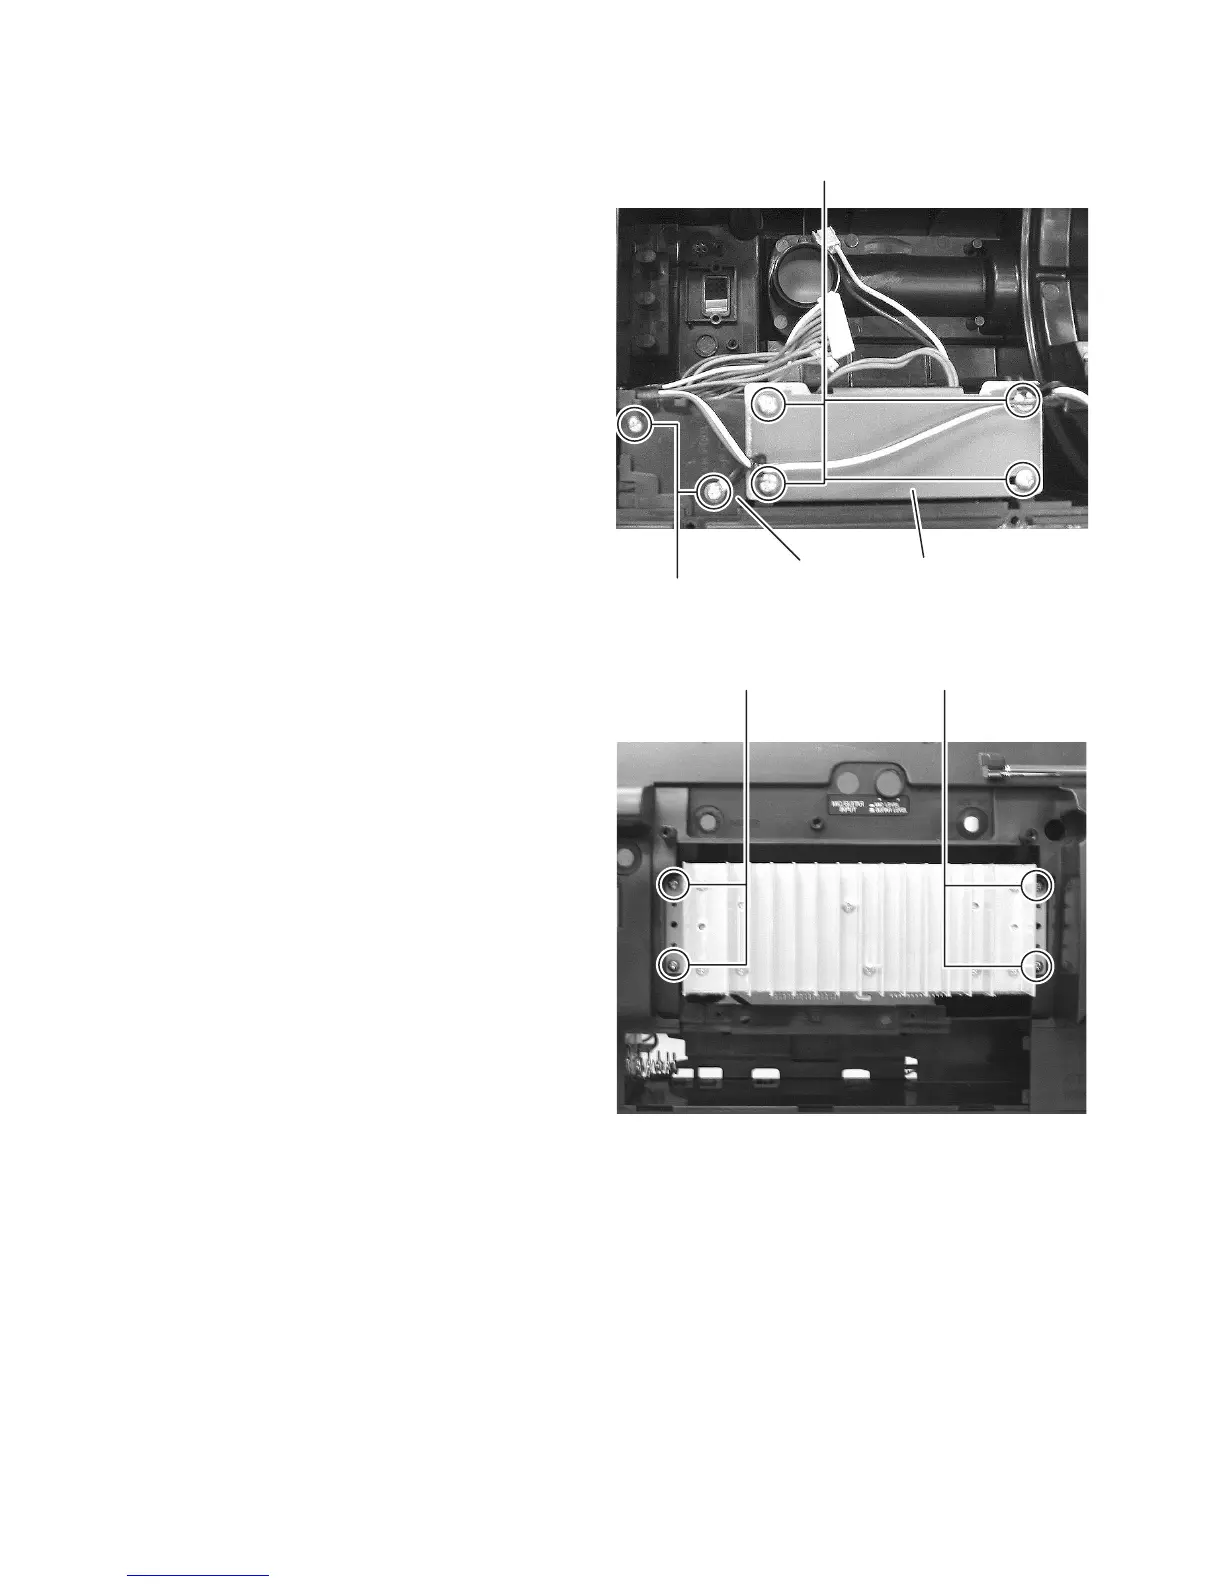
3.1.6 Removing the power transformer
(See Fig.10)
(1) Remove the four screws H attaching the power transform-
er.
3.1.7 Removing the power amplifier board
(See Fig.3, 10 and 11)
(1) Remove the two screws J attaching the cover. (See Fig.10)
(2) Remove the four screws K attaching the heat sink cover.
(See Fig.3)
(3) Remove the four screws L attaching the power amplifier
board. (See Fig.11)
Fig.10
Fig.11
H
J
cover power transformer
LL
 Loading...