18
English
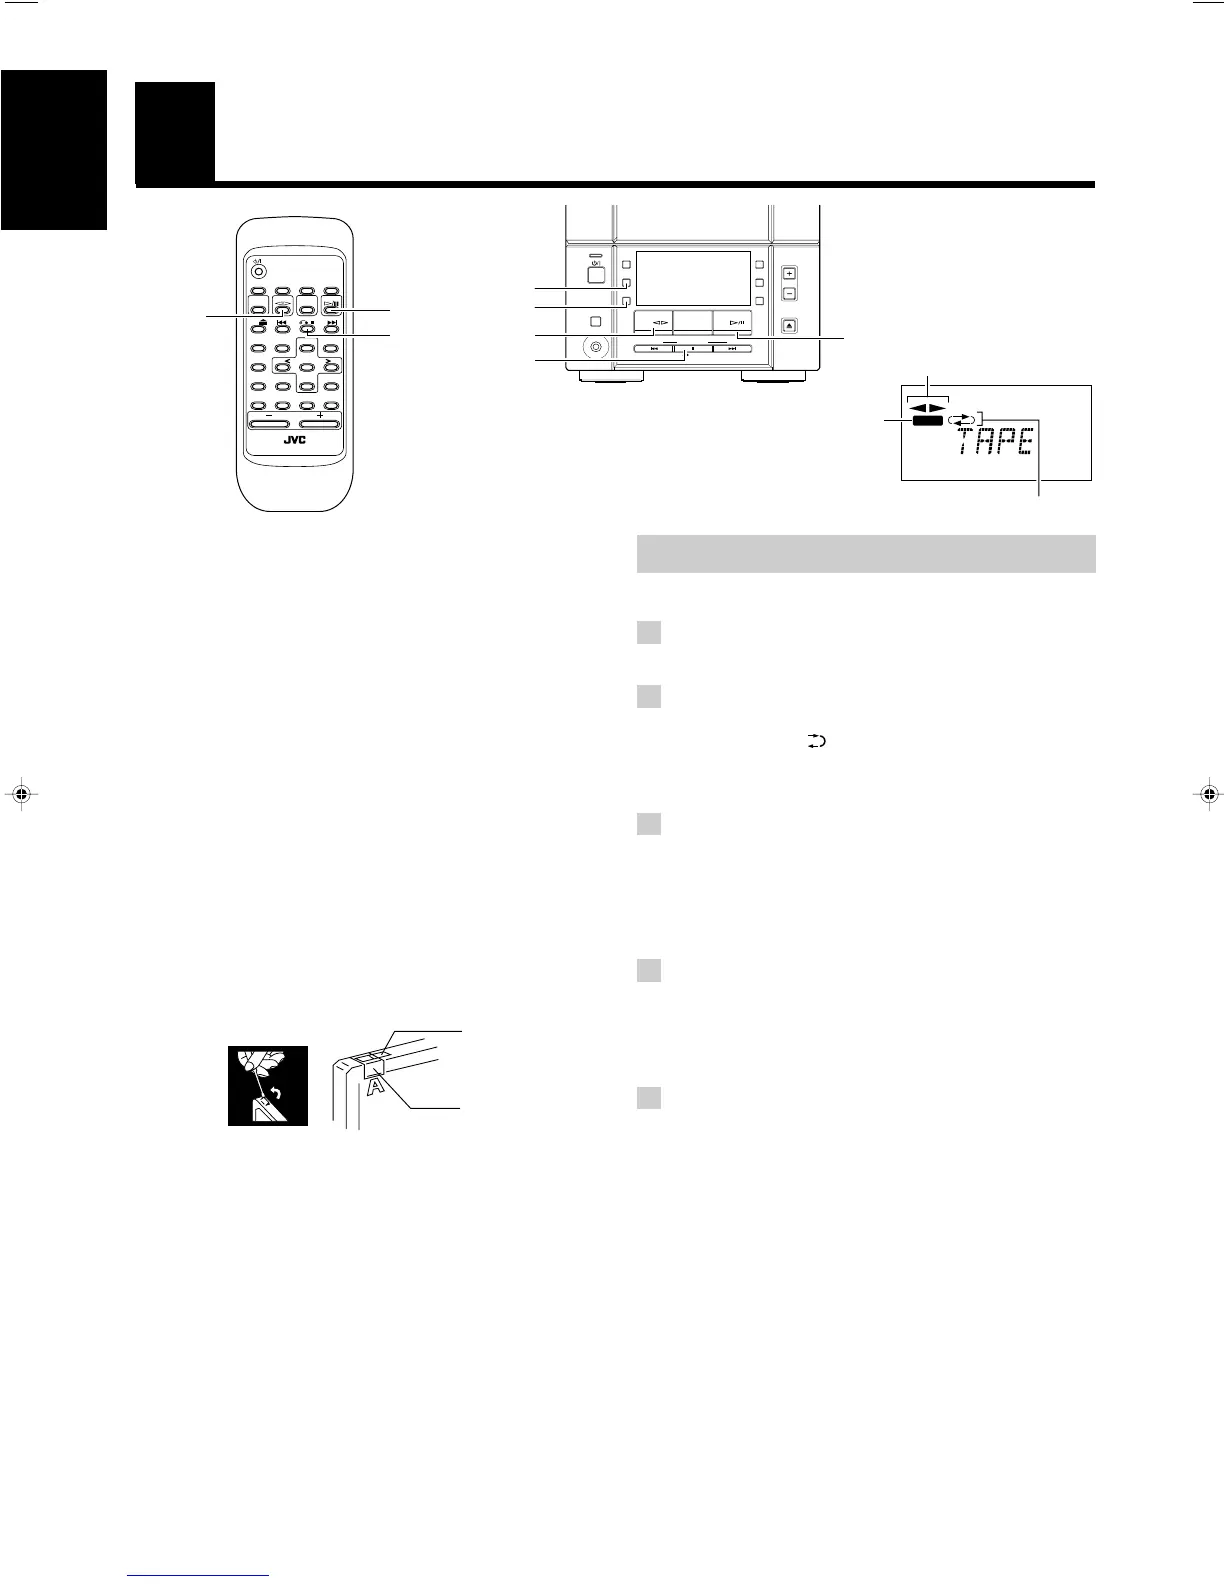
Using the Cassette Deck
(Recording)
When the System is in use, the display shows other items as well.
For simplicity, only the items described in this section are shown here.
TAPE @ #
7
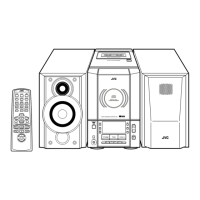
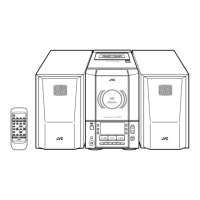
REMOTE CONTROL RM-SUXV50V
CANCELTREBLE
FM/AM
FM
MODE
DISPLAYSLEEP
AUX
TAPE CD
CD
BASS
AHB
PRO
RANDOM
AUTO
PRESET
REPEAT
PROGRAM
VOLUME
VOCAL
MASKING
ON
SCREEN
ECHO
V. INTRO
PREV
NEXT
SELECT
SET
VCD NUMBER
UP
VCD NUMBER
DOWN
Recording onto a tape from any of the sound sources is simple. Just
place a tape in the Cassette Deck, have the source ready, make one
or two settings, and you’re ready to record. For each source the
procedure is a little different so we explain each separately. But
first, here are a few tips for making better recordings.
Things to know before you start
recording –––––––––––––––––––––––––––––
■ It may be unlawful to record or play back copyrighted
material without the consent of the copyright owner.
■ When you want to record onto both sides of a tape, you can set
Reverse mode to do so. Recording automatically stops after
recording in the 2 direction. Therefore, make sure that the tape
direction is 3 when recording with Reverse mode on.
■ The recording level, which is the volume at which the new tape
is being made, is automatically set correctly, so it is not
affected by the VOLUME control on the System. Nor is it
affected by adjusting the sound effects. Thus, during recording
you can adjust the sound you are actually listening to without
affecting the recording level.
■ Two small tabs on the back of the cassette tape, one for side A
and one for side B, can be removed to prevent accidental
erasure or recording.
■ To record on a cassette with the tabs removed, you must cover
the holes with adhesive tape first. However, when a type II tape
is used, only cover part of the hole as shown, since the other
part of the hole (Type II detection slot) is used to detect the
tape type.
■ Type I and Type II tapes can be used for recording.
Note: At the start and end of cassette tapes, there is leader tape
which cannot be recorded onto. Thus, when recording CDs
or radio broadcasts, wind on the leader tape first to ensure
that the recording will be made without any music part lost.
CAUTION:
If a recording you make has excessive noise or
static, the Unit may have been too close to a TV
which was on during the recording. Either turn
off the TV or increase the distance between the
TV and the System.
CD #¥8
Adhesive tape
Type II detection
slot
Standard Recording
You can record any sound source to tape as follows:
1 Insert a blank or erasable tape into the
Cassette Deck.
2 If you want to record on both sides of a
tape, press the REV. MODE button on the
Unit until the indicator is lit.
• When using Reverse mode, insert the tape so that it will be
recorded in the forward 3 direction.
3 Check the recording direction for the
tape.
Make sure that the Tape Direction indicator is the same as that
for the tape in the Cassette Deck. If the direction is different,
press the TAPE @ # button to correct the tape direction and
then press the 7 button to stop the tape.
4 Prepare the source by, for example,
tuning in a radio station or turning on
connected auxiliary equipment.
Note: For CD recording, refer to “CD Direct Recording” on page
19.
5 Press the REC button on the Unit.
The REC indicator lights up and the System begins recording.
Notes for using Reverse mode for recording
When recording in Reverse mode, the System automatically stops
when it reaches the end of the reverse 2 direction. To record on
both sides of a tape, make sure that the recording direction for the
tape inserted is forwards 3, and that the Tape Direction indicator is
also forwards 3, before you start recording.
To stop at any time during the recording
process
Press the 7 button.
7
TAPE @ #
PREV RETURN NEXT
VCD
NUMBER
DOWN UPMULTI CONTROL
TAPE FM/AM CD
STANDBY
PHONES
AUX
REC
REV
MODE
AHB
PRO
TIMER
CLOCK
VOLUME
CD
OPEN/CLOSE
SELECT
REC
REV. MODE
CD #¥8
Tape Direction indicator
Reverse Mode indicator
REC indicator
EN10-28.UX-V50[U] 6/21/00, 6:1118