25
24
● Slide the cutting head forward enough so
that the laser line is visible on the front of the
board.
● Looking at the front of the board, if the laser
line is not parallel to the “pattern line” please
follow the instructions listed below under
“Front Line” paragraph.
● Looking at the top of the board, if the laser
line is not parallel to the “pattern line” please
follow the instructions listed below under
“Top Line” paragraph.
B. Adjusting the Position of the Laser Line
(Fig. 23, 24, 25)
Front Line (Fig. 23, 24)
If the laser line is angled from left to right,
turn the laser vertical adjustment knob (1)
counterclockwise to align the laser line parallel
with pattern line. If the laser line is angled from
right to left, turn the knob clockwise to align the
laser line parallel with pattern line.
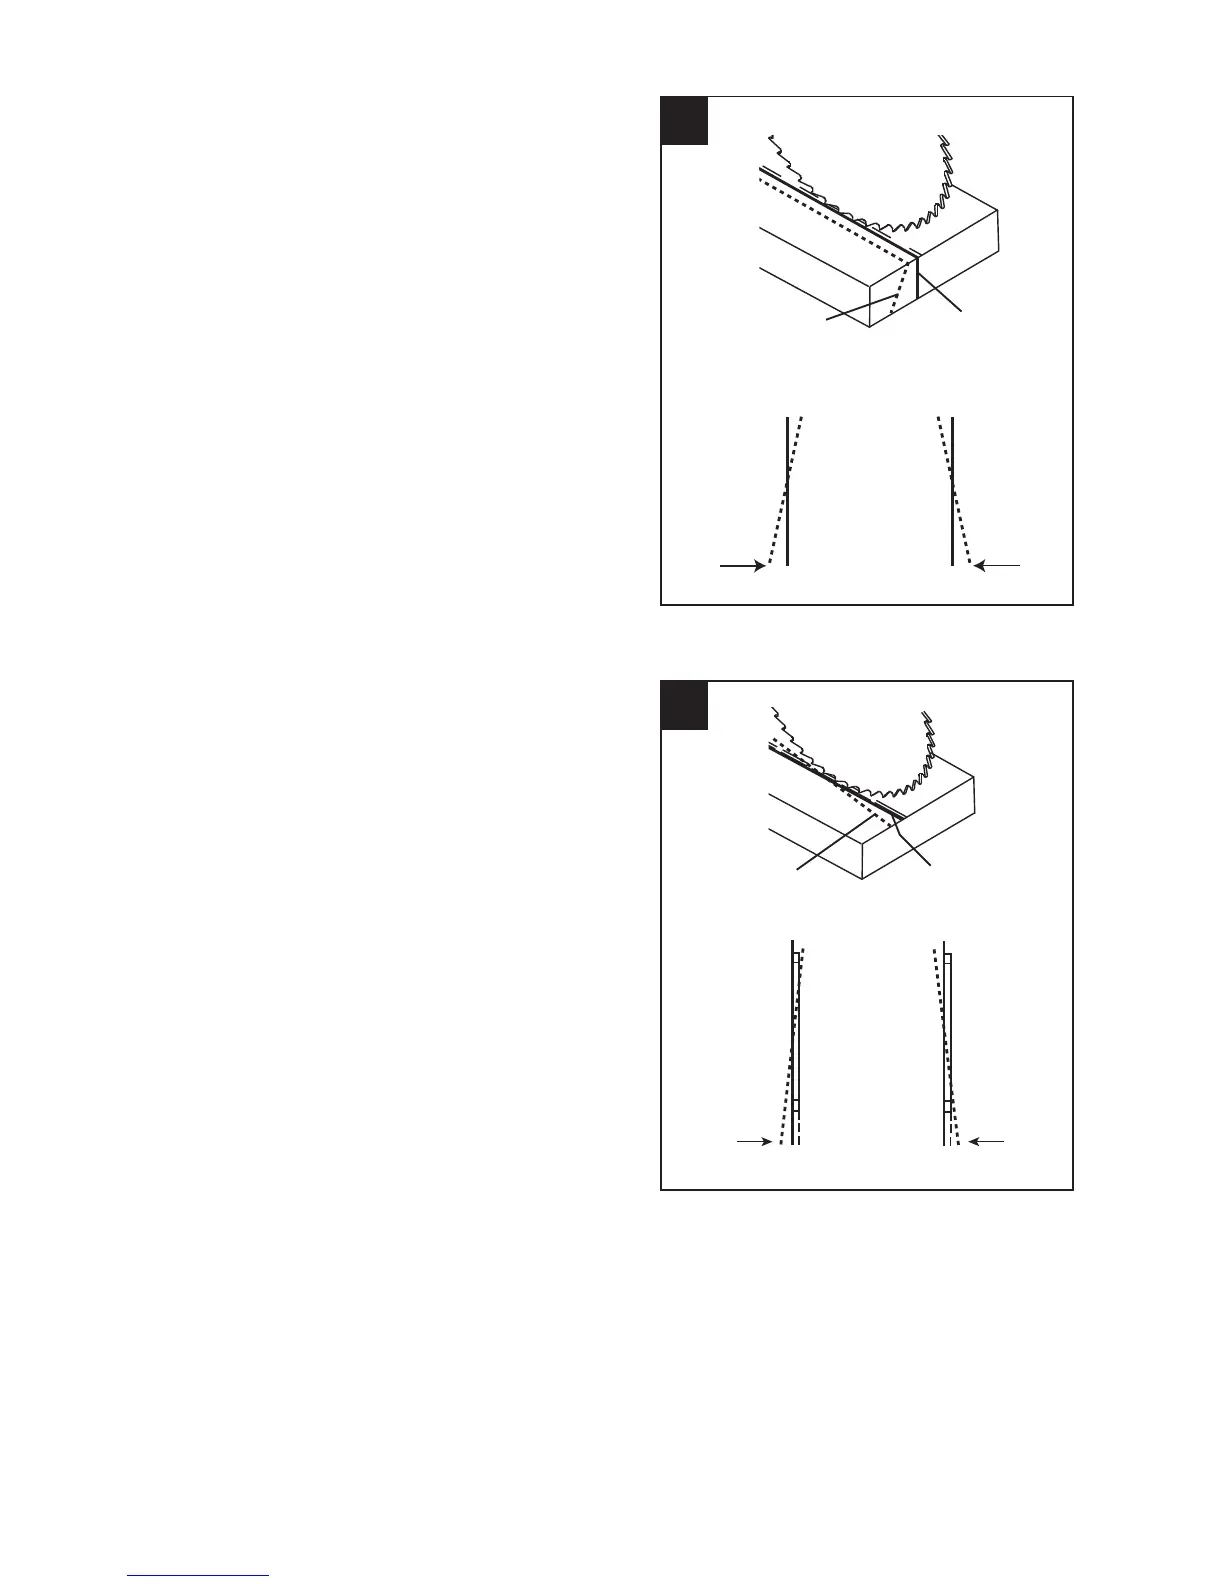
Top Line (Fig. 23, 25)
If the laser line is angled from left to right, turn the
laser horizontal adjustment knob (2) clockwise to
align the laser line parallel with pattern line. If the
laser line is angled from right to left, turn the knob
counterclockwise to align the laser line parallel
with pattern line.
After performing the above adjustments, visually
check that both the front and top laser lines are
parallel with pattern line.
NOTE:
● Laser line is calibrated and set up to project
to the left of the blade.
● If you have any problem or questions
concerning the laser guide, call the Customer
Service Department at 1-888-356-2258.
Laser line Pattern line
Clockwise Counterclockwise
25
Laser line Pattern line
Counterclockwise Clockwise
 Loading...